
Creating Photo Books, Storing and Organizing Photos
Creating photo books to beautifully display all the family photos we take, is such a wonderful way to tangibly relive, display and enjoy our treasured family memories. Here I share about how I create the photo books, store and organize the photos and how to make the process as simple as possible. 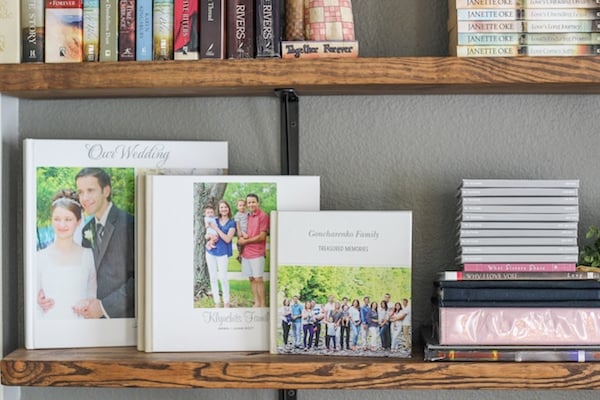
In today’s world where we take pictures on a regular basis, we have SO many photos on our phones, computers and hard drives. Besides sharing some on social media and sometimes looking through them on our phones, these pictures kind of get lost in space, where we only retrieve them on rare occasions when we are looking for a certain photo, reminiscing, or clearing out memory. At least, that’s how it was for our family.
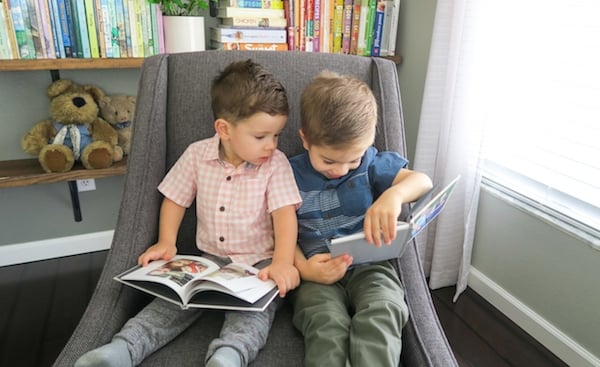
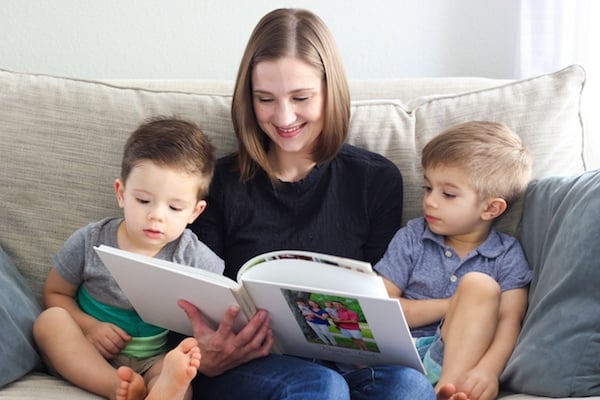
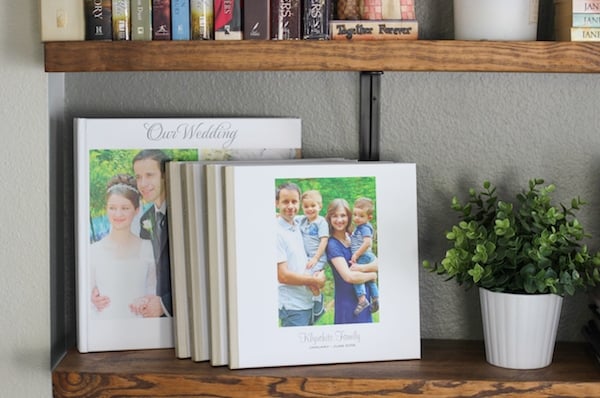
I have completely fallen in love with photo books. They are a tangible way to display, relive and enjoy all the memories that you create over the years. There is something so magical about looking through pictures of all your major life events and some of the daily candid moments too. I absolutely love our family photo books and they are some of my most treasured possessions.
 Back in the day when I was a little girl, we had photos stored in photo albums and they were always so much fun to look at. I used to enjoy scrapbooking to a certain point – I loved storing the photos and being able to insert a bit more fun and creativity into them. However, I’m not a very crafty person, so I wished there was an easier way to do this without taking out scissors, glue and other random supplies.
I have shared our family photo books here on my website and on my Instagram stories (where I share a lot of random, behind the scenes moments of my personal and family life), and I get SO many questions about how I create the photo books, so I wanted to write this post so it will be a reference point as well as share some of the tips I’ve picked up that I hope will be helpful for you as well.
What I Use To Create Our Photo Books
 I use Shutterfly to create the photo books using photos from our family photo shoots using our professional camera and the photos that we take on a regular basis with our point and shoot camera. Sometimes I insert phone pictures, but very rarely. I mostly create smaller books using the Chatbooks app for our phone pictures. I just wanted to make the process very simple and this works well for me right now.
Our Cameras and Lenses
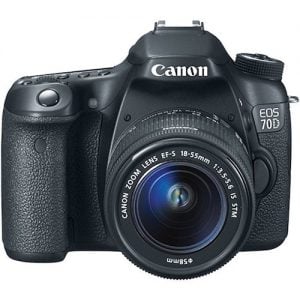
This is a professional camera that I use for all my food photography and I like using it every once in a while for photoshoots and sometimes I just want a more creative shot of our every day life, our home, our family. I love taking photos of beautiful candid moments of our life.
This is a pretty simple lense that I use for both food photography and our family photoshoots. It has the beautiful focused look where you focus and the background is blurry. (You have to manually focus the lens, it won’t focus automatically.)
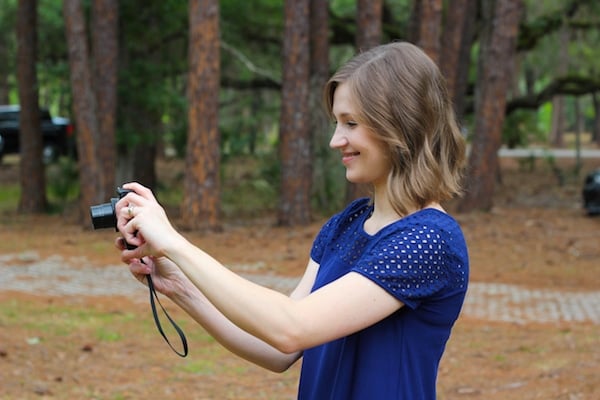
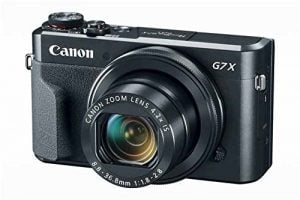
This is a simpler point and shoot camera and the one I use on a regular basis for everything. I also use it to record family videos.
 Storing and Organizing the Photos
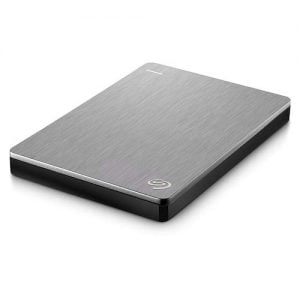
I have a very simple process of storing and organizing our photos. Since we have SO MANY photos, I don’t store them on my computer/laptop. We buy external hard drives and store all our photos and videos there. We have been using Seagate external hard drives* for many years now and have been happy with them.
We have both 2T and 4T sized hard drives. That will store a huge amount of files. If you don’t take as many photos as we do, 2T should be a sufficient size for you. Don’t fill the hard drives full, otherwise it may run slowly, stall or even crash.
 I clear out my memory cards* on a regular basis because I blog and take pictures all the time. It helps me stay on top of our family photos too. When I am uploading the photos and videos to the hard drive, I simply upload them all – I don’t take the time to go through them, I don’t delete multiples, blurry photos, etc.
Like I said, I keep it simple. I have a folder labeled “Family Photos 2019” “Family Videos 2019” and then in each of these folders I have a folder for each month, which I also label “January 2019 Family Photos” February 2019 Family Photos”, etc. When I upload the files, I simply place them into the monthly folder that the pictures where taken in. That’s it.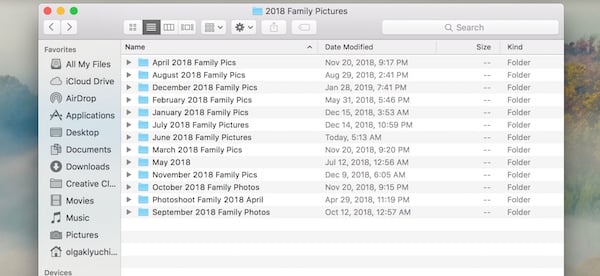
Choosing the Photos To Use
 When I have a bit of time, I go through the photos and choose the best photos and place them into another folder labeled “Best Family Photos 2019”, also with each month in a separate folder. This is the most time consuming part of the process. I try to do this while we are watching a movie with my husband or while listening to a Audio book or something. Since I don’t really need to think to look through photos, I pair it with another fun activity and this helps me be productive and get the job done.
Since I have had hard drives crash in the past, I am very paranoid about it. I store all the best photos online as well, that way if something happens to the hard drive, I at least have all the best photos stored somewhere else. I use Dropbox for this.
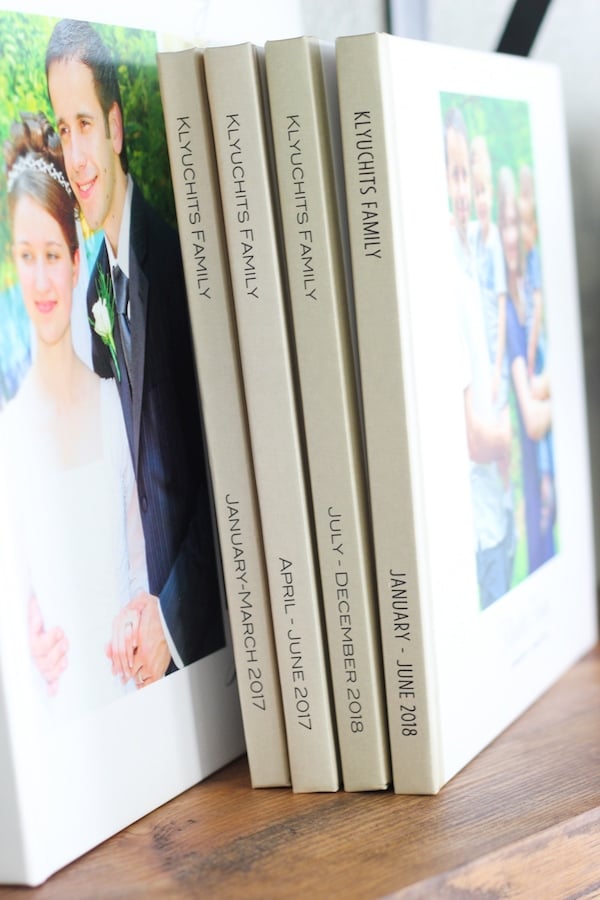
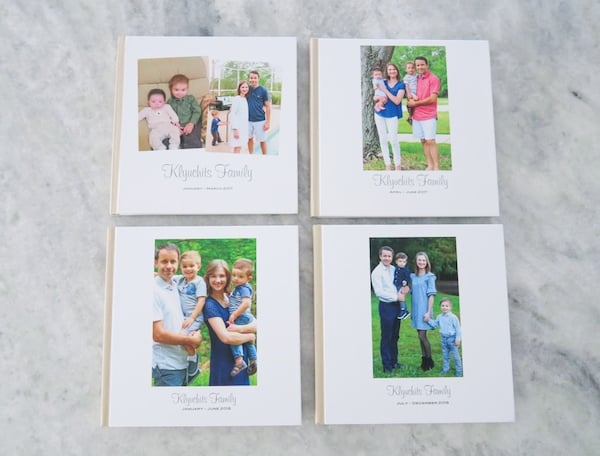
Sometimes I create 2 photo books per year, other times I’ll make 3-4. (It depends how many pictures we took, how many major events happened per year.) I usually max out the amount of pages that are allowed per book. I want to include as many pictures as possible. Since we do take a lot of photos and it’s something I enjoy doing, this works well for me.
Editing Photos
 I do edit most of the photos, but that’s because I am a perfectionist. Honestly, if editing the photos will prevent you from making the photo books because you dread the thought of going through so many photos and tweaking them, skip this step. It’s better to have photo books with imperfect pictures, than no photo books at all that you’re meaning to do “someday”.
I use Lightroom to edit our photos, because that is what I use for my food photography and I am most comfortable with this program and for me, it doesn’t take very long.
Creating the Photo Books in Shutterfly
To keep the process streamlined and as simple as possible, I decided to use the same template in Shutterfly and keep the design really easy.
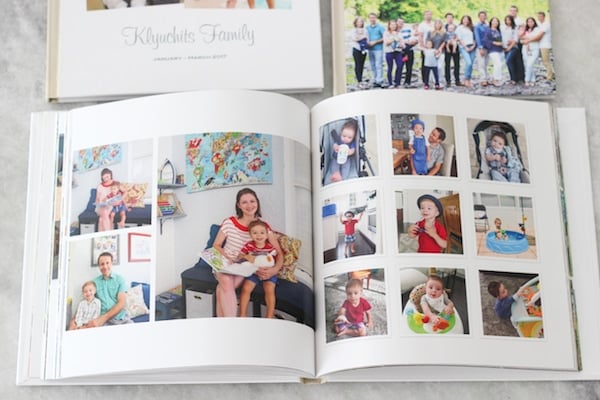
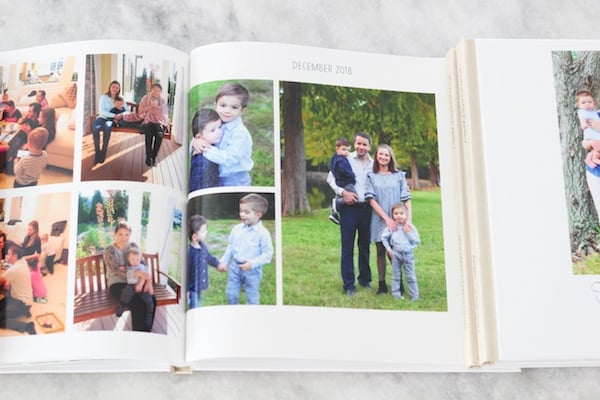
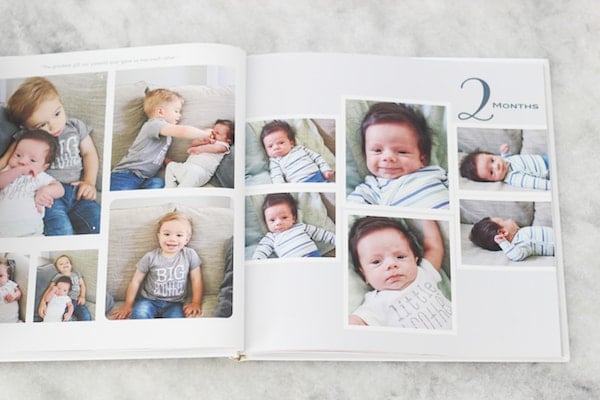
I add the photos chronologically, which is really easy, because that’s how my photos are stored in the first place. I don’t add too much writing or quotes in my photo books. If I did, it would take me forever and I would keep procrastinating trying to get it “perfect”, so I only label months, birthdays, anniversaries and special moments. 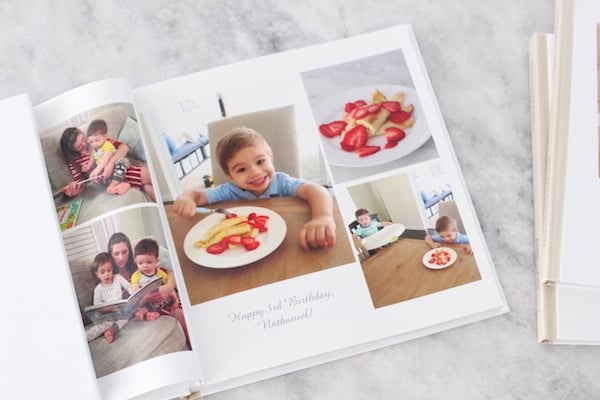
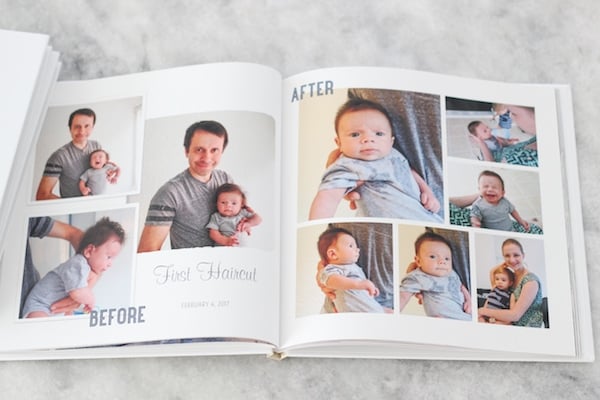
 When my boys were babies, I took monthly photos of them, so I included their first monthly photoshoots in the books too. First haircuts, milestones, the day I got my PICC line removed, vacations and other significant moments I just write a quick little blurb.
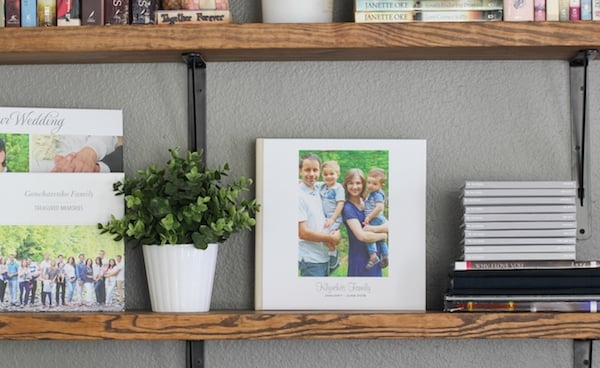
 I choose to make the regular photo books the same size, 10 x 10 inches, same template, similar fonts, etc.
Here are the options I use for my Photo books:
- Size: 10 X 10 inches
- Template: Modern White
- Hardcover, Matte Finish
- Glossy Pages
Quality of the Photo Books
The quality of the photo books greatly depends on the quality of your photos. No matter how wonderful your phone is, the newest iPhone or android (My husband and I have both), the photos will NOT be as good quality as when using a decent camera. I may look out of place and called old fashioned, but I still use an actual camera for most of our photos because I want the quality to be better. Phone pictures are not as clear, look more grainy, especially if you make them a little bit bigger. If I do use phone pictures in our photo books, I keep them on the small side.
We have been happy with the quality of the Shutterfly photo books. There are many other options available, but I haven’t tried very many of them, mainly because I don’t want to overcomplicate the process. I don’t want to take the time to learn a new editing process, becoming familiar with the website, options, etc. Every time you need to make decisions, you waste more time. I choose not to at this point. Plus, I like having a similar look to our books.
Tips to Make the Photo Books More Affordable
Shutterfly has sales very frequently, so I wait to order the photo books when there’s a great deal available. (Free extra pages is the BEST deal for me, because I like to make books that are 100+ pages.)
I’ll create the photo books when I have the time and then wait for a sale to order. I am subscribed to their newsletter, so I can see when they have a sale.
I also use Ebates* to order through Shutterfly, so I get back a tiny percentage from the amount of money that I spend on the photo books. I’m going to spend the money anyway, might as well make a little bit back. If you sign up for Ebates (which I use when shopping at Loft, Old Navy, Proflowers, Macy’s, Sephora online – they have over 2,500 stores), you’ll get $10.
Photo Books As Gifts
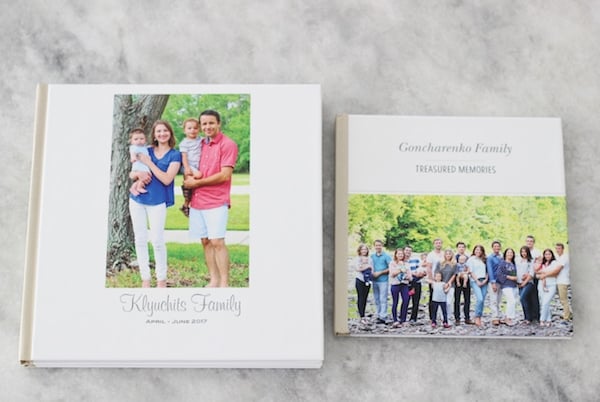
Photo books are an excellent gift option, especially for grandparents. I make some for my parents and my husband’s parents quite frequently, and we they are always really excited and thankful to receive them. When my parents went to Belarus for the first time after moving here in 1992, I made them a smaller book (8 X 8 inches), because I wanted it to be easy to bring with them on the trip. It was perfect for them to show family and friends their children, grandchildren and be able to share where we live in a book, rather than scrolling through phone pictures.
 I won’t sugar coat it, though. Photo books are NOT cheap. They ARE time consuming. For our family, they are 100% worth it. We find money in our budget for them and are always so happy that we bought the books. They are one of the purchases that we never regret and only regret not buying more. I plan on printing extra copies of our photo books for each of our boys to have when they are adults too. The time and money you invest in them will be enjoyed for generations to come.
*This is NOT a sponsored post. Some of these products may be affiliate links. This simply means when I recommend a product or service and if you choose to purchase that product or service from my recommendation, I will get a small referral commission. Of course, this is at no extra cost to you. I really appreciate your support. Thank you!
Dina
What a great post Olga, thanks for sharing! How much is about one book of 100 pages?
olgak7
Hi Dina,
The price is very subjective. It depends on the size of book that you choose, the template, the type of cover, the type of pages that you choose.
Alexis K
Excellent post Olga! Very helpful ! Thank you so much for writing out all the details. Makes so much sense ! Always a pleasure reading your site.
olgak7
I’m so happy to hear that, Alexis! I love sharing what has worked well for me, hoping it will be useful for others too.