
Layered Rainbow Jello
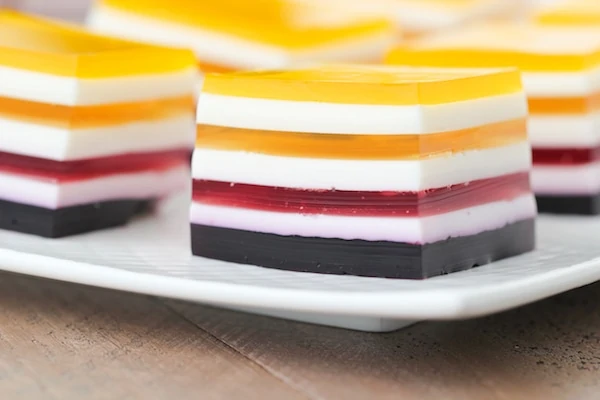
A colorful rainbow jello dessert is so perfect for the warm summer months. It’s relatively easy to make and is perfect for birthday parties, summer barbecues or many a treat for your little ones.
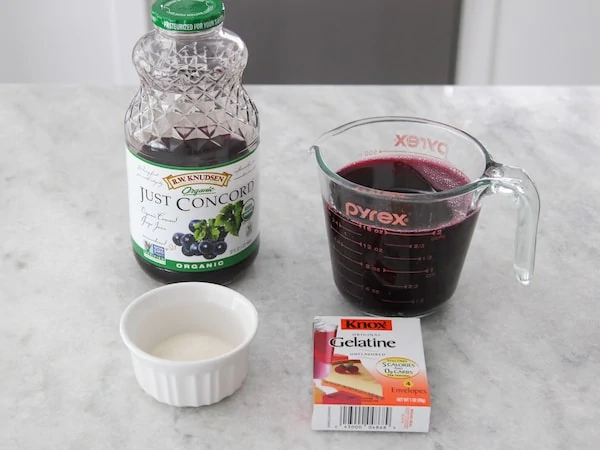
There are SO many recipes for this dessert, but most of them use the boxed jello containers. This version uses juice – so you can completely omit all the unnecessary sugar, artificial dyes and other chemicals.

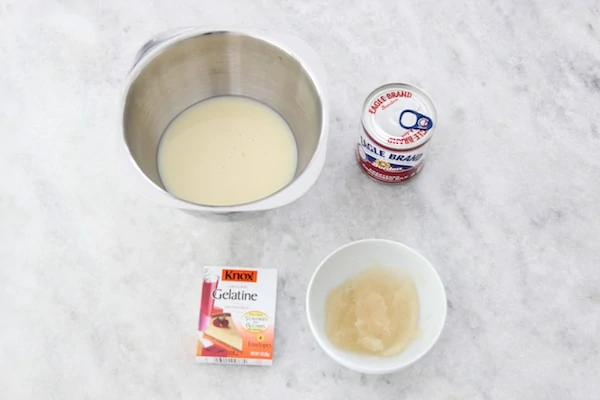
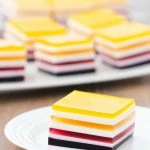
The pretty colors really pop in between the thin white layers. I use sweetened condensed milk for the white layers. Unflavored gelatin is used to set all the layers and I use enough so that the gelatin is really firm and jiggly:).
I love that you can customize the flavors and colors in this recipe, as well as cut the jello into different shapes or even pour it into different cute containers and make it in one large container or even individual servings.
What Juice To Use:
I used only natural juices, without any dyes, added sugar or artificial ingredients. Honestly just went to the store and bought different juices in a range of colors.
If you want to have a rainbow effect and have all the colors of the rainbow, you will need to put in a little more work and use natural dyes (you can add them to apple juice, which is pretty neutral) or create different colors by using ingredients such as spinach, freeze dried fruit/veggies, etc.
I just wanted to have a variety of colors, that’s all, so I just used 4 colors.
Here are the juices that I used:
- Purple: grape juice
- Red: cranberry raspberry juice
- Yellow: Apple Juice
- Orange: Clementine juice
Preparing the Colored Layers
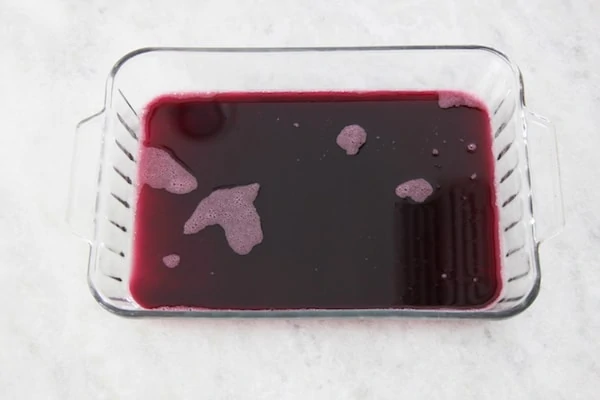
Prepare a large rimmed baking pan, 9 x 13 inches, to be used for the Rainbow Jello.
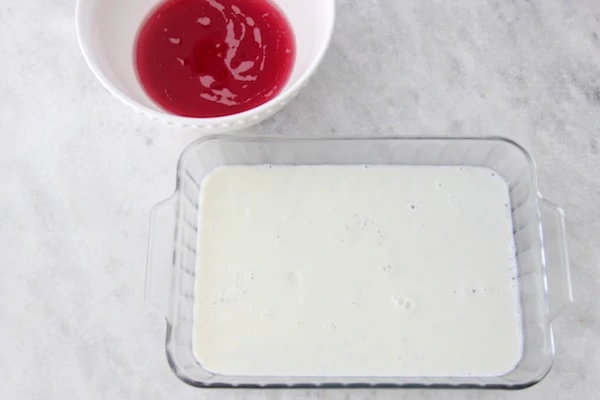
In a large bowl, pour in 1 cup of juice and sprinkle 3 1/2 teaspoons of unflavored gelatin over it. Set aside for the gelatin to bloom for about 5 minutes.
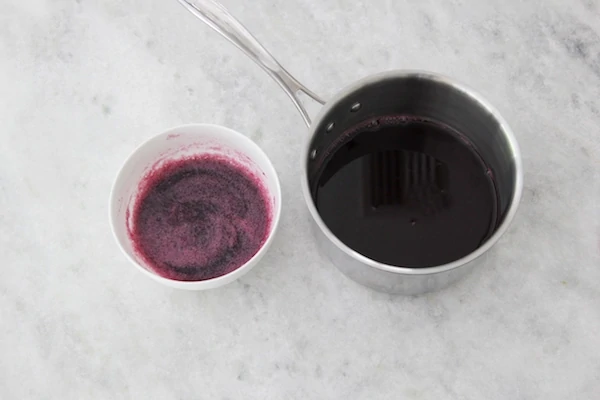
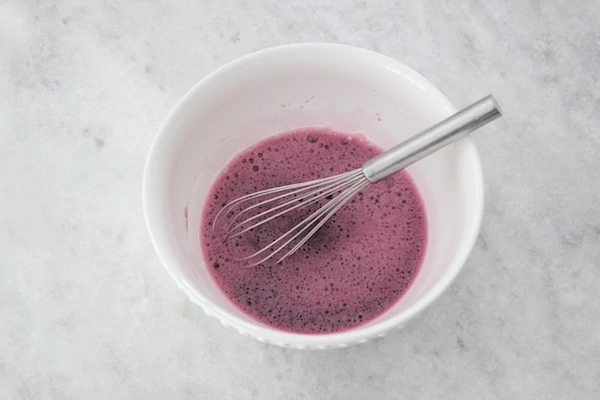
Place the other cup of juice in a small saucepan and bring to a boil. Pour the boiling cup of juice over the bloomed gelatin and juice and whisk to combine until all the gelatin is dissolved.
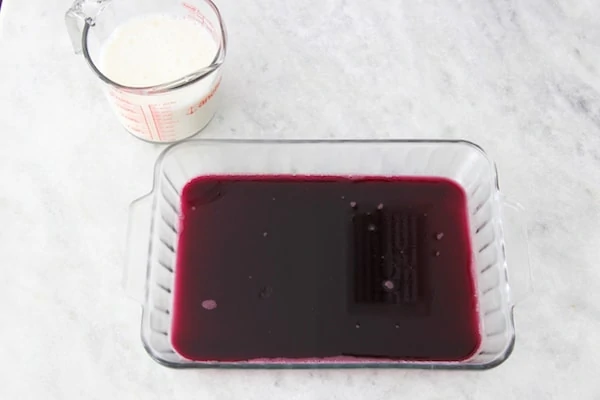
Pour this mixed juice mixture into the prepared baking dish and place into the refrigerator to set for about 30 minutes.
Timing Between Pouring the Different Layers:
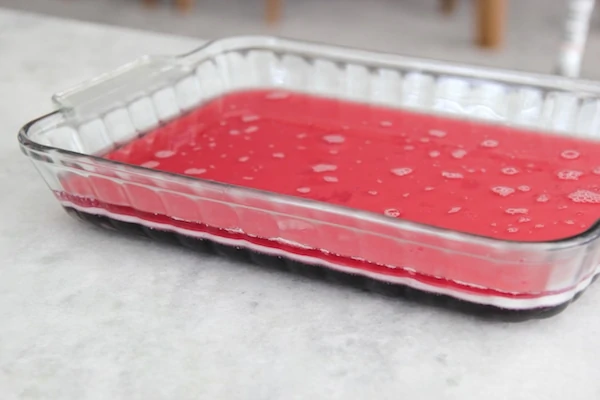
It is important to let each layer set for just the right amount of time in between adding more layers. If each layer isn’t set enough – the first layer will be too soft and the the layers may bleed together, you may have holes in the first layer when you pour the next layer, etc. If you let each layer set longer than 3o minutes, the layer may be too firm and in the end, the layers may separate and slide apart when you cut the finished product.
Cooling the Hot Liquid Before Pouring Over the Set Layer:
While you are waiting, prepare the next layer. As soon as you pour one layer into the baking sheet and place into the refrigerator, start making the next layer, so it has a chance to cool off a bit, before you pour it over the set layer. If the juice mixture is too hot, it will melt the chilled layer and the colors might mix together. You don’t want to mix them too far in advance too, or the juice will start to set.
Preparing the White Layers
For the white layer, I prepared 1 can of sweetened condensed milk, distributed it among the layers and finished off with another 1/2 of another sweetened condensed milk, so that it wouldn’t set as all the different layers were chilling in the refrigerating.
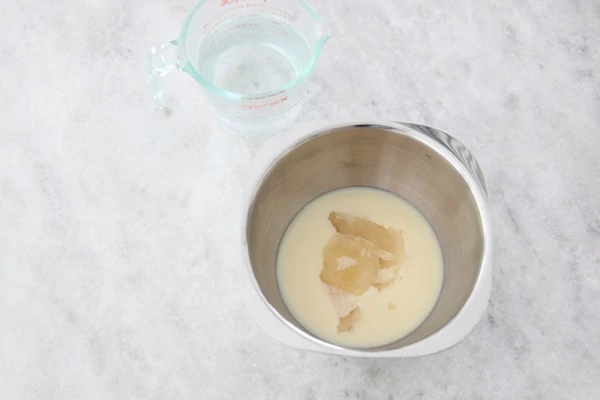
Mix 1/2 cup of water with 5 teaspoons of unflavored gelatin and set aside to bloom for about 5 minutes.
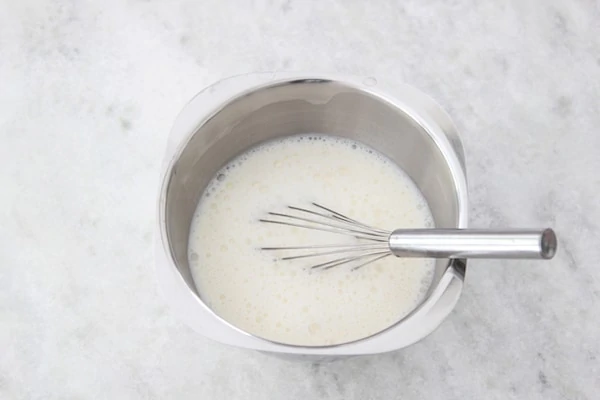
Meanwhile, boil 1 3/4 cups of water. When the gelatin blooms for 5 minutes, whisk together the bloomed gelatin, 1 (14 oz) can of sweetened condensed milk and the 1 3/4 cups boiling water. Mix until all the gelatin is dissolved.
After the first layer of juice chills for 30 minutes, pour 1 1/2 cups of the milk mixture carefully over the chilled layer. Set for 30 minutes.
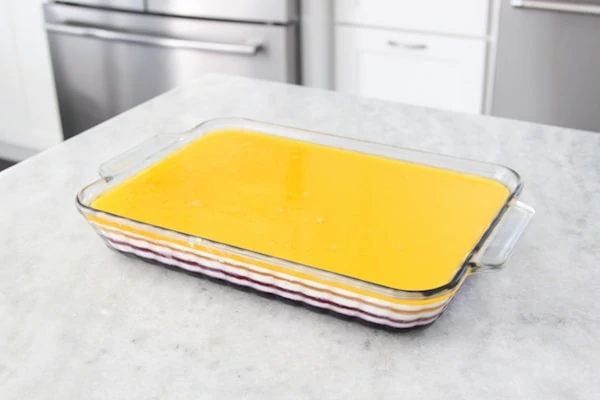
Repeat, making the other juice layers, alternating a rainbow color with a white layer.
When you’ve used all the white mixture, making another half of a batch.
Bloom 2 1/2 teaspoons of unflavored gelatin in 1/4 cup of water, then whisk with 1/2 (14 oz) can of sweetened condensed milk and 3/4 cup of boiling water.
I only used 4 different colors.
Here are the juices I used:
- Purple: grape juice
- Red: Cranberry Raspberry juice
- Yellow: Apple Juice
- Orange: Clementine Juice
Use A Spoon To Pour the Liquid Over the Set Layer
When pouring one the liquid layer over the set layer, pour it over a spoon to disperse the liquid ingredients over the set layer and to prevent it from creating “holes” in the set layer. 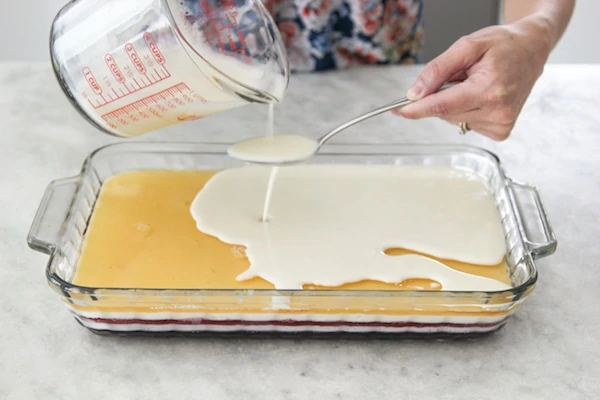
Want to More Colorful Layers?
If you want to use more layers, use less of the white mixture, about 3/4 cup, in between each layer. You can also use 2 full cans of the sweetened condensed milk, if you want to make more colorful layers.
Storing the Rainbow Jello:
Keep the Rainbow Jello refrigerated until ready to serve. You can make it up to 3 days in advance. If you make it more than one day in advance, I recommend covering the container well with plastic wrap, aluminum foil or a cover, to prevent the jello from absorbing the odors of your refrigerated and from drying out.
Using Packaged Jello Instead of Juice:
If you want to use the typical boxed Jello, mix 1 (3 oz) package of Jello with 1 cup boiling water and 1 teaspoon of unflavored gelatin until all the gelatin dissolves. Repeat with all the colored layers, alternating with the white layers.
The rainbow color order if you use all colors: purple, blue, green, yellow, orange red.
Layered Rainbow Jello
A colorful rainbow jello dessert is so perfect for the warm summer months. It’s relatively easy to make and is perfect for birthday parties, summer barbecues or many a treat for your little ones. This version uses juice for for the colored layers – omitting all the unnecessary sugar, artificial dyes and other chemicals.
- Prep Time: 150 minutes
- Total Time: 150 minutes
- Yield: 10 1x
- Category: Dessert
Ingredients
Rainbow Gelatin Layers:
- 2 cups juice (for each layer)
- 3 1/2 teaspoons unflavored gelatin (for each layer)
White Gelatin Layers:
- 1 1/2 cans (14 oz cansweetened condensed milk
- 7 1/2 teaspoons unflavored gelatin
- water
Instructions
- Prepare a large rimmed baking sheet, 9 x 13 inches, to be used for the Rainbow Jello.
- In a large bowl, pour in 1 cup of juice and sprinkle 3 1/2 teaspoons of unflavored gelatin over it. Set aside for the gelatin to bloom for about 5 minutes.
- Place the other cup of juice in a small saucepan and bring to a boil. Â Pour the boiling cup of juice over the bloomed gelatin and juice and whisk to combine until all the gelatin is dissolved.
- Pour this mixed juice mixture into the prepared baking dish and place into the refrigerator to set for about 30 minutes.
- While you are waiting, prepare the next layer. As soon as you pour one layer into the baking sheet and place into the refrigerator, start making the next layer, so it has a chance to cool off a bit, before you pour it over the set layer. If the juice mixture is too hot, it will melt the chilled layer and the colors might mix together. You don’t want to mix them too far in advance too, or the juice will start to set.
- For the white layer, I prepared 1 can of sweetened condensed milk, distributed it among the layers and finished off with another 1/2 of another sweetened condensed milk, so that it wouldn’t set as all the different layers were chilling in the refrigerating.
- Mix 1/2 cup of water with 5 teaspoons of unflavored gelatin and set aside to bloom for about 5 minutes.
- Meanwhile, boil 1 3/4 cups of water. When the gelatin blooms for 5 minutes, whisk together the bloomed gelatin, 1 (14 ocan of sweetened condensed milk and the 1 3/4 cups boiling water. Mix until all the gelatin is dissolved.
- After the first layer of juice chills for 30 minutes, pour 1 1/2 cups of the milk mixture carefully over the chilled layer. Set for 30 minutes.
- Repeat, making the other juice layers, alternating a rainbow color with a white layer. When you've used all the white mixture, making another half of a batch.
- Bloom 2 1/2 teaspoons of unflavored gelatin in 1/4 cup of water, then whisk with 1/2 (14 ocan of sweetened condensed milk and 3/4 cup of boiling water.
- Keep the Layered Rainbow Jello Refrigerated until you are ready to serve it.
Notes
1. If you want to use the typical boxed Jello, mix 1 (3 oz) package of Jello with 1 cup boiling water and 1 teaspoon of unflavored gelatin until all the gelatin dissolves. Repeat with all the colored layers, alternating with the white layers.
2. The rainbow color order if you use all colors: purple, blue, green, yellow, orange red.
Svetlana
It makes my mouth watering! Looks so nice! I definitely have to try it!
vera
beautiful
Violetta
What a beautiful dessert ❤👍 definitely on my list✔
Kel
So excited to make this version!!
Oksana Shell
Love this version! More healthy and beautiful. Thank you so much 🤗
Sofia
I’m dying to know how you were able to de-pan the jello so cleanly, and cut it beautifully!
Do you have any tips? I plan to try this
olgak7
Honestly, it was very easy. I added a lot of gelatin to the Rainbow Jello, which makes it stay together really well and also cuts very easily and stays clean. If there were less gelatin, it would be much messier.
Katerina
I made this today and it turned out just like in Olgas picture! It tastes delicious and the kids love it. I certainly got a good reaction out of them with this one! Thanks Olga! You have many awesome recipes! I made the kiwi/blueberry cake today too. Letting it sit over night before I try it though. It was exciting making it. God bless you!
Eve
Does the recipe call for 1 1/2 cup of condensed milk split between all the white layers or is it 1 1/2 for each layer? I’m a little confused on that part.
Sara
I’m planning on making a version of this for the fourth, using 100% blueberry juice and 100% pomegranate juice for the blue and red layers, respectively. Any idea how much sugar I should add to these juices so it’s sweet but still on the healthier side?
Thanks for the inspiration!