
Tarts are so pretty and elegant and I love how easy they are to make. I wanted to create a tart with a simple shortbread cookie type crust and have a no bake filling. The less oven time, the better. Right now my baby is at an age where he needs a lot of attention, so I don't have time for fancy layer cakes or other fussy desserts during the week. During the weekends, my husband can take charge of baby watching, but during the week, I'm on my own. Since we have company on weeknights too, this is the perfect solution. I made the tart during my baby's nap times and it was all ready to go for our guests that evening.
I combined three of my favorite sweet flavors - cheesecake, berries and a simple cookie that isn't too sweet.
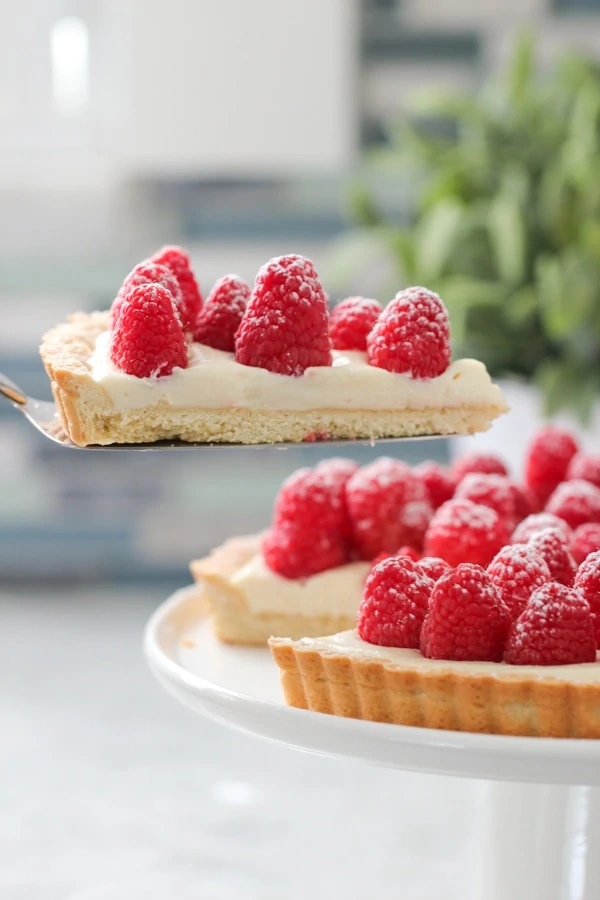
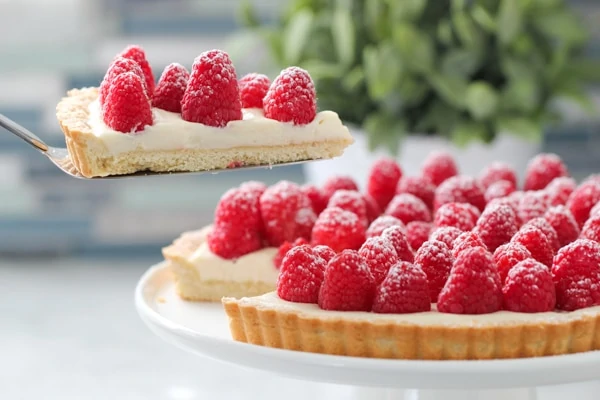
To make sure it wasn't runny, I used unflavored gelatin for the cheesecake filling. This tart has a sandy shortbread crust, with a creamy mascarpone cheesecake filling, topped off with fresh, juicy raspberries. You can even make this into small, individual tarts which would be really cute. With a nice cup of tea, this tart is the perfect way to relax with your family or guests.
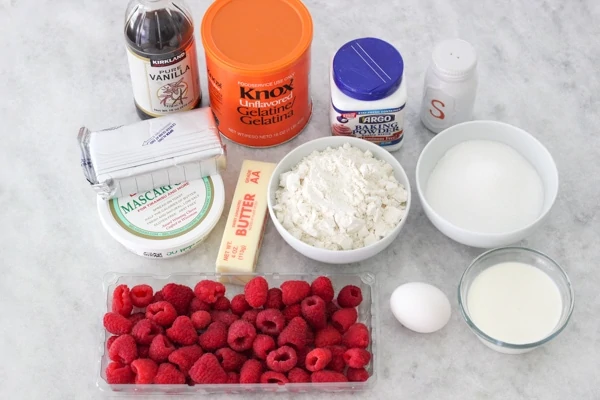
Tart Crust:
1 stick (8 Tablespoons) butter (½ cup), softened to room temperature
½ cup granulated sugar
1 egg, room temperature
½ teaspoon vanilla extract
1 ½ cups all purpose flour
¼ teaspoon baking powder
¼ teaspoon salt
Cheesecake Filling:
1 teaspoon unflavored gelatin
1 Tablespoon water
⅓ cup heavy cream
4 oz cream cheese, softened
4 oz mascarpone cheese, softened
½ cup granulated sugar
1 teaspoon vanilla extract
⅛ teaspoon salt
2 pints raspberries
Instructions:
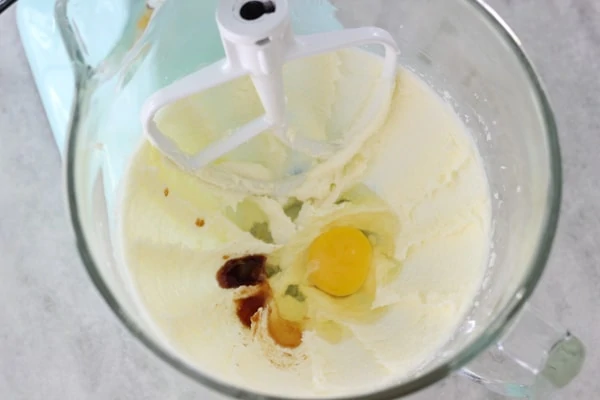
 In a large bowl, cream the butter and sugar together until light and fluffy, about 3 minutes.
Add the egg and vanilla. Mix to combine.
 Add the flour, baking powder and salt. Mix just until combined.
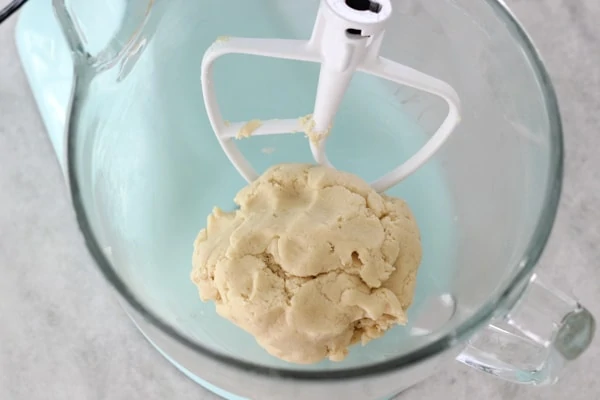 Shape the dough into a flat disc, wrap it in parchment paper and chill in the refrigerate for about 30 minutes. You can even make this a day in advance.
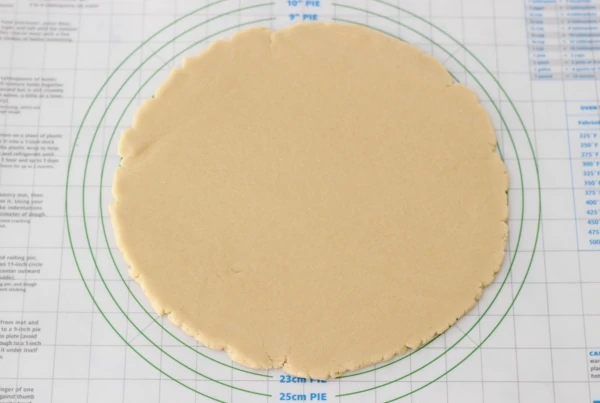
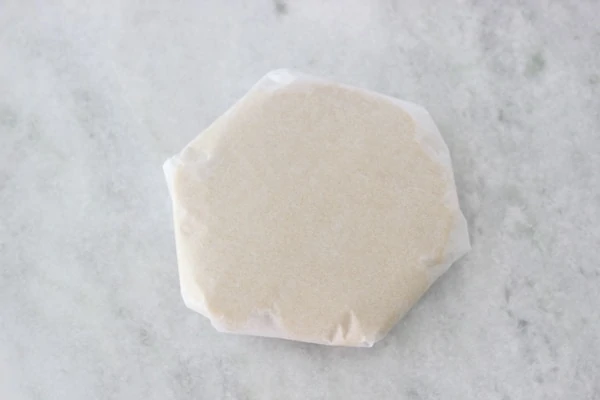 Take the chilled dough out of the refrigerator. Roll out the dough on a lightly floured surface to about an 11 inch circle.
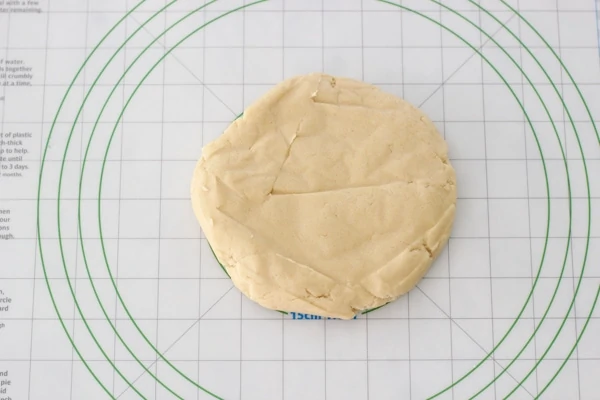
 Place the dough over a 9 inch tart pan with a removable bottom. Lift the edge of the dough and ease it into the corners of the pan. Make sure there is dough in all the corners of the pan.
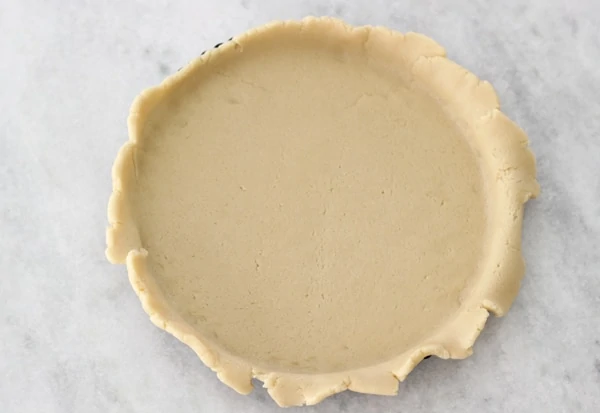
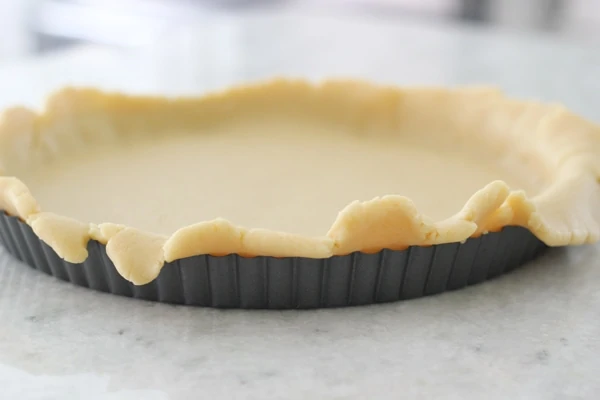 Trim off the excess dough off the top of the tart pan. (I usually roll out the excess dough and bake a few little cookies that taste really great.)
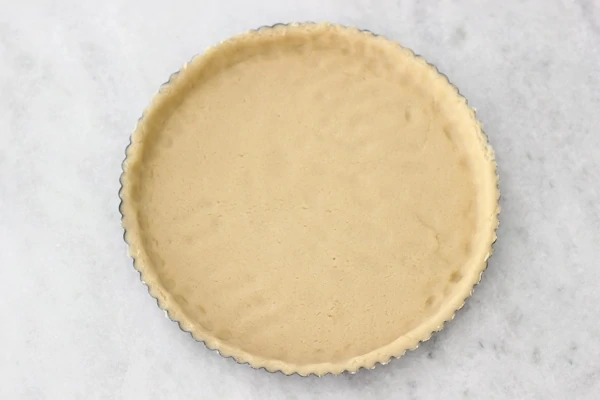 Preheat the oven to 350 degrees Fahrenheit.
Freeze the dough in the tart pan for about 30 minutes.
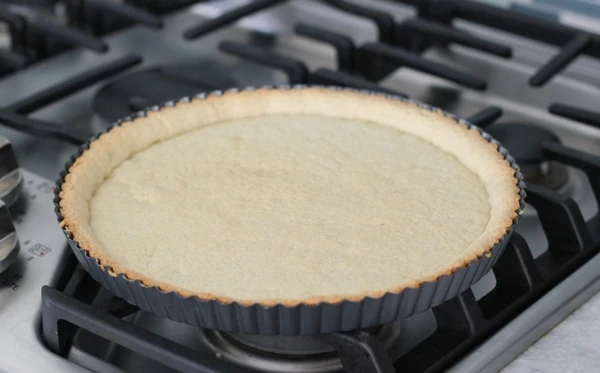
Bake the tart shell in the preheated oven for 15-20 minutes, just until it is lightly golden brown around the edges.
Take the tart shell out of the oven and chill completely.
 Meanwhile, make the filling.
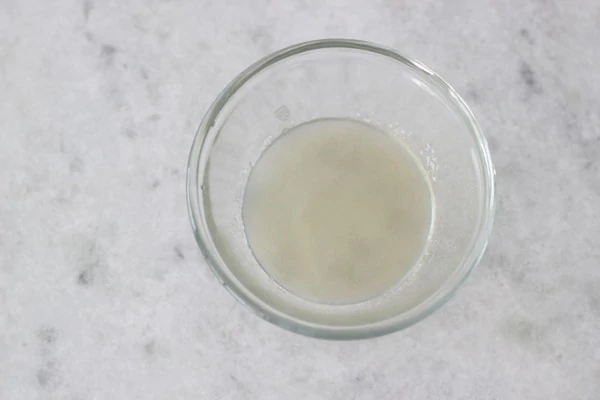
Pour the 1 Tablespoon of water into a small bowl. Sprinkle the gelatin over the surface of the water and let it stand for about 5 minutes.
 In a chilled bowl with a chilled whisk attachment, mix the heavy cream until soft peaks form. Set aside in a small bowl.
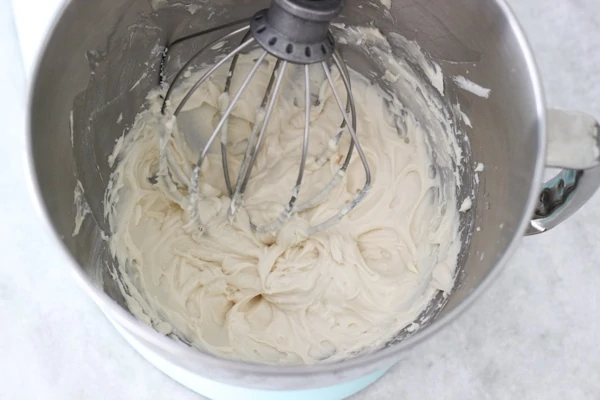
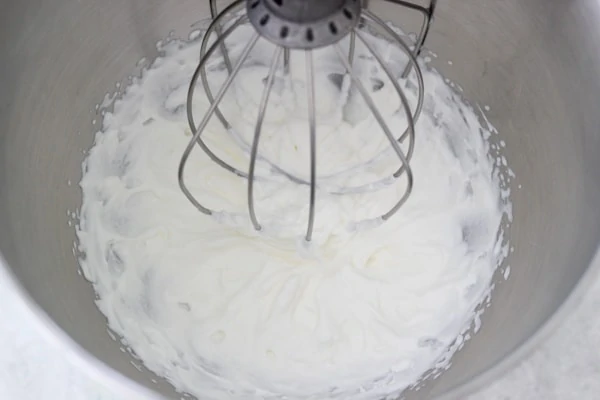 Using the same bowl and standing mixer, mix the cream cheese and sugar until smooth. (You can also use a hand held mixer.)
Add the mascarpone cheese, vanilla and salt. (You can also add some lemon zest for extra flavor.)
You can use 8 oz of cream cheese only, if you don’t want to use mascarpone cheese. Mix until smooth.
 Gently fold in the whipped cream into the cheesecake mixture.
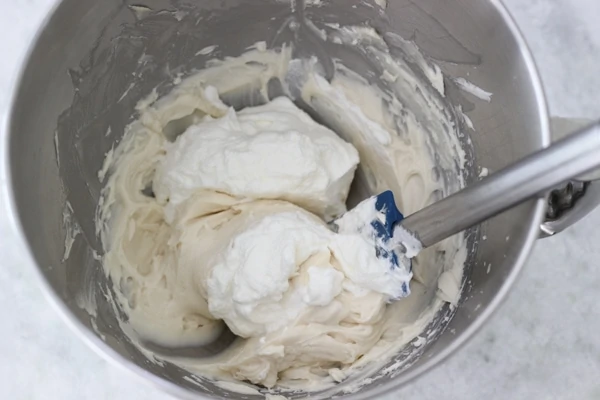 Place the gelatin mixture in the microwave for about 30 seconds or heat in a small saucepan on very low heat, just until the gelatin dissolves. Do NOT boil. Set aside to cool just for a minute.
Add the gelatin into the cheesecake mixture and mix to combine.
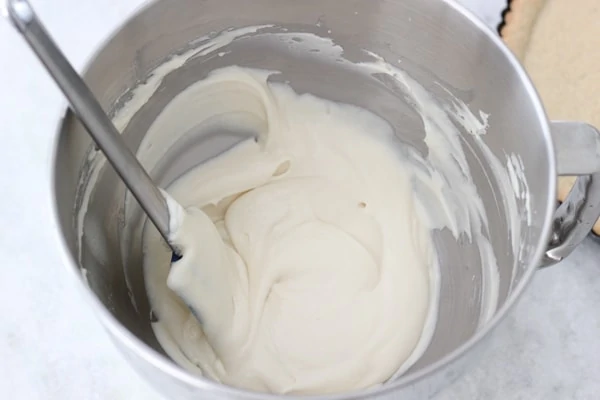 Pour the cheesecake mixture into the cooled tart shell.
 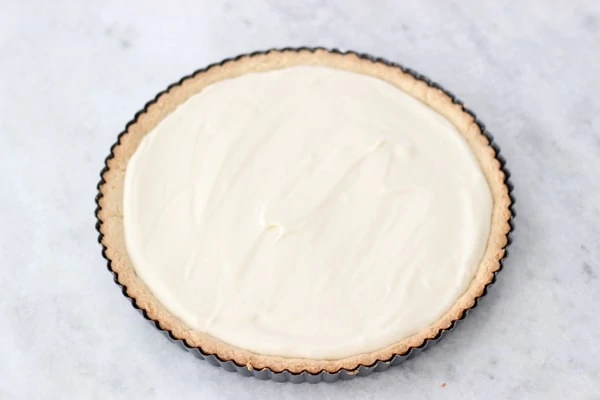 Refrigerate until the cheesecake layer is set, about 1 hour. Garnish with fresh raspberries.
 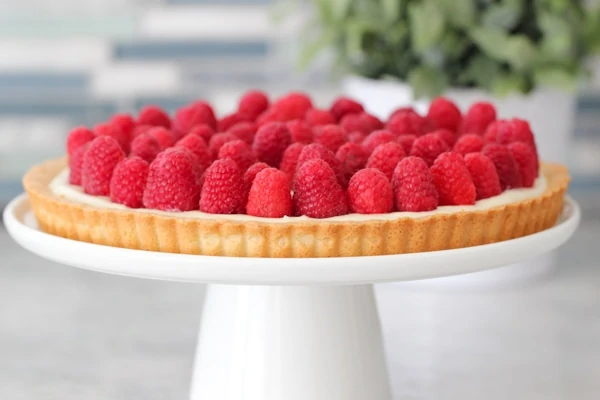 You can also use any other berries, nuts or chocolate shavings.
 To remove the tart out of the pan, place your hand under the pan, holding up only the removable bottom not the sides. Push the tart straight up and the tart ring will fall away and slide down your arm. Use a long thin knife or spatula to gently remove the tart from the bottom of the pan and transfer it to a serving plate.


Raspberry Cheesecake Tart
Ingredients
Tart Shell:
- 1 stick 8 Tablespoons butter (½ cup), softened to room temperature
- ½ cup granulated sugar
- 1 egg room temperature
- ½ teaspoon vanilla extract
- 1 ½ cups all purpose flour
- ¼ teaspoon baking powder
- ¼ teaspoon salt
Cheesecake Filling:
- 1 teaspoon unflavored gelatin
- 1 Tablespoon water
- ⅓ cup heavy cream
- 4 oz cream cheese softened
- 4 oz mascarpone cheese softened
- ½ cup granulated sugar
- 1 teaspoon vanilla extract
- ⅛ teaspoon salt
- 2 pints raspberries
Instructions
- In a large bowl, cream the butter and sugar together until light and fluffy, about 3 minutes.
- Add the egg and vanilla. Mix to combine.
- Add the flour, baking powder and salt. Mix just until combined.
- Shape the dough into a flat disc, wrap it in parchment paper and chill in the refrigerate for about 30 minutes. You can even make this a day in advance.
- Take the chilled dough out of the refrigerator. Roll out the dough on a lightly floured surface to about an 11 inch circle.
- Place the dough over a 9 inch tart pan with a removable bottom. Lift the edge of the dough and ease it into the corners of the pan. Make sure there is dough in all the corners of the pan. Trim off the excess dough off the top of the tart pan. (I usually roll out the excess dough and bake a few little cookies that taste really great.)
- Preheat the oven to 350 degrees Fahrenheit.
- Freeze the dough in the tart pan for about 30 minutes.
- Bake the tart shell in the preheated oven for 15-20 minutes, just until it is lightly golden brown around the edges.
- Take the tart shell out of the oven and chill completely.
- Meanwhile, make the filling. Pour the 1 Tablespoon of water into a small bowl. Sprinkle the gelatin over the surface of the water and let it stand for about 5 minutes.
- In a chilled bowl with a chilled whisk attachment, mix the heavy cream until soft peaks form. Set aside in a small bowl.
- Using the same bowl and standing mixer, mix the cream cheese and sugar until smooth. (You can also use a hand held mixer.)
- Add the mascarpone cheese, vanilla and salt. (You can also add some lemon zest for extra flavor.) Mix until smooth.
- Gently fold in the whipped cream into the cheesecake mixture.
- Place the gelatin mixture in the microwave for about 30 seconds or heat in a small saucepan on very low heat, just until the gelatin dissolves. Do NOT boil. Set aside to cool just for a minute.
- Add the gelatin into the cheesecake mixture and mix to combine.
- Pour the cheesecake mixture into the cooled tart shell. Refrigerate until the cheesecake layer is set, about 1 hour. Garnish with fresh raspberries. You can also use any other berries, nuts or chocolate shavings.
- To remove the tart out of the pan, place your hand under the pan, holding only the removable bottom not the sides. Push the tart straight up and the tart ring will fall away and slide down your arm. Use a long thin knife or spatula to gently remove the tart from the bottom of the pan and transfer it to a serving plate.
Notes
You can use 8 oz of cream cheese only, if you don’t want to use mascarpone cheese.


I love that your recipe is a lower profile cheesecake! I’m not a fan of tall, thick cheesecakes personally. I want to make this immediately, however I don’t have a tart pan! Could I make this in a 9” springform pan instead?
Hi Mel, I hope you enjoy the tart! I have never made it in a springform pan, so it's hard for me to say if it will work or not, but I'd love to hear how it works out for you if you give it a try.
Hi Olga,
When I added the gelatin to the cream it got clumpy? Do you know why?
Also, how many days in advance can I make the tart?
You can make the tart 1-2 days in advance, just add the raspberries right before serving.
Hello,
How many mini tart would one portion recipe make?
One tart.
One mini tart with this portion? With a mini tart molds?
It's a regular sized tart, not a mini tart. The tart pan I used is 9 inches.
You mentioned these can be made into individual sized mini tarts, just wondering if you ever made them and the amount it came out to? 🙂 sorry for the confusion.
Yes, I have made them into smaller individual tarts but I don't remember how many tarts there were. I don't write things down in detail when I am just baking for our family, I take very detailed notes only when cooking for the website:).
What is the gelatin for/what does it do? If I want to make a taller cheesecake on a regular crust, should I just use cream cheese only, does gelatin give it a different texture & wont work for tall cake?
The gelatin stabilizes and "gels" the cheesecake part of the cheesecake. This is essentially a no-bake cheesecake. Without the gelatin, it will have a thinner consistency.
If you want to make it taller, add more gelatin.
Hi Olga,
Where did you buy your tart pan? I cant seen to find a removable 9 inch pan.
Probably Home Goods, but I don't remember for sure.
can i make this dessert the night before? or will it get soggy?
No, it won't get soggy, Annie:).
Do I have too freeze the dough or am reading it wrong ... If yes what freezing do . Thanks .
Yes, you have to freeze the dough in the tart shell for about half an hour. It will prevent the dough from slumping and shrinking while baking.
Hi, Olga. Can I use a regular vanilla jello instead of unflavored gelatin for this recipe?
I wouldn't recommend it, Olga.
LOVE LOVE LOVE this recipe! The tart it self was delicious, I made cookies with the extra dough I had and wow they definitely filled my hunger for something sweet! and love the custard, yum and the raspberries just add that tartness to the entire desert, just perfect!!!!! Thank you!!!!
Thank you so much for taking the time to write your feedback, Vitaliya. I am so glad you enjoyed it.
Thanks for another great recipe, Olga!!! I wonder if I can omit the mascarpone cheese, or substitute it with more cream cheese or..., or it is better to use it???
You can just use cream cheese, Natalia. Use 8 oz of cream cheese total. (I have that written in the instructions.) It's totally up to you. I don't always have mascarpone in my house, but I always have cream cheese, so that's what I would do too.
Hi Olya,
I have an 11-12 inch tart pan. Would I need to change the recipe to have it fit?
Hi Olya,
I have a tart pan but it looks like it's 11-12 inches. Would I still be able to make this tart without changing the recipe or would I need to change something to fit?
I think there would be enough tart dough for the crust, but I would probably make a bit more filling, Tanya.
I just brought a tart pan and have been looking for recipes and you conveniently post this. :))) looks beautiful and very tasty! I have 3 kids so these simple but delicious desserts are right up my alley. Thanks Olga!
Perfect timing then:). I hope you enjoy it, Julia.