
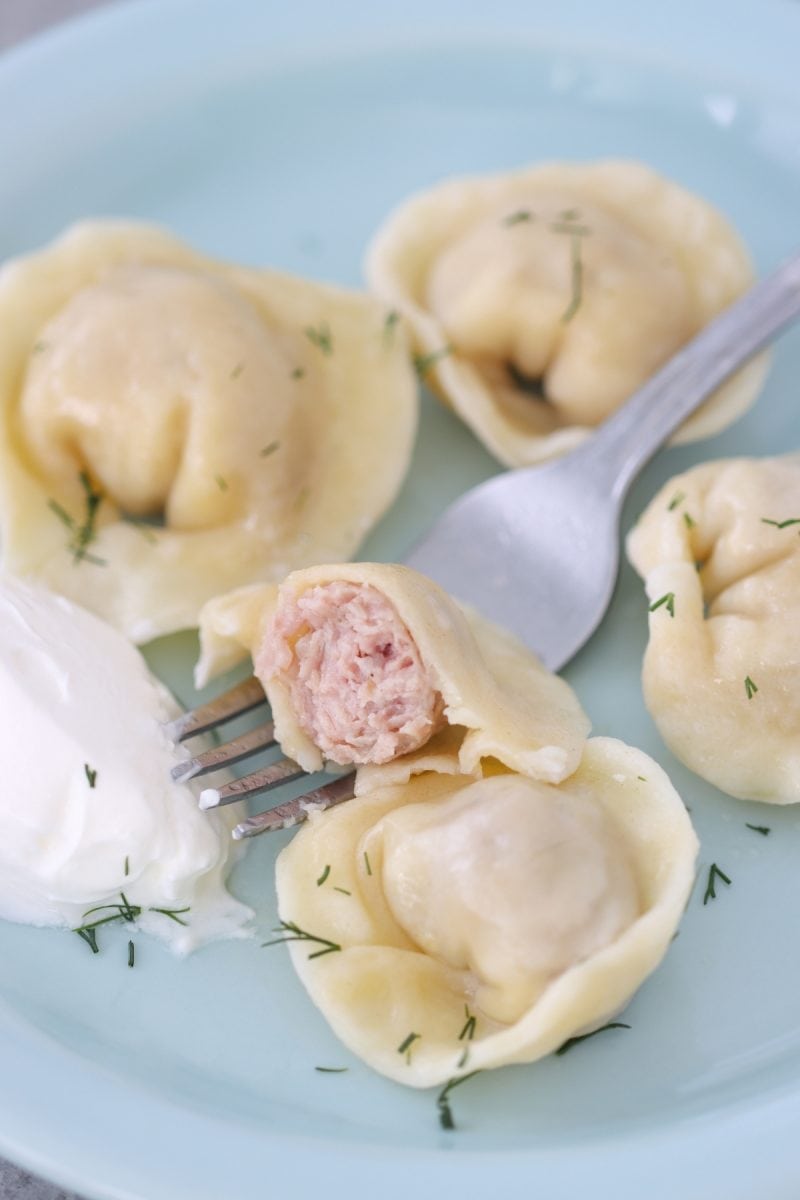
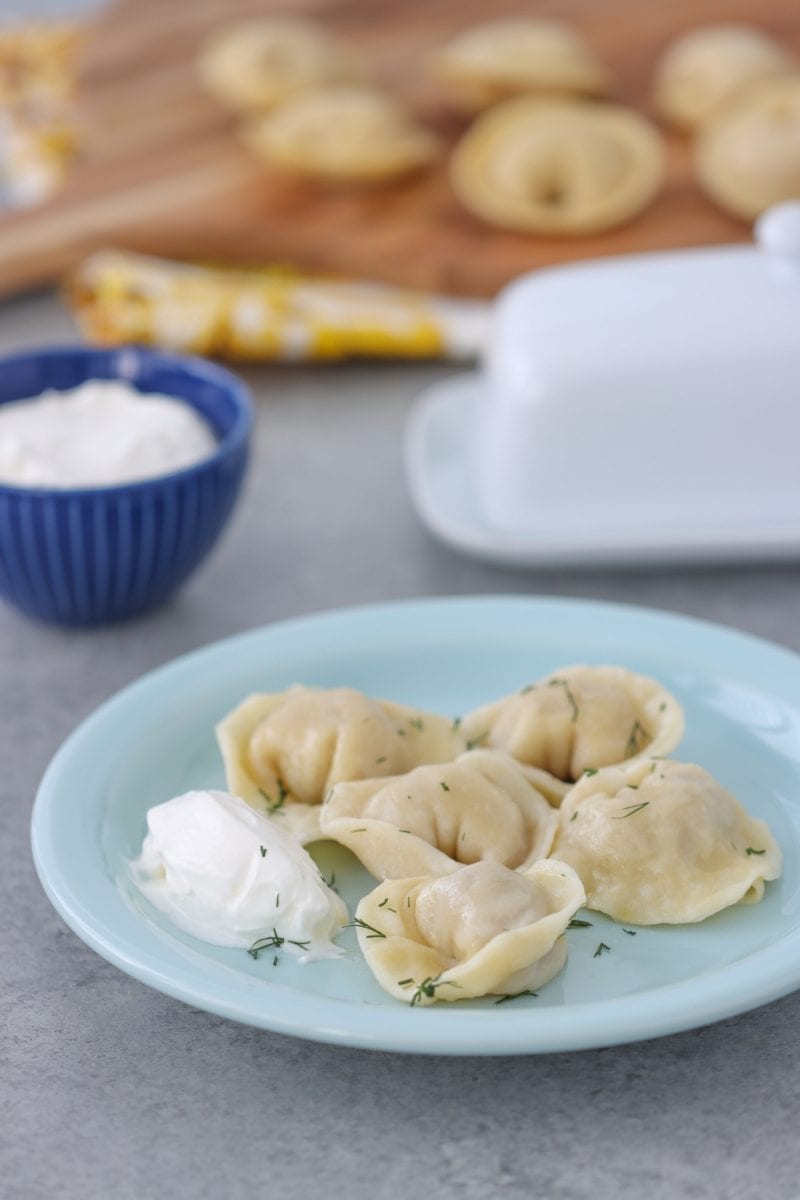
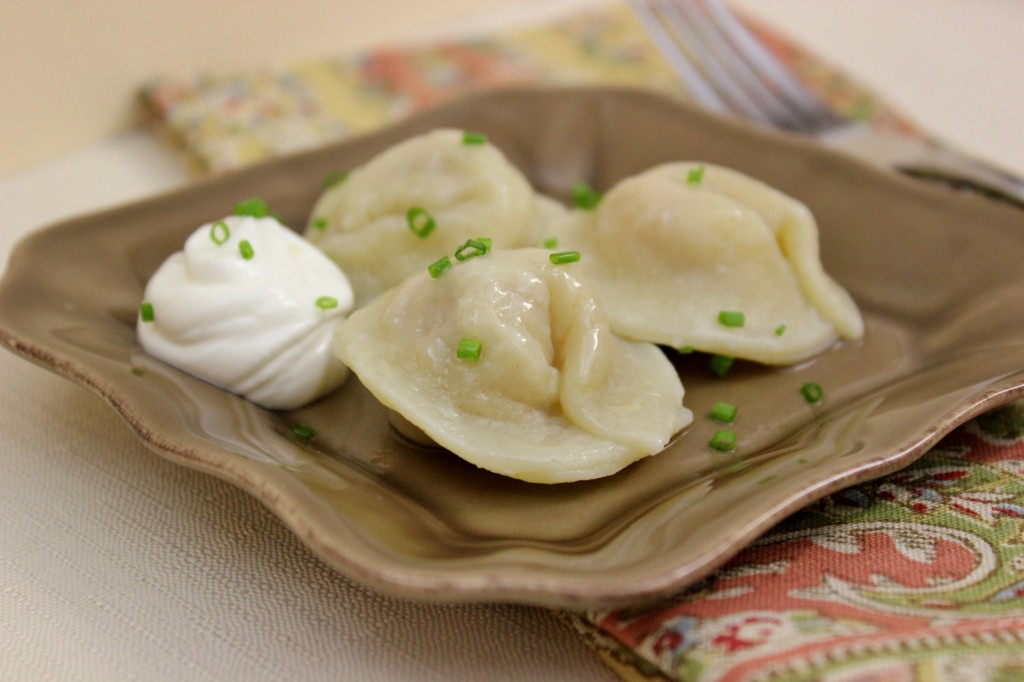
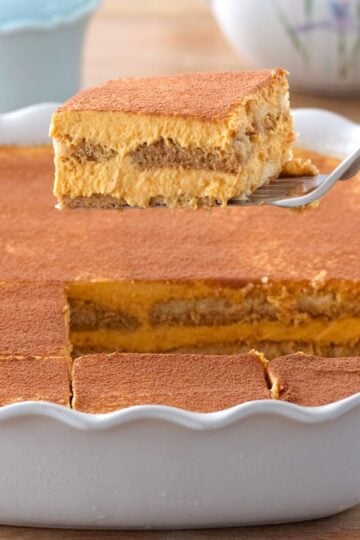
Pelmeni are famous Russian meat filled dumplings. This recipe has a really unique dough that is so easy to make and is a dream to work with. Serve them boiled until they are tender or pan fry until golden and crisp.
Pelmeni are a staple in the Russian cuisine. Almost every country has a dumpling filled with meat in its repertoire - pierogi, ravioli, tortellini, wontons, etc. Similarly, in the the Russian culture, Pelmeni are a big part of the menu. The dumplings have a ground meat and onion filling, encased in a tender dough.
These recipes get passed down from generation to generation. We have been making them in my family for as long as I can remember. With my Mom and sisters, we would have Pelmeni making days, making HUGE batches to store in the freezer to have on hand for quick dinner options. I love traditions like this one. Homemade Pelmeni are such a treat and a labor of love.
Traditionally, the dough is made from water, flour, egg and salt and the filling is ground meat, salt, pepper and onions. Although I love this classic recipe and grew up making, about 15 years ago I experimented with a different type of dough and I was instantly converted.
This dough is an absolute dream to work with. I don't even use any extra flour to roll it out, it doesn't stick to my hands and is soft and pliable. I even use it to make Blueberry Vareniki too. The texture of the pelmeni is very tender too. This recipe will give you 150-200 pelmeni. You can easily halve it and make less. With a little butter and sour cream, this is the ultimate comfort food for Slavic families.
What Are Pelmeni?
Pelmeni are Russian meat filled dumplings. They are tiny morsels that are a perfect mouthful. In most cases, they are boiled in water, however, they can also be sauteed in butter until the dough is golden brown.
In Russia, one of the most famous types of pelmeni are the Siberian pelmeni. It is said that the women would make large amounts of pelmeni and take them outside in the winter, where they would freeze quickly and be stored for many warm dinners in the cozy izba (cabin).
Ingredients:
Pelmeni dough:
- butter
- water
- all purpose flour
- salt
- eggs
Meat Filling:
- ground meat (most of the time ground pork is used, but you can also use ground chicken, turkey or beef)
- salt, pepper, dry herbs and spices
- onions, garlic

How To Make Pelmeni Dough:
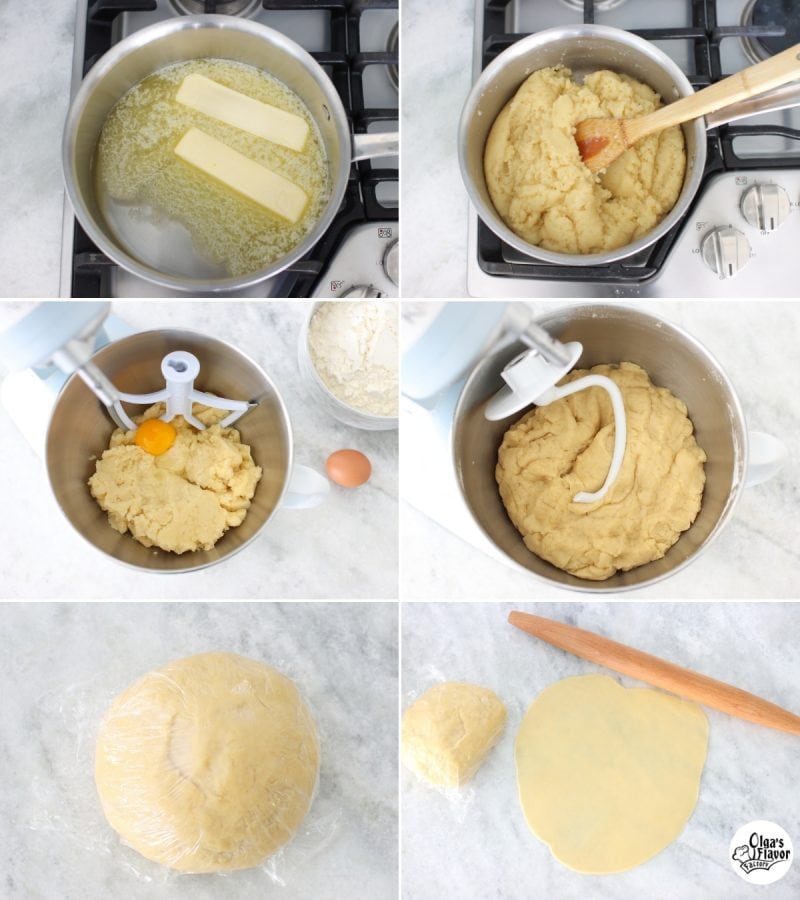
- Make the first part of the dough in a pot on the stove.
- Bring the water and butter to a boil.
- Add the salt and two cups of flour all at once, mixing vigorously with a wooden spoon, until the flour is incorporated and comes together.
- Next, take it off the heat, cool slightly.
- After that, finish making the dough in a mixing bowl. You can use a stand mixer, hand mixer or your hands. It's very easy to work with.
- Transfer the dough to a large mixing bowl, and add the eggs, one at a time.
- Add the remaining flour, mixing until combined.
- Cover, and set aside, letting the dough rest for about 20 minutes.
If you want to try another dough, I really like this one from Natasha's Kitchen.
How To Assemble the Dumplings
(Traditionally, raw onions are used in Pelmeni, either chopped finely or grated. They have a really strong flavor, so I prefer to saute them first before adding to the meat filling. Cooking the onion and garlic mellows out their flavor and adds a sweet note to the onions, not harsh.)
- Make the Meat Filling.
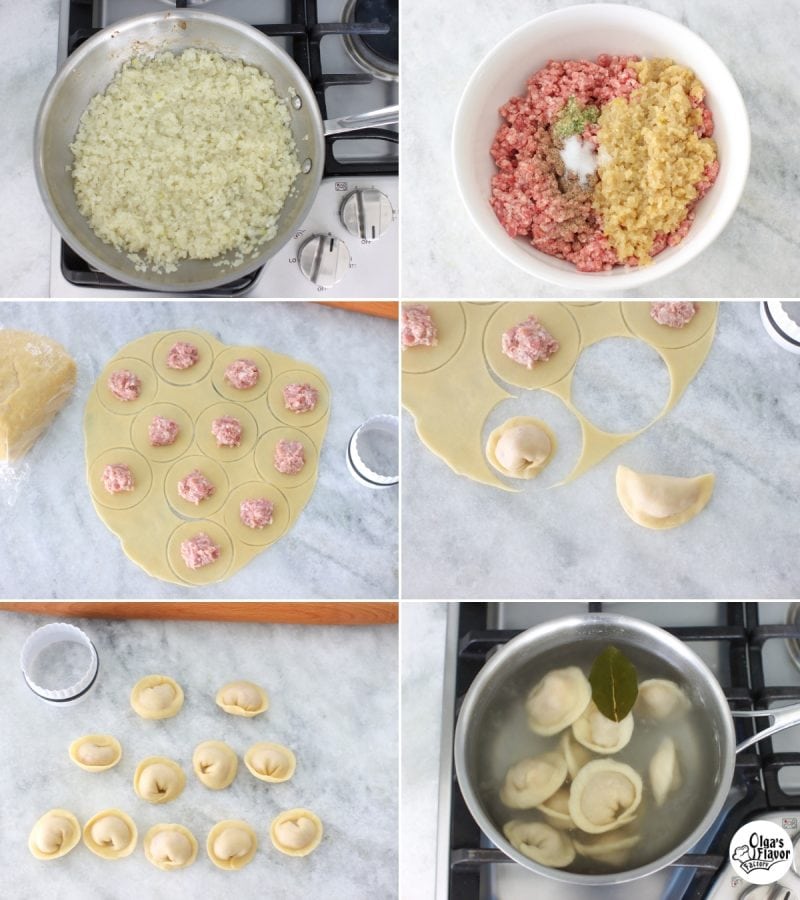
- Melt butter in a skillet. Add the onions and cook for about 5-7 min, until tender and starting to turn slightly golden. Add garlic and cook for about 30 seconds. Cool slightly.
- In a large bowl, combine the ground meat, cooked onions and garlic, salt, ground black pepper, any dry herbs and spices that you like and ¼-1/3 cup water.
- Next, roll out the dough. I like to roll it out thinly, but be careful that it's not too thin, or the filling will come out, or the dough will tear easily.
- After that,shape the assemble the pelmeni.
- Cut out circles in the dough. I use a biscuit cutter that is 3 inches wide.
- Place 1 heaping Tablespoon of meat filling in the center of the dough.
- Fold the circle in half, bringing the edge of the dough over the meat filling and lining up with the edge of dough on the other side. Seal the edges together, sealing the pelmeni, making sure to push out any air. If there is any air inside the pelmeni, they will burst when you cook them.
- Bring the corners of the half moon shaped dumpling together, creating the classic Pelmeni shape.
Best Way to Cook and Serve
You can cook the pelmeni right after making them. That's my favorite dinner while having a Pelmeni making party. Of course it's necessary to taste test the Pelmeni and make sure they turned out alright:).
Bring a large pot of salted water to a boil, just like you would for making pasta. You can add a bay leaf and some peppercorns to the water for extra flavor.
After the water comes to a boil, add as many pelmeni as you want to cook. Keep the water at a medium rolling boil, until the pelmeni float to the top and for only about 5 minutes after that. Don't overcook them or they will fall apart. Drain the pelmeni and serve them hot with a generous helping of sour cream on the side. (You can also serve the Pelmeni with some of the cooking water, using it like a broth.)
Another delicious way to serve Pelmeni is to pan fry them until golden on both sides. Usually, in my family we boil the Pelmeni first, drain them and then transfer them to a skillet with butter and pan fry. However, you can also place them into the skillet raw, saute until golden on both sides. You will need to cook them a bit longer, to make sure the meat filling is completely cooked through.
How To Freeze Pelmeni
Pelmeni freeze beautifully, in fact, that is how we store the majority of the Pelmeni that we make.
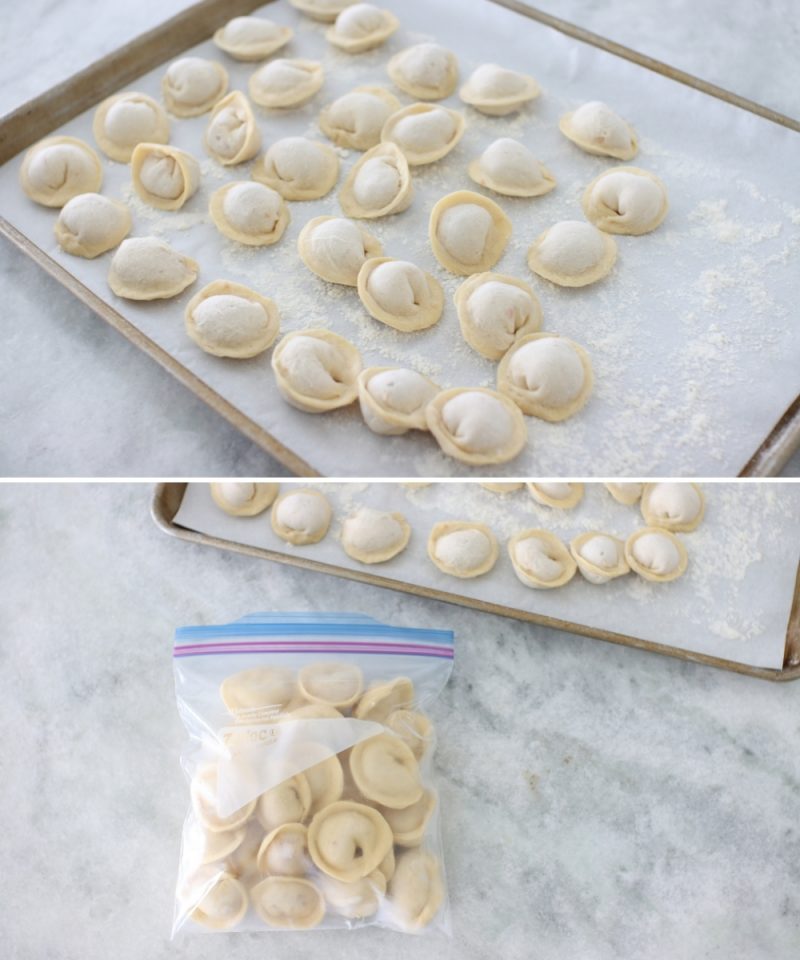
- Sprinkle flour on a wooden board or baking sheet lined with parchment paper. Next, arrange pelmeni in a single layer on top of the flour.
- Place in the freezer for 20-30 min, until the pelmeni are completely frozen and hard.
- After that, transfer the pelmeni to a freezer ziptop bag or an airtight container and store in the freezer for 6 months or up to 1 year.
When cooking frozen Pelmeni, there is absolutely no need to thaw them first.
Helpful Tips
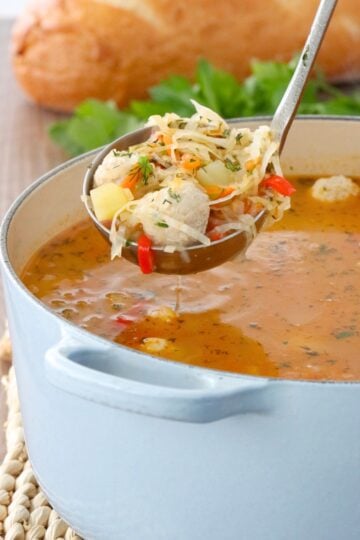
Pelmeni are usually served on their own, with sour cream. You can also add them to soups, they can serve as both a dumpling and meatball in one:).
Other garnish options:
- fresh herbs, especially dill, parsley, and/or green onions.
- melted butter
- a splash of vinegar with some of the pelmeni cooking water
- sauteed onions and bacon
Most of the time ground pork is used, but you can use any ground meat that you want. I also like using ground chicken. Ground beef or ground turkey are also good options. Make sure that the ground meat that you use isn't too lean, or the pelmeni will be tough and dense.
Other Filling Options:
Add some sauteed mushrooms to the meat filling.
Some fresh herbs will also be a great addition, such as dill or parsley.
1. Don't roll out the dough too thin.
2. Make sure to get out as much air as possible when sealing the dumplings. If there is any air inside, the pelmeni will burst when cooking.
3. Don't overcook the pelmeni. If you cook them too long, they will fall apart. The dough is really tender and the dumplings are small, so it doesn't take too long to cook them.
Keep your freezer stocked with these delicious Russian dumplings. They are so convenient to have on hand.
You can freeze them from 6 months to a year, as long as you pack them well to protect from freezer burn.
Pelmeni

Pelmeni - the famous Russian meat-filled dumplings. This recipe has a really unique dough that is so easy to make and is a dream to work with. The pork filling has the addition of napa cabbage, onion and garlic, which add flavor but also make the filling incredibly tender.
- Prep Time: 2 hours
- Cook Time: 20 minutes
- Total Time: 2 hours 20 minutes
- Yield: 150-200 1x
- Category: Appetizer, Main Course
Ingredients
Dough:
- 2 cups water
- 1 cup or 8 oz butter
- 1 tsp salt
- 2 large eggs
- 6 cups all purpose flour
Meat Filling:
- 3 lbs ground meat (I prefer pork or chicken)
- 2 onions (finely chopped)
- 4 garlic cloves (minced)
- 1 ½ Tablespoons butter
- 2 ½ - 3 teaspoons salt
- 2 teaspoons ground black pepper
- ½ - 1 Tablespoon dry herbs and spices, optional
- ¼ - ⅓ cup water
Instructions
Pelmeni Dough:
- In a medium pot, bring the water and butter to a boil.
- Add the salt and two cups of flour all at once. Mix vigorously with a wooden spoon.
- Take off the heat, cool slightly and add the eggs.
- Add the remaining four cups of flour. Mix until combined.
- Cover, and set aside, letting the dough rest for about 20 minutes.
Meat Filling:
- Melt butter in a skillet. Add the onions and cook for about 5-7 min, until tender and starting to turn slightly golden. Add garlic and cook for about 30 seconds. Cool slightly.
- In a large bowl, combine the ground meat, cooked onions and garlic, salt, pepper, herbs and spices and water. Mix to combine.
Assembling the Pelmeni:
- Roll out the dough into a thin sheet. (While assembling the dumplings, keep the remaining dough covered, so it stays soft and pliable, protecting it from drying out.)
- Cut out 3 inch circles, using a biscuit cutter or a cup. Place 1 heaping Tablespoon of meat filling in the center. Fold the dough over in half, sealing the edges together.
- When sealing the edges together, make sure to squeeze out all the air, so the pelmeni don't burst open while cooking.
- Take hold of the corners and pinch them together, creating the classic pelmeni shape.
To cook:
- Add 1 bay leaf, and some peppercorns to a pot of water. Season with salt and bring to a boil.
- Add the pelmeni, (no need to thaw if using frozen Pelmeni). Cook just until the pelmeni float to the top, for about 5 min. Make sure not to overcook them.
- Drain the water or use some of it and serve it with the pelmeni as a broth.
- Serve with sour cream. Other garnish options are melted butter, sour cream, vinegar, fresh herbs, sauteed onions and bacon.
Notes
Freezer Storage:
- Sprinkle flour on a wooden board and arrange pelmeni in a single layer on top of the flour. You can also use a baking sheet lined with parchment paper.
- Place in the freezer for 20-30 min, until the pelmeni are frozen hard.
- Transfer the pelmeni to a freezer ziptop bag or an airtight container and store in the freezer for 6 months - 1 year.
This is an updated version of the Pelmeni recipe that was published originally on January 24, 2012. I updated the photos and clarified the instructions.

Olga, i'v never saw cabbage in pelmeni. Is it good? I want to try to make it one day. We recently got married so i want to try new things.
I like it, Olga. It keeps the meat very tender. You can always omit it, if you prefer.
Hi there,
Cant wait to try making Pelmeni for the 1st time. Been looking at the different versions and I like the sound of your dough best. I have already ordered my pelmeni mold.
My question is ... how much butter is added ? I live on Australia and we dont do 'sticks' here as a measurement, I have no idea. Can you please tell me in grams ?
Thank you,
Robyn
Each stick is approximately 100 grams of butter. I hope you enjoy the pelmeni, Robyn.
A one-pound (16ounces..) package of butter has 4 sticks. (4 0unces each...) 4 ounces is 113 grams..
hi again Olga 🙂
when you say 2 sticks of butter, can you tell me how many grams please and is it salted?
thank you
Each stick of butter is about 100 grams and I always use unsalted butter in all my recipes.
When I will have free time, I'll make the recipe both ways - half water/ half milk and compare the results. Thanks for the quick reply! 🙂
Hey Olya, I have a question for you regarding the dough. My grandma makes her pelmni dough with milk, egg, flour, etc. I see that your recipe uses water. Do you think the flavor of the dough would change if I substitute milk for water? Have you ever tried making this recipe using milk before? Thanks!
Hi Oksana,
No, I've never tried making this dough with milk. I personally don't think it needs the milk, but you can certainly try it. I don't think it will hurt it.
Wow, this dough is amazing! I used my pelmeni mold to make it and it was just beyond words! They tasted great - just like any other pelmeni dough I've tasted, but most importantly, the dough is EXTREMELY easy to work with! I used to dread making pelmeni before, because I never felt like rolling out dough - not anymore!
Thank you!
I'm so happy to hear that you were pleased with the results, Liza.
I certainly agree with you about the dough. It makes the whole process of making pelmeni so much more manageable when the dough is easy to work with.
I have been making pelmeni for many years. I was taught how to make them by my mother-in-law who was born in Siberia. I am having trouble getting the dough as light as she used to make it. I saw your recipe using butter and like several other postings have never seen this before. Does the dough taste similar to the pelmeni made without butter? I will be having Russian family here VERY soon and want to treat them to pelmeni but need for them to taste like the real pelmeni..
Thanks for your advice..
Theresa,
The dough is a little bit different, but not noticeably so. I actually prefer it. It has a great flavor and texture.
I will give it a try! Thanks so much for replying!
I have never seen butter in a pelmeni/vareniki recipe. If I make these and freeze these, will they taste good after the butter has been frozen in the dough?
This is definitely a very different type of dough:). I've made it many times and always freeze it and haven't had any issues.
Olya, have you made vareniki using this recipe? If so, could you tell me how long would I need to cook them for?
Yep, I sure have. Cook them in boiling water for about 5-7 minutes.
Wow, never seen butter in pelmeni dough. It's new for me.
Can I also use this dough for vareniki?
Yes, Inna, you can use this dough for vareniki.
Ok, I've made pelmeni several times over the last few years, but this dough recipe is the BEST I've ever used. The dough rolls out as smooth and pliable as playdough (better really!) and really makes it easy to stuff, pinch and fold. For those that haven't made pelmeni before, a good dough like this one makes all the time spent wrapping the pelmeni's so much easier and enjoyable. THANK YOU OLGA!
Thanks for taking the time to write, Christina! I'm so glad to know that you liked the dough recipe. It really is a dream to work with:)
Wow. I'm a little envious. With having three Russian born children we try to eat some Russian foods...but mine never end up looking even halfway as pretty as this. 🙂 Perhaps I should go do some practicing.
Have you ever tried making these with ground chicken?
Ground chicken would be great too. Just use ground chicken from both dark and white meat; using only breast meat might make it a little tough, although the napa cabbage solves most of that problem. Ground turkey will work as well.
Olga, thank you so much for the compliment 🙂 Your pelmeni look so good! Tasty and pretty (mine look a little bit like diapers when I make them by hand. I'll try fold them like you do next time). I've been craving pelmeni all week long. I guess I shouldn't be lazy and just make some!
Lol. Actually, mine look just like yours when I use the pelmeni mold. This dough makes them look pretty. I LOVED your dough. It was so great to work with, and it cooked up so well too. I definitely use your recipe now whenever I make the more traditional style pelmeni. I like stocking the freezer with them. It's a great option during the days that I'm working:)