
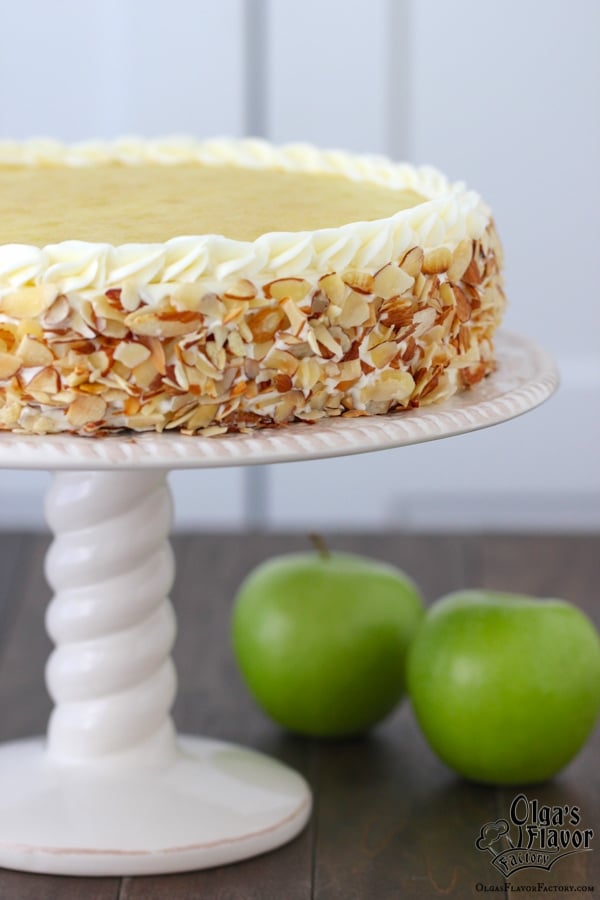
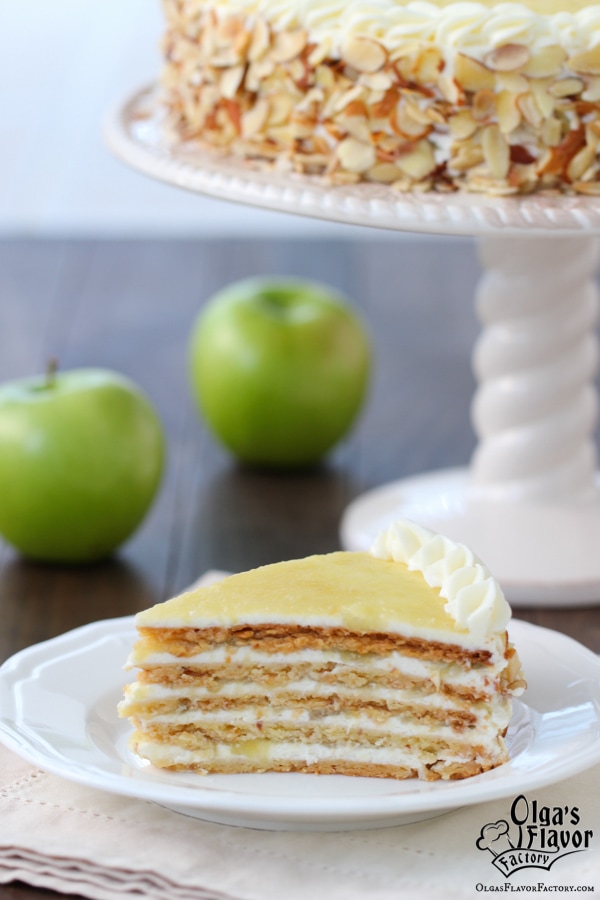
 You can't go wrong with an Apple Almond Cake this time of year. Any dessert that has apples in it, has my name written all over it. If you've been wondering what to make for a celebratory cake for one of the upcoming holidays, you don't need to wonder anymore.
I love looking for inspiration for new recipes to try and when I found this recipe, I was immediately intrigued. With a few minor adjustments, this cake has become a big hit in our family. I tried to be very descriptive and detailed in the instructions. The cake is actually very easy to make. If you read through the instructions and make the cake once, the next time you will breeze right through it.
This cake is as surprising and unusual as it is delicious. The cake layers are very much like a shortbread cookie, sandy in texture and not too sweet. The addition of toasted almonds really gives the cake layers a lot of texture and flavor. I've never had a cake with applesauce before, but it creates the perfect harmony with the sandy, crisp cake layers and the creamy, fluffy cream cheese frosting. I really love the slight tartness that the applesauce gives the cake. The cake layers soften and become tender and the flavors of apple and almond sing through each bite.
Recipe from videoculinary.ru.
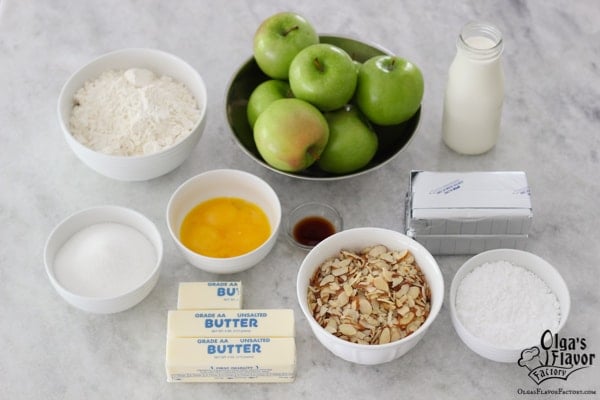
Ingredients:
Cake Layers:
2 ⅓ cups all purpose flour
½ cup sugar
1 ¼ cups (2 ½ sticks) butter, cold
5 large egg yolks
1 ½ - 2 cups sliced almonds, toasted, divided
Applesauce:
2 ½ lbs apples, preferably Granny Smith apples
⅓ cup granulated sugar (more or less, depending on taste)
¼ cup water
1-2 teaspoons lemon juice
½ teaspoon vanilla extract
Frosting:
2 packages (8 oz each) cream cheese, softened
2 cups powdered sugar, or to taste
1 teaspoon vanilla extract
2 ¼ cups heavy cream, chilled
Instructions:
 Cake Dough:
Place the flour and sugar into a large bowl and grate the cold butter into the flour, mixing with your hands every so often to coat the grated butter.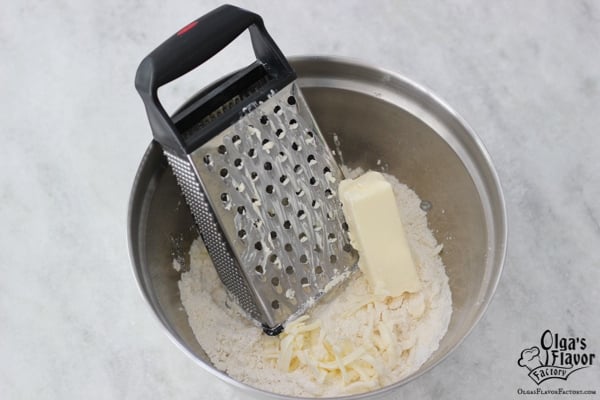 You can also do this in a food processor. (Cut the butter into 1 inch pieces, and pulse in the food processor with the flour until you have a sandy texture. Keep adding all the ingredients until the cake dough is complete.)
Add the egg yolks and mix to combine.
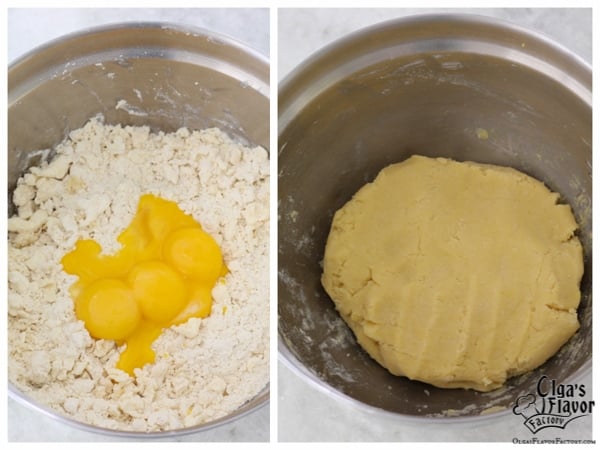 Crush about ¾ - 1 cup of the toasted sliced almonds in a food processor or using a rolling pin. Add the nuts to the cake dough. (If your almonds are toasted and completely cool before you start making the dough, you can add them to the flour in the very first step.)
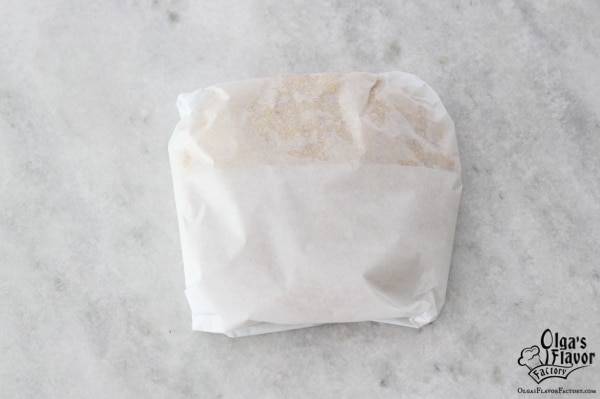
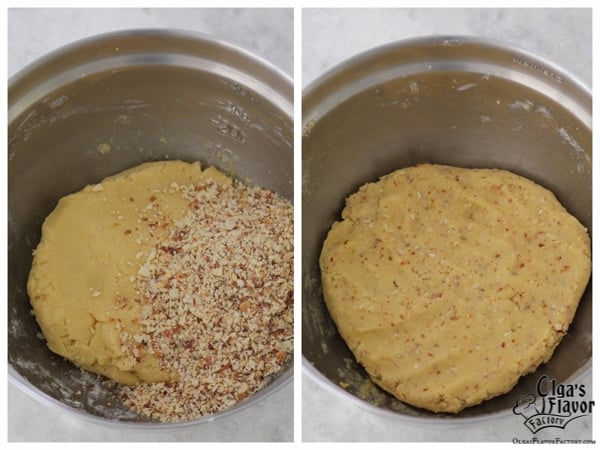 Set the remaining ¾ - 1 cup sliced almonds aside to be used later to coat the sides of the cake. The amount of almonds depends on how much nuts you want to have in the cake. You can use even less nuts if you don't want them to have a prominent role in the cake. You can also use other nuts instead. Mix to combine. The cake dough will look a lot like cookie dough. Shape the cake dough into a disc, wrap it in aluminum foil or parchment paper and place it in the refrigerator to chill for about 30 minutes.
 Applesauce:
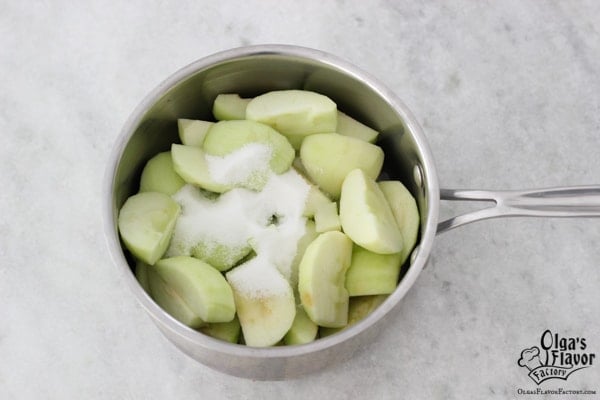
Meanwhile, make the applesauce. Peel the apples and cut them into quarters. Place the apples along with the sugar, water and lemon juice into a medium saucepan.
 Cover, bring it to a boil, reduce the heat to a simmer and cook for 15-20 minutes until the apples are soft and tender. At this point, most of the water will be absorbed by the apples. If there is a very small amount of water left, that is just fine. If there is a lot of water, uncover the saucepan, increase the heat and let the apples cook for a little while longer, so that most of the water will evaporate.
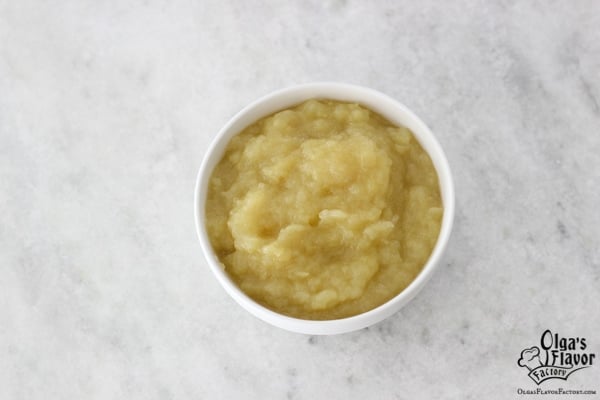
Take the apples off the heat, add the vanilla extract and mash the apples with a potato masher, or use a food processor or immersion blender. The apples should be soft enough that you can easily do this with a potato masher. Cool the applesauce completely. 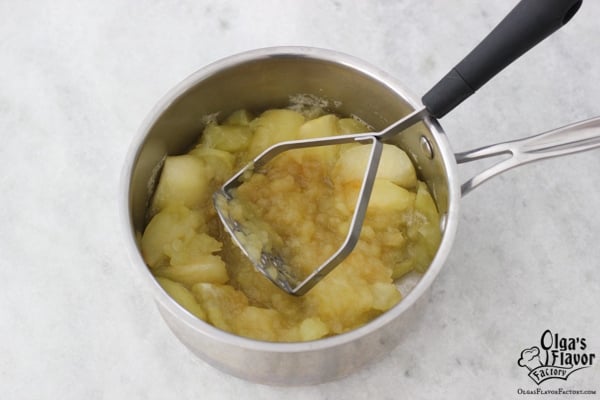 (If you want to use store bought applesauce, it will have more of a brown color, not a sunny yellow like this one. Also, I would recommend using the one that has a very minimal amount of added sugar, but that's completely up to you.)
 Making the Cake Layers:
Preheat the oven to 375 degrees Fahrenheit.
When the cake dough has chilled for 30 minutes, divide it into 5 even portions. 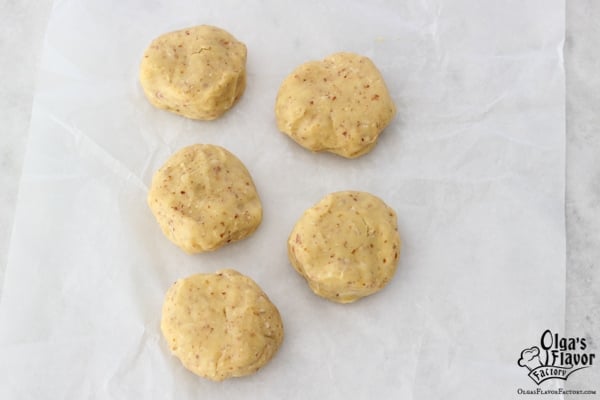 Roll out each portion of dough into a 9 ½ inch circle. Roll out the cake dough in between two sheets of parchment paper. This way, you won't have to use any extra flour, it's much easier to work with and you can bake it on the same parchment paper.
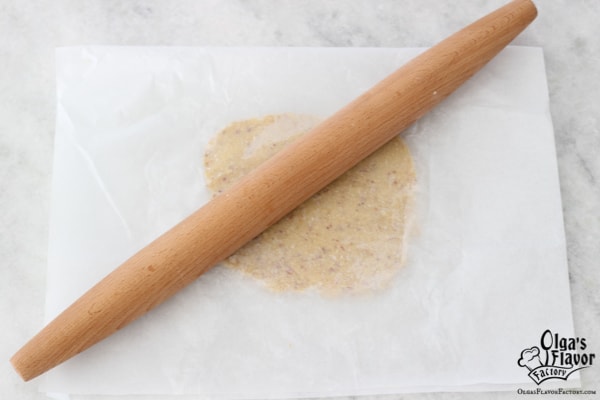 This is how I do it. Roll it out into a rough 9 ½ inch circle. Place a 9 ½ inch plate or the bottom of a tart pan on top of the rolled out cake layer and cut off all the protruding scraps of dough.
 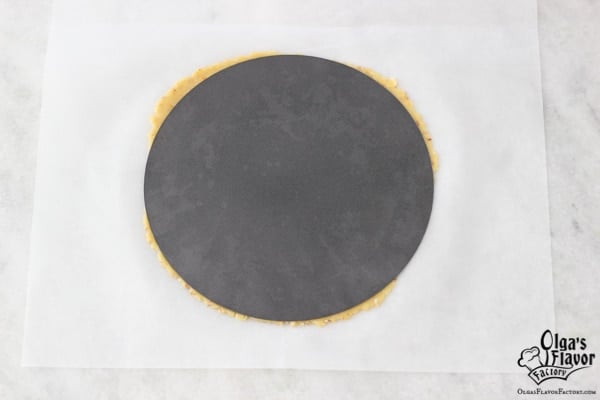 Take the leftover scraps and use them to patch up any gaps around the sides or gently distribute the extra cake dough evenly over the rolled out circle. You should use all of it.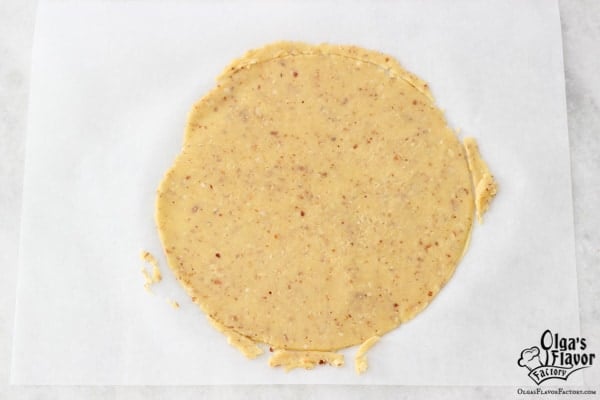
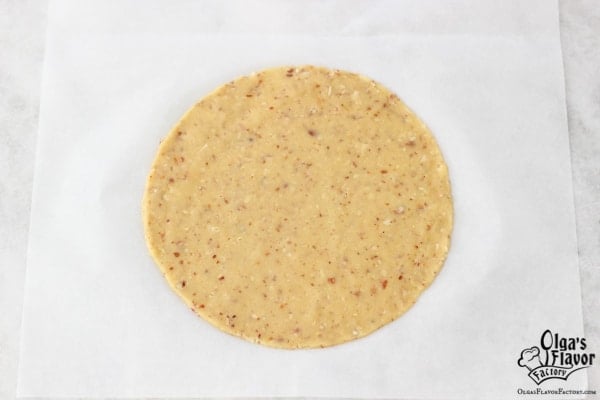 Use scissors to cut around the parchment paper and place the cake layer with the parchment paper on a rimmed baking sheet or in the tart pan.
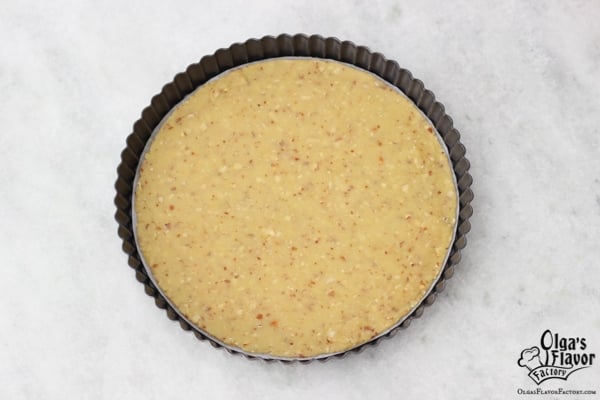 Bake in the preheated 375 degrees Fahrenheit oven for 12-15 minutes, until lightly golden brown. I bake 2 layers at the same time.
 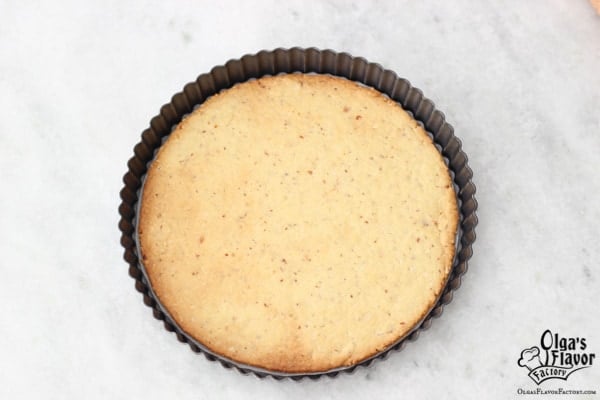 Repeat with all 5 cake layers.
Cool the cake layers completely. The cake layers are very fragile, so they will break easily. Take special care when taking them off the baking sheet and when assembling the cake.
Frosting:
To make the frosting, combine the softened cream cheese with the powdered sugar and vanilla extract using a hand held mixer or a standing mixer fitted with a whisk attachment until completely smooth. When you taste it, it should taste a little bit more sweet than you want for the cake. The more sugar you add, the stiffer the cream cheese frosting will be. 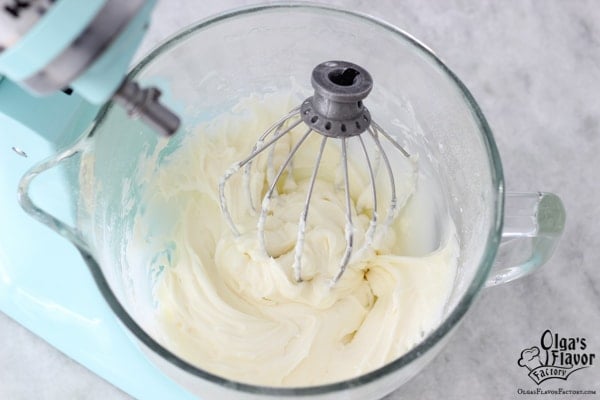 Set aside ⅓ - ½ of the cream cheese mixture. You will use that later to pipe around the edges of the cake. Place this part of the cream cheese frosting in a piping bag and store it in the refrigerator while you are assembling the cake. (If you leave it in there too long, it will become too cold to pipe and you will need to warm it up a bit before piping on top of the cake.)
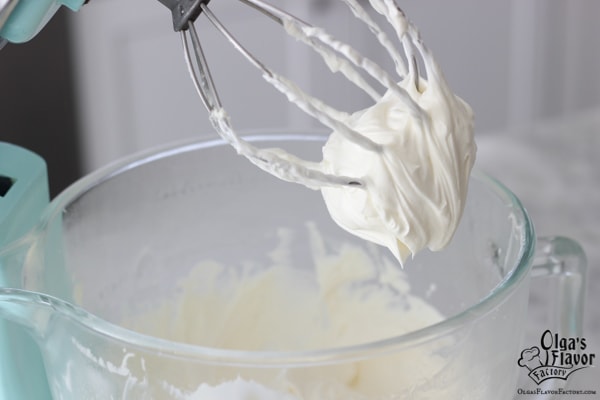
Add the chilled heavy cream to the remaining cream cheese mixture and whisk, starting on low and gradually increasing the speed until the frosting is thickened. (If you're nervous about this step, whip the cream separately and then fold it into the cream cheese.) 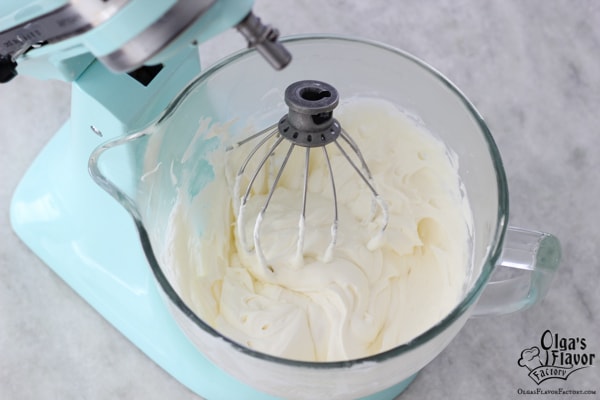
Assembling the Cake:
I like to line the edges of my serving plate with aluminum foil while I am frosting the cake, that way when I'm done decorating, I can just pull the aluminum foil out from under the cake and the edges of the plate are clean.
Put a small dollop of frosting in the center of the serving plate. This will hold the cake in place. Place a cake layer on top of it. Like I mentioned earlier, the cake layers are very fragile, so be as gentle as you can when handling them. If they break, it's not a big deal. Just put them together again like a puzzle and no one will ever know once the cake is all assembled. Spread ⅕ of the frosting over the cake layer, all the way to the edges.
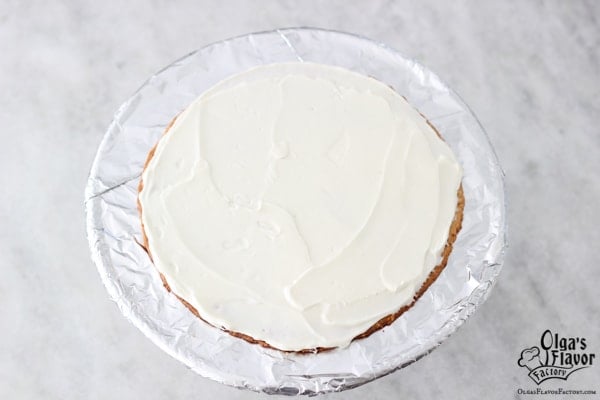 Scoop about ¾ cup of applesauce over top of the frosting and spread it out all the way to the edges too.
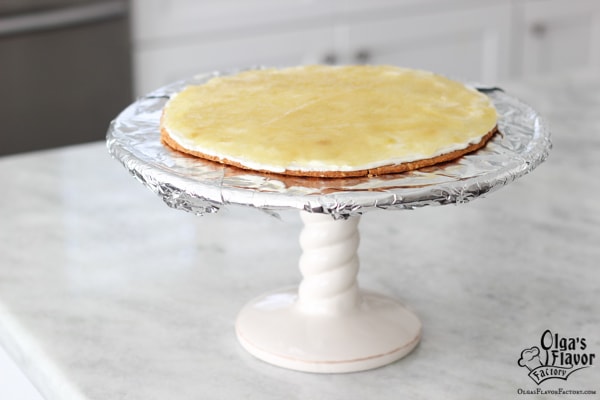 Continue assembling the cake, following the same order: cake layer, frosting, applesauce, cake layer, etc.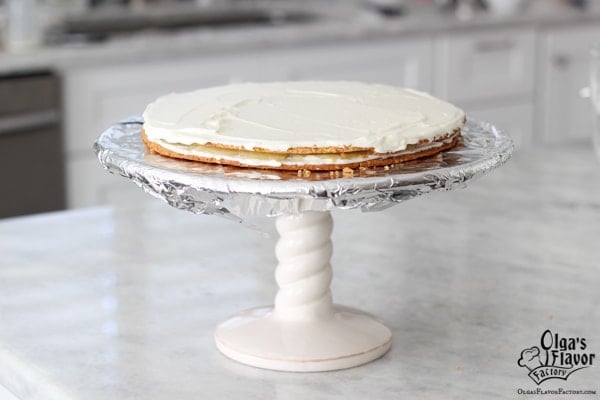
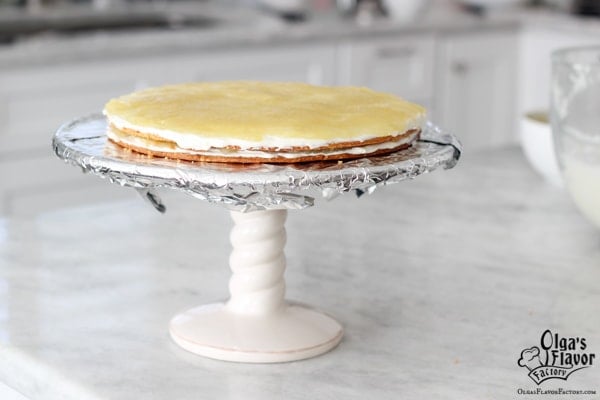 Frost the sides of the cake and the top of the cake, smoothing them out to make them level.
 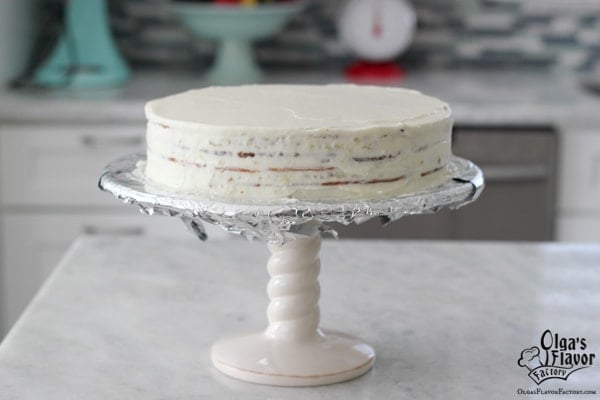 Press the remaining sliced almond on the sides of the cake. (You will probably need less than ¾ - 1 cup, but it's much easier to work with when you use more than you need.)
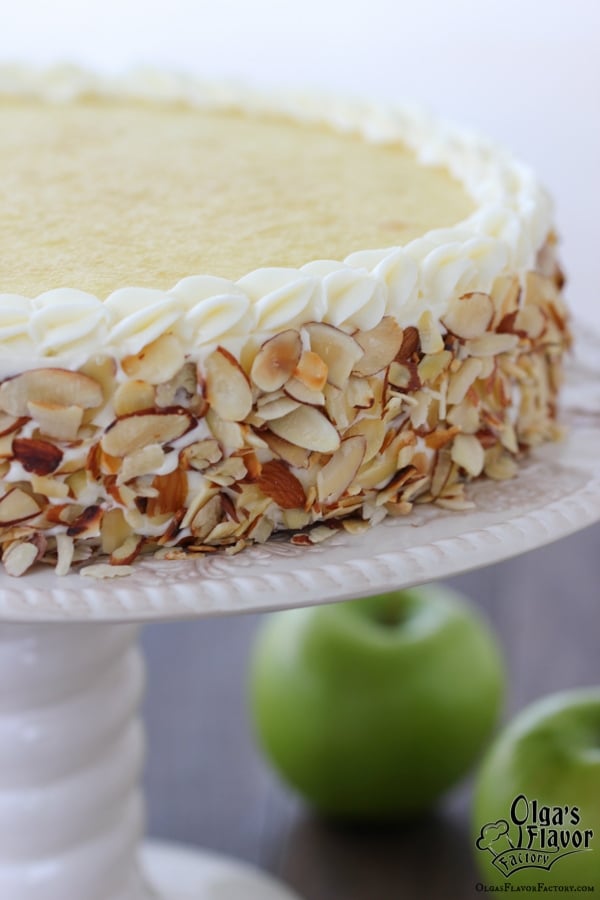
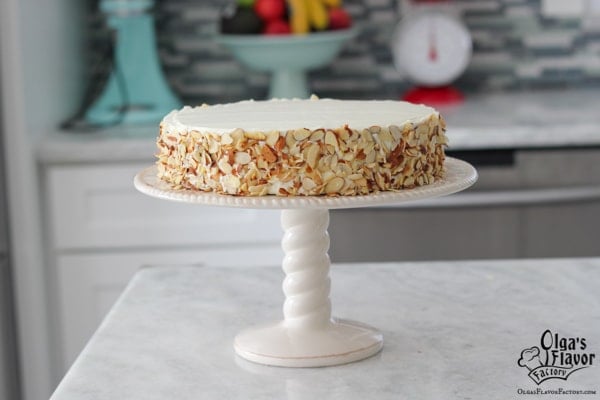 Spread out more applesauce on the very top of the cake, leaving a small border around the edge. Take the cream cheese frosting that you set aside earlier and pipe any kind of design that you like around the very edges of the cake.
  Allow the cake to stand in the refrigerator for at least 2 hours, preferably overnight.
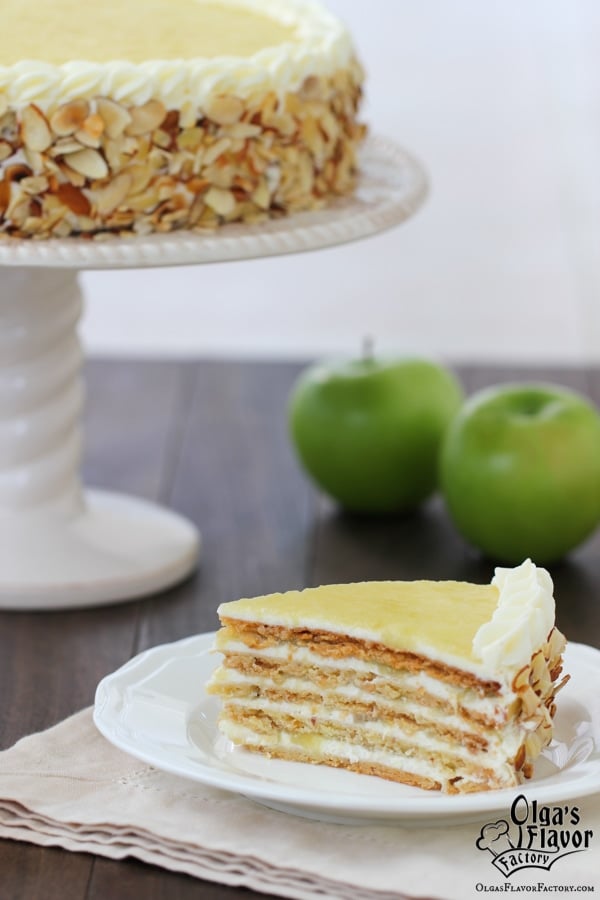
Apple Almond Cake
Ingredients
Cake Layers:
- 2 ⅓ cups all purpose flour
- 1 ¼ cups 2 ½ sticks butter, cold
- ½ cup sugar
- 5 large egg yolks
- 1 ½ - 2 cups sliced almonds toasted, divided
Applesauce:
- 2 ½ lbs apples preferably Granny Smith apples
- ⅓ cup granulated sugar more or less, depending on taste
- ¼ cup water
- 1-2 teaspoons lemon juice
- ½ teaspoon vanilla extract
Frosting:
- 2 packages 8 oz each cream cheese, softened
- 2 cups powdered sugar or to taste
- 1 teaspoon vanilla extract
- 2 ¼ cups heavy cream chilled
Instructions
Cake Dough:
- Place the flour and sugar into a large bowl and grate the cold butter into the flour, mixing with your hands every so often to coat the grated butter. You can also do this in a food processor. (Cut the butter into 1 inch pieces, and pulse in the food processor with the flour until you have a sandy texture. Keep adding all the ingredients until the cake dough is complete.)
- Add the egg yolks and mix to combine.
- Crush about ¾ - 1 cup of the toasted sliced almonds in a food processor or using a rolling pin. Add the nuts to the cake dough. Set the remaining ¾ - 1 cup sliced almonds aside to be used later to coat the sides of the cake. The amount of almonds depends on how much nuts you want to have in the cake. You can use even less nuts if you don't want them to have a prominent role in the cake. You can also use other nuts instead. Mix to combine. The cake dough will look a lot like cookie dough.
- Shape the cake dough into a disc, wrap it in aluminum foil or parchment paper and place it in the refrigerator to chill for about 30 minutes.
Applesauce:
- Meanwhile, make the applesauce. Peel the apples and cut them into quarters. Place the apples along with the sugar, water and lemon juice into a medium saucepan.
- Cover, bring it to a boil, reduce the heat to a simmer and cook for 15-20 minutes until the apples are soft and tender. At this point, most of the water will be absorbed by the apples. If there is a very small amount of water left, that is just fine. If there is a lot of water, uncover the saucepan, increase the heat and let the apples cook for a little while longer, so that most of the water will evaporate.
- Take the apples off the heat, add the vanilla extract and mash the apples with a potato masher, or use a food processor or immersion blender. The apples should be soft enough that you can easily do this with a potato masher. Cool the applesauce completely. (If you want to use store bought applesauce, it will have more of a brown color, not a sunny yellow like this one. Also, I would recommend using the one that has a very minimal amount of added sugar, but that's completely up to you.)
Making the Cake Layers:
- Preheat the oven to 375 degrees Fahrenheit.
- When the cake dough has chilled for 30 minutes, divide it into 5 even portions. Roll out each portion of dough into a 9 ½ inch circle. Roll out the cake dough in between two sheets of parchment paper. This way, you won't have to use any extra flour, it's much easier to work with and you can bake it on the same parchment paper.
- This is how I do it. Roll it out into a rough 9 ½ inch circle. Place a 9 ½ inch plate or the bottom of a tart pan on top of the rolled out cake layer and cut off all the protruding scraps of dough. Take the leftover scraps and use them to patch up any gaps around the sides or gently distribute the extra cake dough evenly over the rolled out circle. You should use all of it. Use scissors to cut around the parchment paper and place the cake layer with the parchment paper on a rimmed baking sheet or in the tart pan.
- Bake in the preheated 375 degrees Fahrenheit oven for 12-15 minutes, until lightly golden brown. Repeat with all 5 cake layers. I bake 2 layers at the same time.
- Cool the cake layers completely. The cake layers are very fragile, so they will break easily. Take special care when taking them off the baking sheet and when assembling the cake.
Frosting:
- To make the frosting, combine the softened cream cheese with the powdered sugar and vanilla extract using a hand held mixer or a standing mixer fitted with a whisk attachment until completely smooth. When you taste it, it should taste a little bit more sweet than you want for the cake. The more sugar you add, the stiffer the cream cheese frosting will be.
- Set aside ⅓ - ½ of the cream cheese mixture. You will use that later to pipe around the edges of the cake. Place this part of the cream cheese frosting in a piping bag and store it in the refrigerator while you are assembling the cake. (If you leave it in there too long, it will become too cold to pipe and you will need to warm it up a bit before piping on top of the cake.)
- Add the chilled heavy cream to the remaining cream cheese mixture and whisk, starting on low and gradually increasing the speed until the frosting is thickened. (If you're nervous about this step, whip the cream separately and then fold it into the cream cheese.)
Assembling the Cake:
- I like to line the edges of my serving plate with aluminum foil while I am frosting the cake, that way when I'm done decorating, I can just pull the aluminum foil out from under the cake and the edges of the plate are clean.
- Put a small dollop of frosting in the center of the serving plate. This will hold the cake in place. Place a cake layer on top of it. Like I mentioned earlier, the cake layers are very fragile, so be as gentle as you can when handling them. If they break, it's not a big deal. Just put them together again like a puzzle and no one will ever know once the cake is all assembled. Spread ⅕ of the frosting over the cake layer, all the way to the edges.
- Scoop about ¾ cup of applesauce over top of the frosting and spread it out all the way to the edges too.
- Continue assembling the cake, following the same order: cake layer, frosting, applesauce, cake layer, etc. Frost the sides of the cake and the top of the cake, smoothing them out to make them level. Press the remaining sliced almond on the sides of the cake. (You will probably need less than ¾ - 1 cup, but it's much easier to work with when you use more than you need.)
- Spread out more applesauce on the very top of the cake, leaving a small border around the edge. Take the cream cheese frosting that you set aside earlier and pipe any kind of design that you like around the very edges of the cake. Allow the cake to stand in the refrigerator for at least 2 hours, preferably overnight.

I wanted to make something special for my mom’s birthday. I make cakes a lot so wanted something that was different. This cake was perfect! Very unique, not too sweet and so delicious! Thanks so much for sharing. Every cake I’ve made from your website has been delicious ❤️
Thank you so much for taking the time to write, Jenny. I am so happy you enjoyed this cake. Happy birthday to your mom - I think it's so thoughtful of you to make her a cake:).
Hello olga,
May i ask for tips into cutting the cake into such a perfect slice? Kz i can feel how it will be hard to cut because of the softness of the cream cheese n the applesauce.
2.i also had in mind that maybe i can try these into small verrines like french desserts often call for. Dya think it will work?
Hi Chamila,
I used a really sharp knife and wiped the blade after each cut.
I have not tried making it into anything other than a cake, so I don't know if it will work out.
Thank you. Ill try the verrines soon and shall let u know how they turn out in individual portions in glasses.
My mouth is watering so bad just from reading the instructions! I cannot wait to make this!
Not that I know of. It's a modern creation of many typical Russian cake components - shortbread cake layers, a frosting that we typically make (especially Russians who live in America). Many Russian cakes contain multiple thin cake layers.
If you want a cake that has a very classic Russian history, I would suggest Medovik, Spartak, Kiev Cake,Royal Cake, Fluffy Honey Layer Cake, Smetannik, or Lady Fingers Cake.
Very Beautiful Cake! I want to make for thanksgiving day, for Thursday. What can I do in advance? Like can I do tomorrow cake layers and apple sauce and Wednesday to assemble ? Thank you!!!!
You sure can, Ana. That would be perfect.
Hi Olga: This looks great, I'll have to try it. Thanks for sharing it.
I hope you enjoy it, Pelusa.
As soon as I got your cake recipe in the email, I had to make it the next day. The ingredients sounded so good together. The cake was Delicious!!! Unique in taste. I think it tastes best cold, right out of the fridge because of the applesauce. My cake layers also broke into several pieces but the cream covered that up:) With my last two layers, I figure sliding the layers off of the parchment paper onto the cake worked best. Thanks so much Olga! God Bless and Happy Thanksgiving!
That's awesome, Tanya. I'm so glad to hear that you enjoyed the cake. That's a great tip to slide the cake layers from the parchment paper to the cake. Brilliant.
Wow, such a beautiful cake! I will try to make it for the holidays. thank you!
That's great, Lena. I hope you enjoy it.
Hi Olga. I am baking this cake as I write. For some reason my layers turn out thinner then one half inch as the recipe suggests... I took the first layer out of the oven and I I'm a little nervous... Being as careful as I can be, I took the parchment off the baking sheet with the cake still on.... It cracked like in five places.... Any suggestions?
I love you recipes by the way!
Olga, how I understand it's have to be 5 layers in 9 and 1/2 inches diameter not 1/2 inches thickness
Yes, that is correct.
I didn't write anywhere in the recipe that the cake layers are supposed to be 1/2 inch thickness, Olga. Each cake layer is supposed to be rolled out into a 9 1/2 inch circle, meaning diameter, not thickness. The layers are very thin and fragile. If the layers break, just piece them back together again. The cake will be just fine. The frosting will hold it all together.
Ok! For some reason I read 9 inch 1/2 inch thickness.... Ooops.
I did put it together like a puzzle. Lol
Very excited to try it tomorrow after it spends the night in the fridge. I have never made a cake with applesauce before. Thank you for the recipe!
Olga,
This is such a beautiful cake! I look forward to trying it. 🙂 Being the grammatical perfectionist that I am, I noticed a couple of typos in your step by step recipe, and I hope you won't mind if I point them out? 1. In the Introduction: "Any dessert that has apples in YOU..." (should say in IT).
2. In the "Cake Dough" I believe the 2nd paragraph, it says "You can also do this in a food processor. (Cut the FLOUR into 1 inch pieces...)." (should say butter). 🙂
One question - after the cake stands in the refrigerator for a little while, do the layers become a little bit soft from the moisture? I would assume so, but just want to make sure I know what I should be looking for.
Thank you for pointing that out, Luba.
Yes, the cake layers do get much softer after standing in the refrigerator. I mentioned that in the introduction.
Beautiful piece of culinary art!
Thank you, Valya.
Thank you! I was just looking for an interesting recipe. 🙂
I hope you enjoy it, Tatyana.
Hi Olga, this cake looks amazing! I think I may make this for my dad's upcoming birthday! Question, is there a reason why you added the nuts to the dough once it was already in a "dough" form vs. adding it to the flour before adding eggs? I'm afraid that there is a higher chance of over mixing the dough if nuts are added after. Thanks!
The only reason I added them last was because my nuts were still a bit warm from toasting them and if I added them at the same time with the flour and butter, they would have melted the butter:). You can add them right away, Olga.
Beautiful cake! Olga, what decorating tips set would you recommend?
I like the Wilton extra large ones, Tanya. Those are great for cakes and cupcakes too.
Olga, you are quite the artist! This looks perfect and absolutely delicious. I know what I will be making for thanksgiving this year. 🙂
Thank you, Tania.