
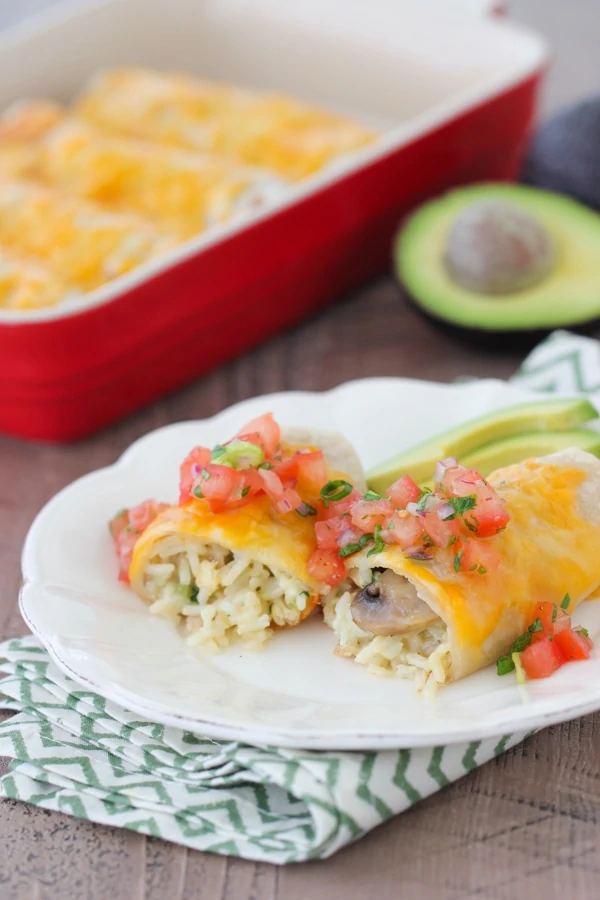
Baked Burritos filled with a creamy chicken, rice and mushroom filling absolutely incredible. The edges crisp up as they bake and are cheesy, comforting and taste so healthy and filling. Serve them with avocado and tomato salsa or pico de gallo, to make this even more delicious.
Sometimes, you accidentally create a recipe that is such a winner with your family, you can't believe it yourself. I wasn't expecting anything spectacular when I put together the ingredients for this dish, since I was only thinking that this would be a great staple to put into my meal rotation. This was more a practical recipe creation than a creative lighting bolt moment. When I took it out of the oven and took the first bite, I was so excited at the flavors and textures that greeted my mouth, but I was even more thrilled when I saw my family's reaction when I served it to them. Needless to say, I hope you guys enjoy these Chicken, Rice and Mushroom Burritos as much as we did:).
Chicken and rice are such common leftovers at my house and I figured that incorporating them into a completely different meal would be a cool way to give them new life. Adding lots of extra flavor with simple pantry ingredients was exactly the way to go, so I used onion, celery, garlic and fresh mushrooms. If you don't like mushrooms, you can easily skip them.
You know what's even better about these Burritos? You can make them ahead of time and even freeze them. I know, it just keeps getting better and better! The burritos bake up with a lovely cheesy topping, but still have some crisp edges all around. The filling is so creamy and flavorful and completely versatile. You can add all kinds of other ingredients depending on what you have in your house or what you're craving on the day that you're making them - bell pepper, corn, beans, tomatoes, olives, broccoli - the possibilities are endless. Instead of the chicken, you can use shredded pork, shredded beef or even ground meat. I served these burritos with Pico de Gallo, sliced avocados and sour cream.
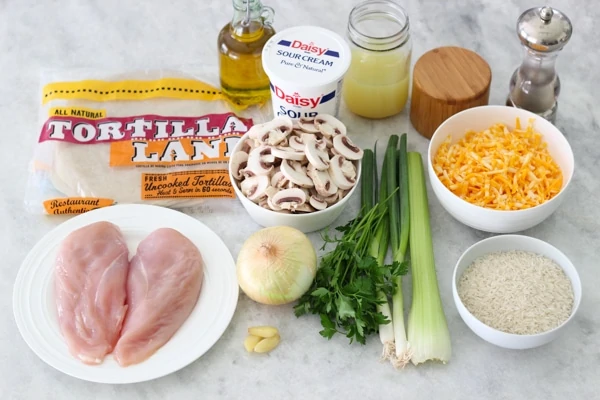
Ingredients:
1 cup uncooked long grain white rice (or about 3 cups cooked rice)
2 boneless, skinless chicken breast halves (or 3 ½ - 4 cups cooked, shredded chicken)
salt, ground black pepper, to taste
2 Tablespoons oil, plus additional oil for brushing the burritos
8 oz fresh mushrooms, sliced
1 large onion, chopped
1 celery stalk, finely chopped
3 garlic cloves, minced
12 oz grated cheese, divided (I used Colby Jack, but you can use Cheddar, Monterey Jack, Havarti, etc.) ½ cup sour cream
1 cup chicken or vegetable broth
1 Tablespoon each, fresh minced parsley and green onions 12 medium or large tortillas
Chicken and Rice Burritos Recipe
- Preheat the oven to 375 degrees Fahrenheit.
I started this recipe with all fresh ingredients, just so you wouldn't have to wait for leftovers to make this meal. You can certainly make it with leftover rice and leftover cooked meat. You can even pick up a rotisserie chicken at your local grocery store. It will make the recipe even faster to make.
Cook the rice. You can either use the package instructions, or use my recipe. (You can even use brown rice, if you'd like, and I have a recipe for that too.)
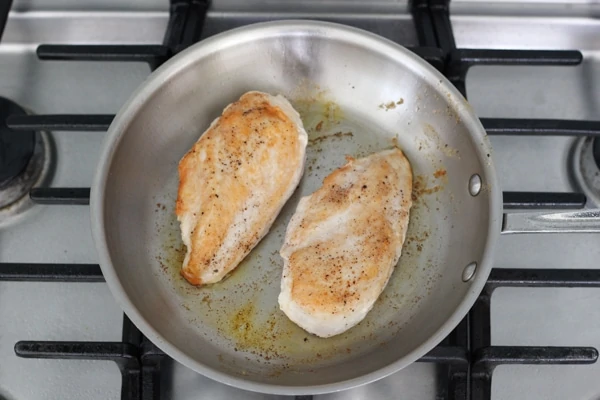
While the rice is cooking, season the chicken on both sides with salt and ground black pepper. In a large skillet, heat 1 Tablespoon of oil until shimmering, add the chicken and cook until the chicken is golden on both sides and cooked through all the way, about 4-6 minutes per side on medium high heat. (You can also use chicken thighs instead of chicken breast.)
Also, I have to mention that since I was using raw tortillas, I cooked them for about 30 seconds per side before assembling the burritos. If you're using cooked tortillas, you don't have to do this step. Set the chicken aside. When it's cool enough to handle, shred it into bite sized pieces. You can use a knife, fork or your fingers. In the same skillet, add the remaining Tablespoon of oil and heat it up until hot. Add the sliced mushrooms, season with salt and pepper and cook on medium high heat until the mushrooms are starting to get golden, about 5-7 minutes. At first the mushrooms will exude a lot of liquid, but eventually the liquid will cook off. Use a wooden spoon to scrape the bottom of the skillet to get all the brown bits off the skillet that were left behind from the chicken; it will add extra flavor to the filling. Add the onion, celery and garlic to the mushrooms in the skillet, seasoning with salt and pepper. Cook on medium low heat until the vegetables are soft and starting to turn lightly golden. In a large bowl, place the cooked rice, shredded cooked chicken, the mushroom and vegetable mixture, 8 oz of grated cheese (reserving the remaining cheese to use on top of the burritos), sour cream, chicken broth, parsley and green onion. If you didn't season the rice when you were cooking it, you may need to add some salt to the filling. I seasoned everything while I was cooking it, so I didn't need to add any extra salt. I did add some ground black pepper to it though. Mix to combine. Place about ½ cup of filling into the center of each tortilla, but more towards the bottom of the tortilla. (I flipped mine after taking this picture, but forgot to retake the photo.) Tuck both sides of the tortillas over the filling. With the sides folded in, use your thumb to bring the bottom of the tortilla over the filling and then roll it tightly until you have a neat burrito. Place the rolled burritos into an oiled, rimmed and oven safe baking dish. Since it's only my husband, myself and our toddler for dinner, I usually only bake 5 of them and freeze the rest. Brush the burritos with oil (or butter) all over the top and sides and then top with the remaining grated cheese. You can use more or less cheese, depending on how you like it. Bake in the preheated oven for 30 minutes or so. All the ingredients are cooked through, so all you want is for everything to heat through and the cheese to melt and turn golden. If you make the burritos in advance and they are cold, it will take a little bit longer to cook.
Serving the Burritos and How to Store and Freeze
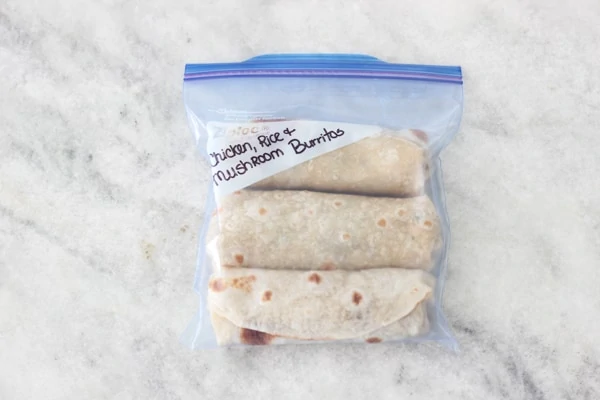
There are so many possibilities of what to serve with the burritos: sour cream, extra cheese, Pico de Gallo, avocado, shredded lettuce, or even make a salad with lettuce, tomatoes, cucumbers and avocado. To freeze this meal, just place the burritos, already topped with cheese, into a freezer safe baking dish, just like the one I used in the photo above, or you can use a disposable aluminum baking pan and wrap it really well (in several layers) before freezing it. You can also keep the cheese off the burritos and just add the cheese later when you're baking the burritos. Another way of freezing these burritos is to place them in a freezer safe ziplock bag. When you are ready to serve it, just transfer it to a baking sheet, brush with oil and top with cheese before baking. You can thaw the burritos in advance or place them straight into the freezer. (If you're using a glass baking dish, I would recommend bringing it to room temperature first, since the sudden temperature change may cause the glass to shatter.) Of course, it will take longer than 30 minutes to bake the burritos then if you're asking them right after assembling them.
PrintChicken, Mushroom and Rice Baked Burritos

Baked Burritos filled with a creamy chicken, rice and mushroom filling absolutely incredible. The edges crisp up as they bake and are cheesy, comforting and taste so healthy and filling. Serve them with avocado and tomato salsa or pico de gallo, to make this even more delicious.
- Prep Time: 45 mins
- Cook Time: 50 mins
- Total Time: 1 hour 35 mins
- Yield: 12 burritos 1x
- Category: Entree
Ingredients
- 1 cup uncooked long grain white rice (or about 3 cups cooked rice)
- 2 boneless, skinless chicken breast halves (or 3 ½ - 4 cups cooked, shredded chicken)
- salt, ground black pepper, to taste
- 2 Tablespoons oil, plus additional oil for brushing the burritos
- 8 oz mushrooms, sliced
- 1 large onion, chopped
- 1 celery stalk, finely chopped
- 3 garlic cloves, minced
- 12 oz grated cheese, divided (I used Colby Jack, but you can use Cheddar, Monterey Jack, Havarti, etc.)
- ½ cup sour cream
- 1 cup chicken or vegetable broth
- 1 Tablespoon each, fresh minced parsley and green onions
- 12 medium or large tortillas
Instructions
- Preheat the oven to 375 degrees Fahrenheit.
- Cook the rice. You can either use the package instructions or use my recipe. (You can even use brown rice if you'd like, and I have a recipe for that too.)
- While the rice is cooking, season the chicken on both sides with salt and ground black pepper. In a large skillet, heat 1 Tablespoon of oil until shimmering, add the chicken and cook until the chicken is golden on both sides and cooked through all the way, about 4 minutes per side on medium-high heat.
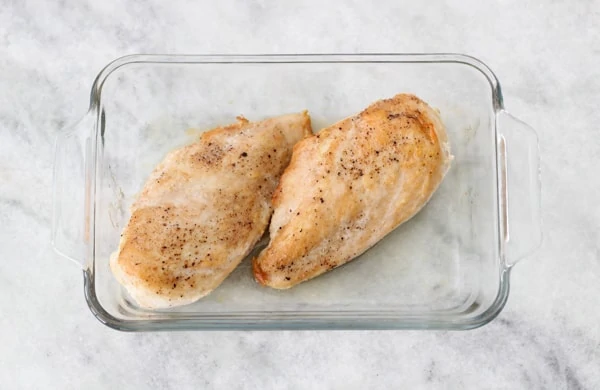
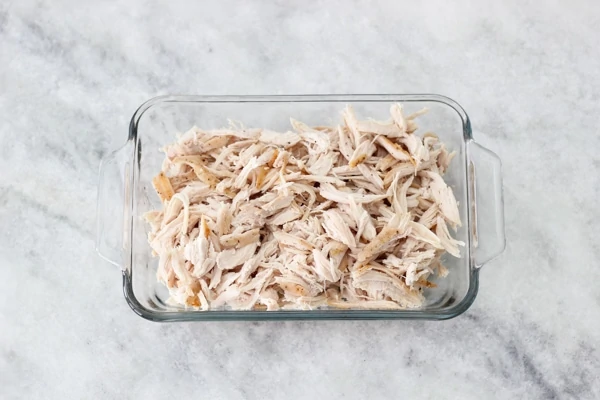
- Set the chicken aside. When it's cool enough to handle, shred it into bite-sized pieces. You can use a knife, fork or your fingers.
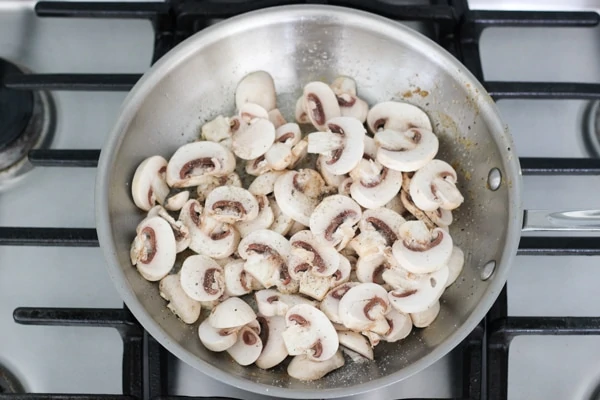
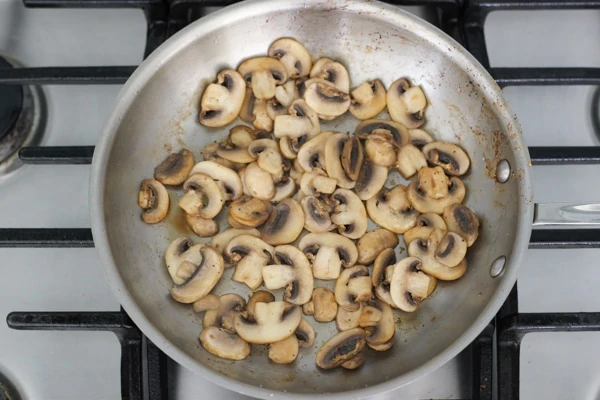
- In the same skillet, add the remaining Tablespoon of oil and heat it up until hot. Add the sliced mushrooms, season with salt and pepper and cook on medium-high heat until the mushrooms are starting to get golden, about 5-7 minutes. At first the mushrooms will exude a lot of liquid, but eventually, the liquid will cook off. Use a wooden spoon to scrape the bottom of the skillet to get all the brown bits off the skillet that were left behind from the chicken; it will add extra flavor to the filling.
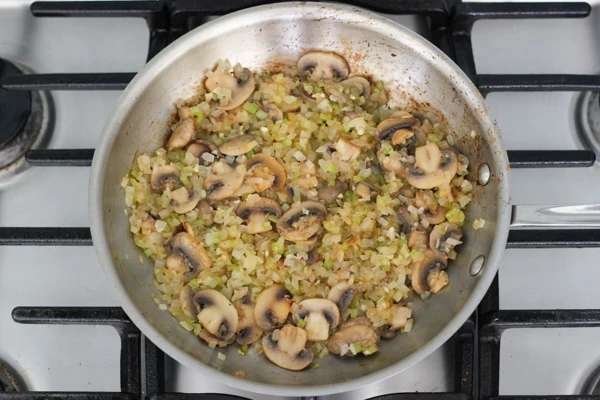
- Add the onion, celery, and garlic to the mushrooms in the skillet, seasoning with salt and pepper. Cook on medium-low heat until the vegetables are soft and starting to turn lightly golden.
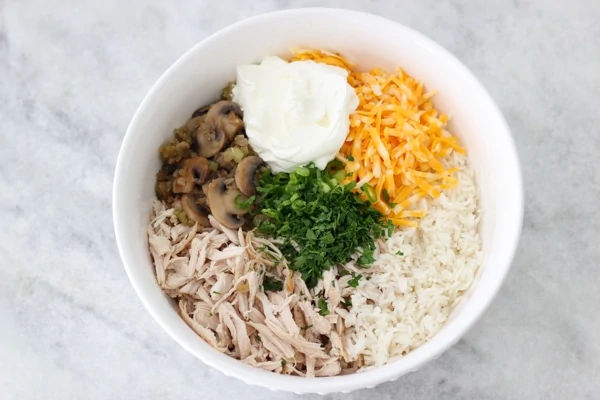
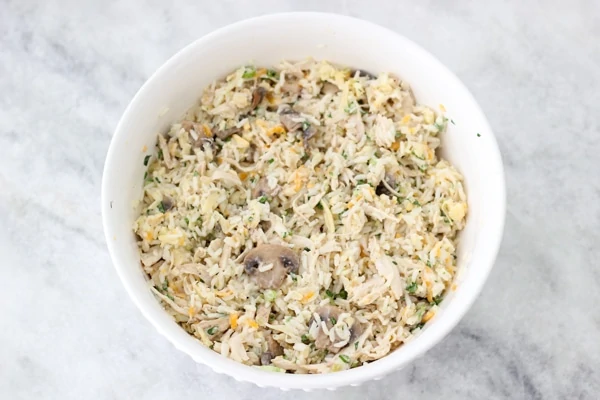
- In a large bowl, place the cooked rice, shredded cooked chicken, the mushroom and vegetable mixture, 8 oz of grated cheese (reserving the remaining cheese to use on top of the burritos), sour cream, chicken broth, parsley and green onion. If you didn't season the rice when you were cooking it, you may need to add some salt to the filling. I seasoned everything while I was cooking it, so I didn't need to add any extra salt. I did add some ground black pepper to it though. Mix to combine.
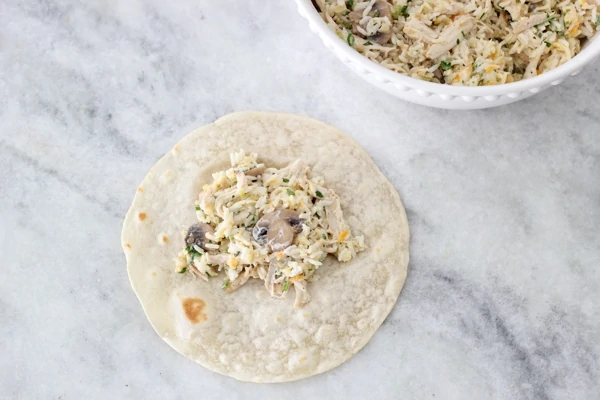
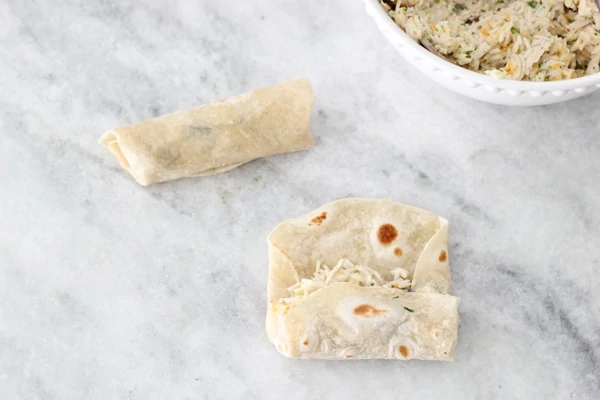
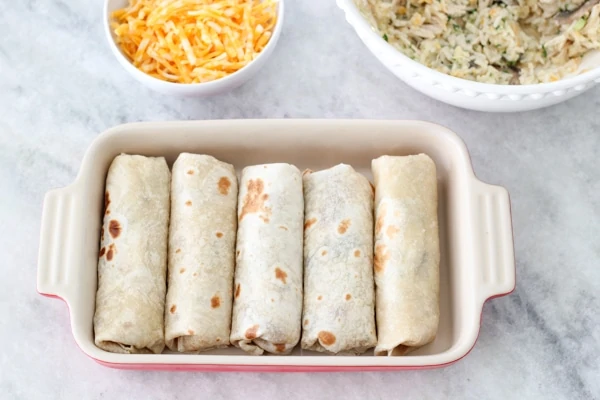
- Place about ½ cup of filling into the center of each tortilla, but more towards the bottom of the tortilla. Tuck both sides of the tortillas over the filling. With the sides folded in, use your thumb to bring the bottom of the tortilla over the filling and then roll it tightly until you have a neat burrito. Place the rolled burritos into an oiled, rimmed oven safe baking dish.
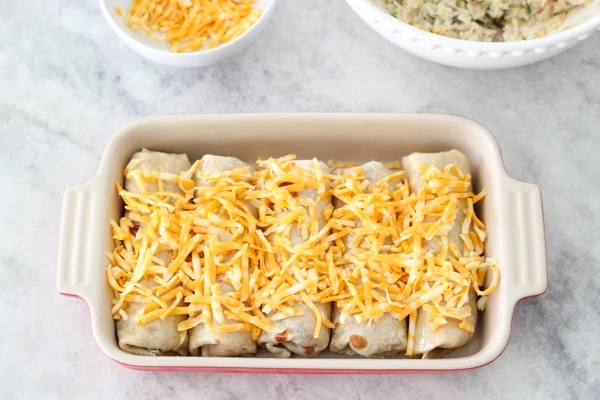
- Brush the burritos with oil all over the top and sides and then top with the remaining grated cheese. You can use more or less cheese, depending on how you like it.
- Bake in the preheated oven (375 degrees Fahrenheit) for 30 minutes or so. All the ingredients are cooked through, so all you want is for everything to heat through and the cheese to melt and turn golden. If you make the burritos in advance and they are cold, it will take a little bit longer to cook.
- There are so many possibilities of what to serve with the burritos: sour cream, extra cheese, pico de gallo, avocado, shredded lettuce, or even make a salad with lettuce, tomatoes, cucumbers and avocado.
This recipe was originally published on June 21, 2016. I added a video but the recipe is the same.


My kids love these and they make a great school/work lunch!
Made this dish for my Saturday evening treat. Now just cooking for one since my husband died so I froze a bunch of two tacos per bag. Absolutely outstanding. Did not change a thing. Lots of love from Texas!
Thank you so much for taking the time to write, Georgi. So happy you enjoyed these burritos.
Tried this for dinner and it was wonderful! My husband loved it and said it was one of his favorite meals. I had a lot of Kirkland brand canned chicken that I didn't know what to do with and used it for this recipe 🙂 Super duper easy and quick.
I'm so glad you enjoyed the Burritos, Alina. Thank you for taking the time to write.
I love this receipe. I just made it again, this time double batch. My freezer is full of burritos.
Thank you! 🙂
I'm so happy you enjoyed this recipe, Suzana:).
Hi OLGA, for how long can they be frozen for?
Love these burritos. I find that it is rather time consuming to make them, but it’s very much worth it. Both times I made them I intended my family to eat some and save some for later by freezing them, but there was nothing left to freeze because all the burritos were gone in no time! Thanks for sharing this recipe with us!
I'm so happy to hear that you and your family enjoyed these burritos, Natalia:).
I just made these for dinner tonight, exactly as written. These were sooo good! Topped with sour cream, yum 🙂 I recommend cooking and shredding the chicken the night before if you have little kids, so you can save some time 🙂 will be making again soon! Thanks Olga for this recipe
I'm so glad you enjoyed the Burritos, Angela!
I definitely agree about cooking the chicken (and even rice) in advance, which makes assembly so much easier. I like to do meal prep while my son is napping or after his bedtime and it makes dinnertimes so much easier when he is awake and I don't have as much time.
Mmmmm wow olya gurl omg have not had really way good Mexican in ages gotta make a Mexican buffet night in mu house another gr8 way to use up leftover chicken can't wait 2 try luv have an awesome super hot blessed day and week ahead cheers
A Mexican buffet night sounds like a lot of fun, Tzivia. I love that idea:). I hope you enjoy these Burritos.
Ya it's a gr8 way for everyone to make their own little meals oh I intend to enjoy these burritos mmmmm my mouth is totally watering right now
Hello Olga
How did you cooked the burritos? You mention for 30sec in macrowave? Or in the oven ?
Thank you
As I mentioned in the recipe, Veronica, the tortillas that I used were raw, so they needed to be cooked before making the burritos. I used the skillet for 30 seconds on each side. However, if you are using regular tortillas, you don't have to do this step.
This looks like something my family will enjoy! Thank you for posting 🙂
P.S. We just came back from Tampa Bay...beautiful city you get to live in!
I hope you enjoyed your visit to Tampa Bay, Lyuba. We love it here:).
These look SO good. Will attempt to make them tonight. Can you please tell me what temp to bake them at? I am not seeing it... thx!!
I hope you enjoy the Burritos, Galina.
The oven temperature is 375 degrees Fahrenheit.