
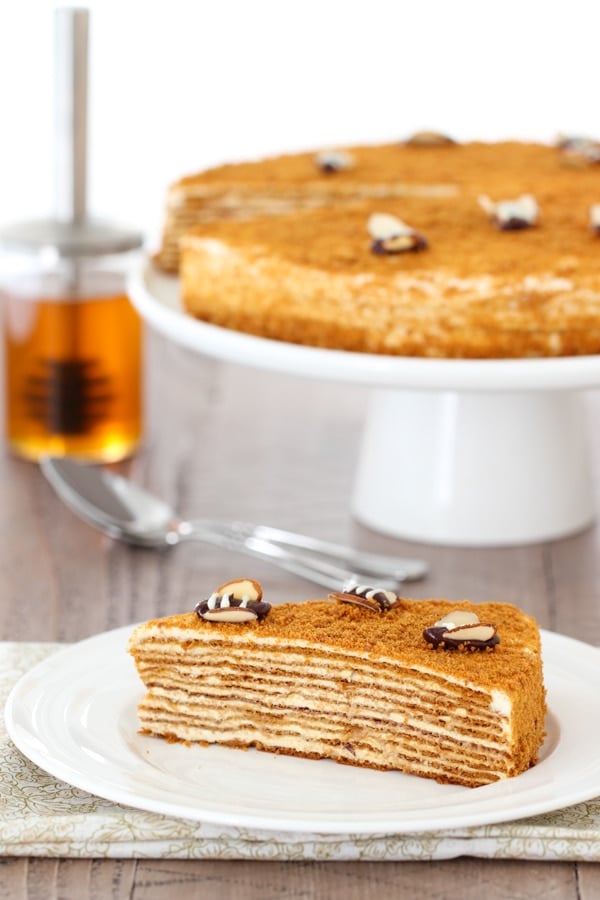
With multiple, thin honey layers and a tangy sour cream frosting, this cake is so tender it just melts in your mouth. It's a classic Russian recipe that has been loved for generations.
Medovik is, hands down, my favorite cake and is totally worth every ounce of effort that it takes to make it. My mom has been making this cake since before I was born. I loved watching her in the kitchen; I was always in awe of how she expertly made beautiful creations right before my very eyes. She made it looks so easy and effortless. As I watched her, it all seemed so magical and I couldn't wait until I made this cake myself.
I was probably about eleven or twelve when I felt confident enough to approach her and plead with her to let me have a try. Mom told me it was a really hard cake to make, really finicky and I wouldn't be able to do it. Well, she didn't forbid me from making it. The next time Mom wasn't home, I rolled up my sleeves and made this cake, from start to finish. When Mom came home, the Medovik was finished and standing proudly as if personifying my victory. (By the way, this is exactly the same thing that happened with Borsch and Napoleon Cake.) Ha ha! I was always a very determined girl:). Love you, Mom!
Instructions:
Making the Cake Layers:
Place the butter and sugar in a large nonstick pot.
If you don't have a nonstick pot, or your pot burns easily, you may wish to use a double boiler. (Just place a metal or glass bowl on top of a pot with about an inch or water in it and keep it simmering, but make sure the bottom on the bowl never touches the simmering water. Add more water if it evaporates.
Cook it just until the butter melts but is still barely warm, NOT HOT. Take it off the heat. Add the eggs, baking soda and honey and mix to combine.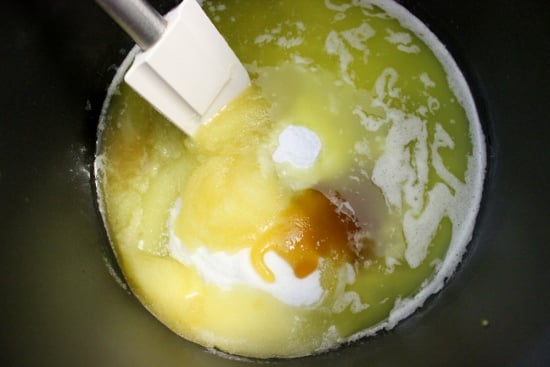
This is important, if you add the eggs to hot butter, it will scramble.
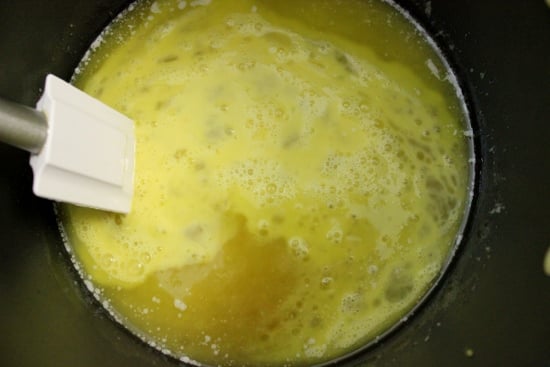
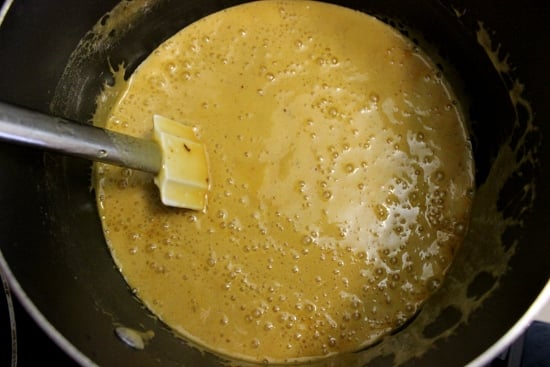
Cook the mixture on medium low heat for about 7 minutes, longer if you're using a double boiler. The batter will puff up and turn a deep caramel color. 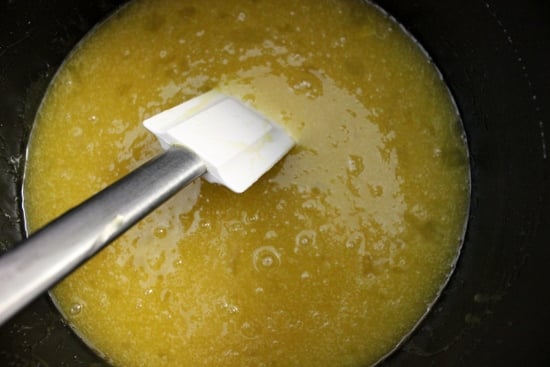
 Add the flour and mix quickly with a wooden spoon.
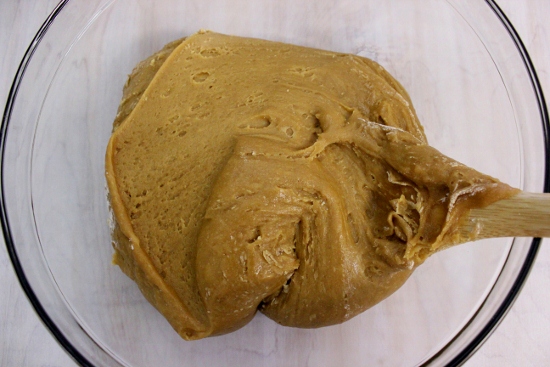
I always add less flour than I need and add more when I'm rolling out the cake layers. If you add too much flour, it will be really hard to roll out.
Preheat the oven to 350 degrees.
On a lightly floured surface, roll out the cake layers.
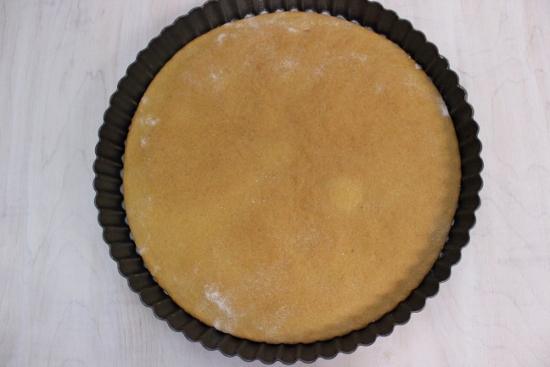
Take approximately ¼ cup of batter and knead it on your work surface. If it's sticking to your hands and the counter, add more flour. Roll it out thinly into somewhat of a circle. Use the bottom of a cake pan or the bottom of a tart pan to cut around it with a paring knife to make a perfect circle. 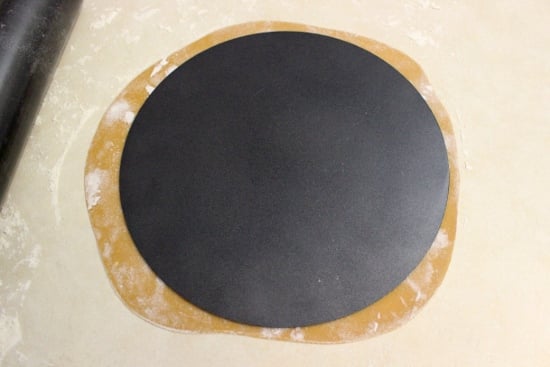
You can save all the scraps just the way you cut them and place them on a baking sheet and then bake. Later, you can crush them into crumbs and sprinkle the sides and top of the cake.
I usually just take the scraps and knead them into the batter as I roll out each new cake layer. It works great. 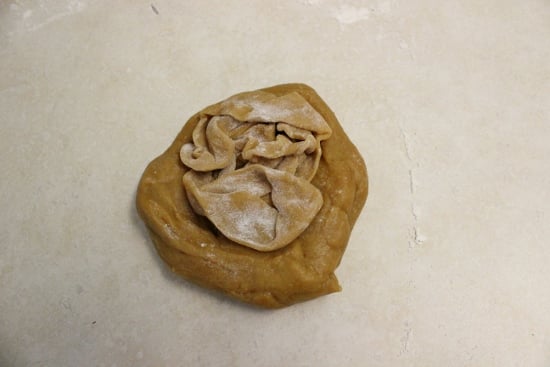 I use 2 (9 inch) round tart pans to bake the cake layers. If you don't have a tart pan, use a rimmed baking sheet, sprinkled with flour or lined with parchment paper.
Sprinkle the bottom of the tart pan with flour and bake the cake layers for about 4 minutes each. 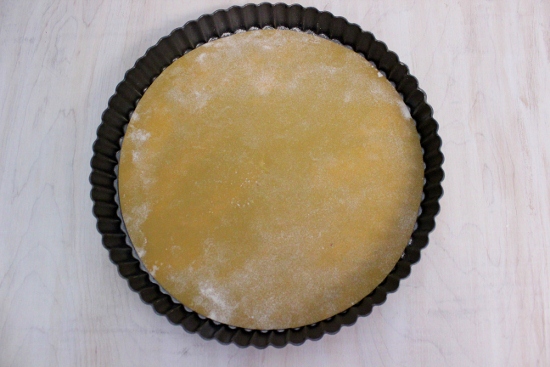
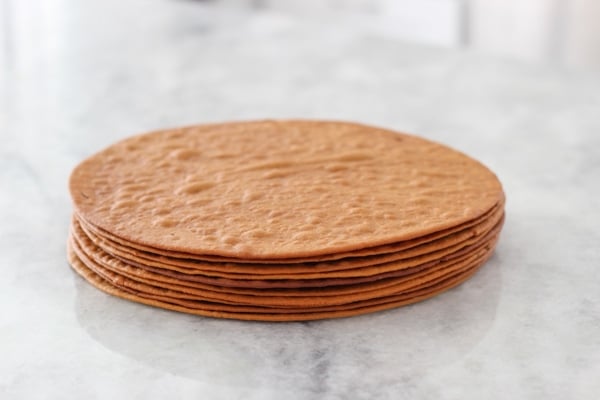
 Take them off the tart pan right away. As the cake layers cool, they will become pretty hard. Work quickly; you can roll out the cake layers and set them aside, waiting to be baked.
You want to roll them all out while the batter is still warm. As the batter cools, it becomes harder and harder to roll out.
You will end up with about 10-12 layers.
 Making the Frosting:
Cream the softened cream cheese and condensed milk in a standing mixer with a paddle attachment or using a hand mixer until it's well combined. 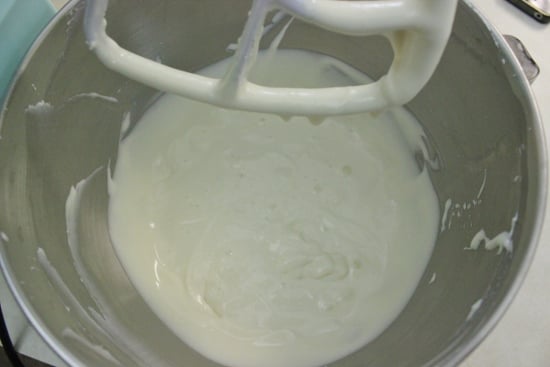 Add the sour cream and vanilla.
 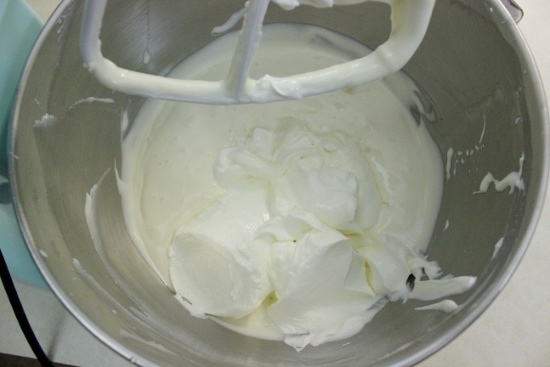 In another chilled bowl, whip the heavy cream with the powdered sugar. Gently fold it into the rest of the frosting.
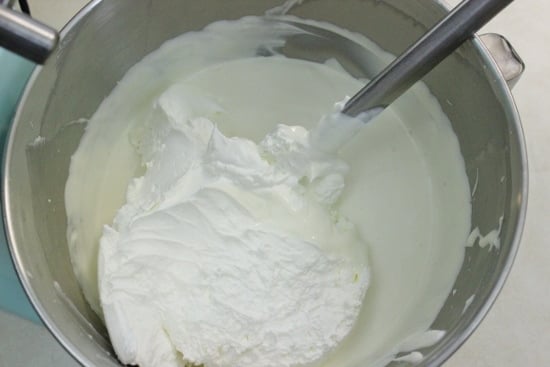

Assembling the Cake:
Dust off any excess flour from the cake layers.
Line your serving plate edges with aluminum foil. Place a dollop of frosting into the center of the plate, just to keep the cake from sliding around.
Top each cake layer with about ¼ cup of frosting and spread it around evenly. 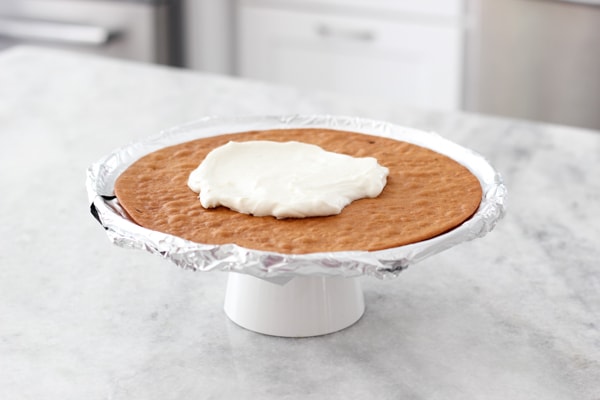
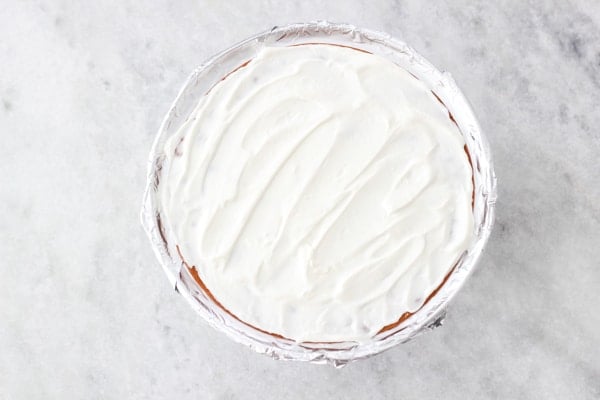 Repeat with all the cake layers. As you place the layers on top of each other, some of the frosting will ooze out of the sides.
  Spread it out evenly over the sides.
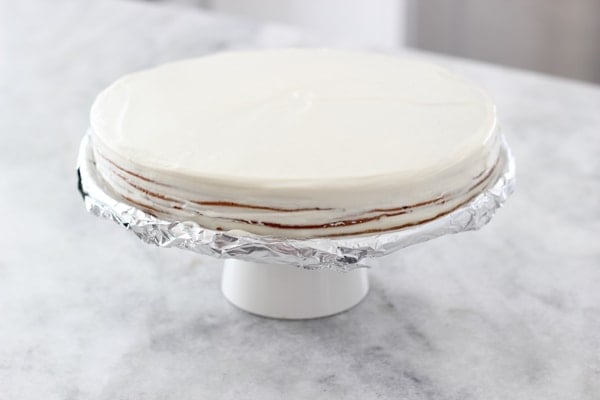
Gently remove the aluminum foil.
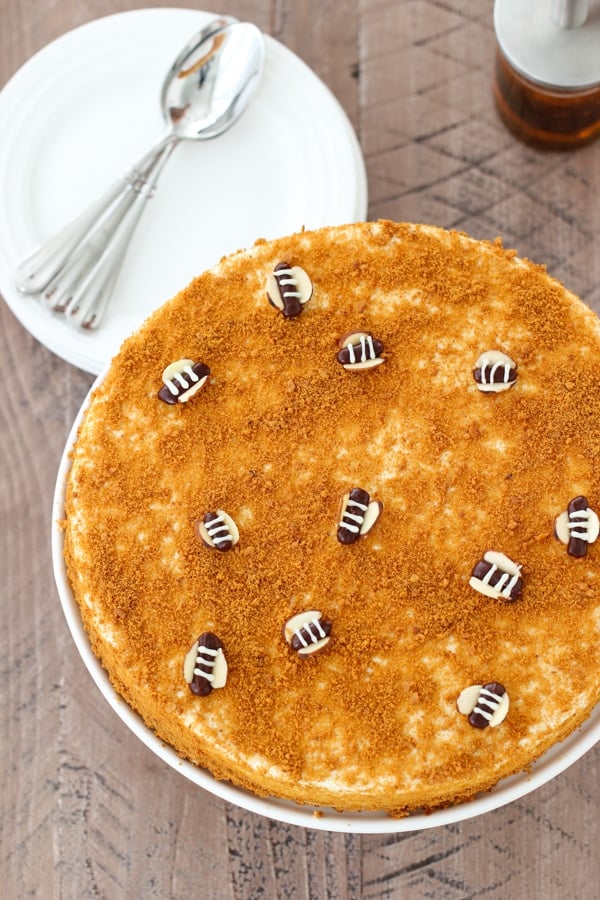
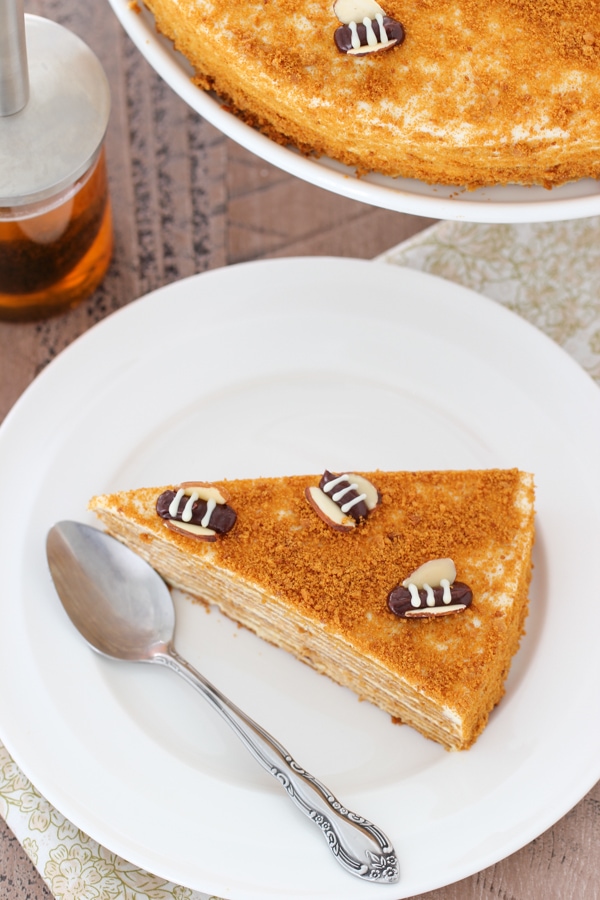
Decorate with crushed cake layer crumbs.
I also make little bees to decorate the cake. Here's the tutorial on how to make the bees.
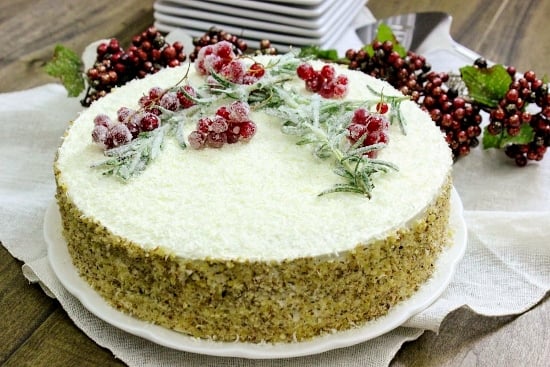
 During the winter, here's a really beautiful way to decorate the cake.
Heat 1 cup water and 1 cup sugar in a small saucepan just until the sugar dissolves. Pour it into a shallow dish. Place about ⅓ - ½ cup of sugar in another shallow dish. Dip the rosemary and the red currants in the sugar syrup and dip it in the sugar. 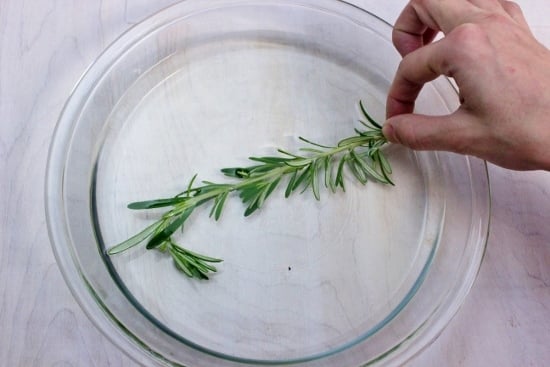
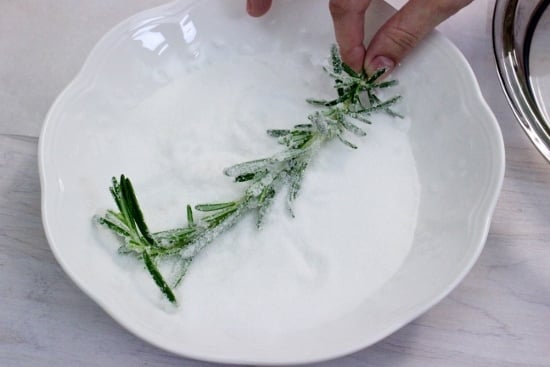
 Place on a parchment paper to dry and then place it on the cake. Now you have a beautiful winter masterpiece.
Medovik - Honey Layer Cake

With multiple, thin honey layers and a tangy sour cream frosting, this cake is so tender it just melts in your mouth. It's a classic Russian recipe that has been loved for generations.
- Prep Time: 120 minutes
- Cook Time: 60 minutes
- Total Time: 540 minutes
- Yield: 1 cake (9 inch round) 1x
- Category: Dessert
Ingredients
Cake:
- ½ cup butter
- ¾ cup sugar
- 2 eggs
- 2 teaspoons baking soda
- ¼ cup honey
- 3 ½ - 4 cups all purpose flour
Frosting:
- ½ package of cream cheese (4 oz total)
- ½ (14 oz) can sweetened condensed milk
- 16 oz sour cream
- 1 teaspoon vanilla
- 1 cup heavy cream
- 2 Tablespoons powdered sugar
Sugared rosemary and currants: (Optional)
- Fresh rosemary
- Red currants or cranberries
- 1 cup water
- 1 cup plus ½ cup sugar
Instructions
Making the cake layers:
- Place the butter and sugar in a large nonstick pot. If you don't have a nonstick pot, or your pot burns easily, you may wish to use a double boiler. (Just place a metal or glass bowl on top of a pot with about an inch or water in it and keep it simmering, but make sure the bottom on the bowl never touches the simmering water. Add more water if it evaporates.
- Cook it just until the butter melts but is still barely warm, NOT HOT.
- Take it off the heat. Add the eggs, baking soda and honey and mix to combine.
- Cook the mixture on medium low heat for about 7 minutes, longer if you're using a double boiler. The batter will almost double in size and will turn a deep caramel color. Take it off the heat.
- Add the flour and mix quickly with a wooden spoon. I always add less flour than I need and add more when I'm rolling out the cake layers. If you add too much flour, it will be really hard to roll out.
- Preheat the oven to 350 degrees.
- On a lightly floured surface, roll out the cake layers.
- Take approximately ¼ cup of batter and knead it on your work surface. If it's sticking to your hands and the counter, add more flour. Roll it out thinly into somewhat of a circle.
- Use the bottom of a cake pan or the bottom of a tart pan to cut a perfect circle. You can save all the scraps just the way you cut them and place them on a baking sheet and then bake. Later, you can crush them into crumbs and sprinkle the sides and top of the cake. I usually just take the scraps and knead them into the batter as I roll out each new cake layer.
- I use 2 (9 incround tart pans to bake the cake layers. If you don't have a tart pan, use a rimmed baking sheet., sprinkled with flour or lined with parchment paper.
- 1Sprinkle the bottom of the tart pan with flour and bake the cake layers for about 4 minutes each.
- Take them off the tart pan right away. As the cake layers cool, they will become pretty hard.
- Working quickly, repeat with the rest of the cake batter. You can roll out the cake layers and set them aside, waiting to be baked. You want to roll them all out while the batter is still warm. As the batter cools, it becomes harder and harder to roll out. You should have approximately 10-12 cake layers.
Making the frosting:
- Cream the softened cream cheese and condensed milk in a standing mixer with a paddle attachment or using a hand mixer until it's well combined.
- Add the sour cream and vanilla and mix to combine.
- In another chilled bowl, whip the heavy cream with the powdered sugar.
- Gently fold it into the rest of the frosting.
Assembling the Cake:
- Dust off any excess flour from the cake layers.
- Line your serving plate edges with aluminum foil.
- Place a dollop of frosting into the center of the plate, just to keep the cake from sliding around.
- Top each cake layer with about ¼ cup of frosting and spread it around evenly.
- Repeat with all the cake layers. As you place the layers on top of each other, some of the frosting will ooze out of the sides. Spread it out evenly over the sides.
- Grate some white chocolate on top of the cake and chopped nuts or crushed cake layer scraps over the sides of the cake.
- Gently remove the aluminum foil.
- Heat 1 cup water and 1 cup sugar in a small saucepan just until the sugar dissolves. Pour it into a shallow dish.
- Place about ⅓ - ½ cup of sugar in another shallow dish.
- Dip the rosemary and the red currants in the sugar syrup and dip it in the sugar.
- Place on a parchment paper to dry and then place it on the cake. Now you have a beautiful winter masterpiece.


... I went ahead and made the cake-- it was delicious! I'm looking forward to making it again (my waistline probably not so much). Thank you for answering my question; I came to the same conclusion while baking the layers. God bless you with your pregnancy.
Yay! Glad to hear that you liked it.
Hi there! First, I just wanted to say that I make a lot of your recipes (as do many people I know!), but I rarely comment. I appreciate how detail oriented you are, and I love the little tips you sprinkle throughout your recipes, and how you explain things (like how Yukon potatoes hold their shape better, etc). I know you have quite a following, but I'm always surprised it's not bigger... your recipes always come out great when I make them, whereas many other slavic-recipe based sites have hard to follow instructions, or jthe recipes ust don't taste like mama's cooking. So, thank you for the recipes!
Regarding this recipe- is there a reason you cannot use parchment lined 9" baking pans? Your instructions state to use a tart pan, or to just lay the layers onto a rimmed baking pan. Just wondering the reason, since I've never made this cake. Thanks!
Thanks for taking the time to write, I really appreciate it. I'm thrilled that you find the tips helpful and are enjoying the recipes.
I wouldn't recommend using regular baking pans because these cake layers are very delicate and would be difficult to take out of the pan without breaking them.
yummiest medovik i have ever made, the layers come out so fluffy my husband loves this cake definitely his favorite cake, thankyou so much for this wonderful recipe i love all your cakes and definitely want to try them all:)
That's awesome, Anna! I'm so happy to hear that you enjoyed the cake. Medovik is one of my favorites for sure.
Hi Olga,
I just made this cake... and I'm not sure why you roll it out while it's still warm. If you pre-measure the dough into whatever sizes you want and then chill them in the fridge it is Sooooo much easier to work with! I remember I used to see my mom doing this (I would sneak into the fridge and eat the cake batter). I think the honey in the cake is why you can do this (as opposed to spartak which would become a hard rock). Just a suggestion 🙂 Thanks for all your recipes!!
For me, it's much easier and a lot faster to roll it out while it's hot, Dee.I have tried to roll it out when it's cold, and for me, there is a significant difference.
Love it! I made Medovik with 16 layers for my wedding.... Only I made a traditional cream - whipped butter with sugar + кляр. I will definitely try yours. Thank you!
Hi Olga,
I am so excited to make this cake for my family this weekend. I am trying to plan ahead....can I bake the layers on one day and then make the frosting and assemble another day, or do I have to do it all in one day (not sure if the layers will get too hard if not assembled the same day). Or another options is, could I make the cake completely two days before serving? Would it get too mushy?
Thanks!
Susanna
Hi Susanna,
You can bake the layers ahead of time, even up to a week ahead of time. Just store them somewhere tightly wrapped so they don't absorb the smells of the room, etc. You can also make the whole cake a day or two in advance as well. It will not get too soggy.
I made it!!!! It's SOOOOO GOOD! Thank you so much for posting this great recipe! My Russian and American families were quite impressed. By the way, in the last two weeks I also made your recipes for pelmeni, chicken kotleti and the salmon appetizer cake. All were AWESOME! Can't wait to try more Olga's treats!
Thank you! All the best to you!
Susanna
I'm so happy to hear that you had good results with the cake, Susanna. I'm so honored that you've been using some of my other recipes too:). I'm always thrilled to hear that.
I made this cake last night in honor of the Sochi Winter Olympics opening ceremonies. Everyone loved it and we going back for seconds before the finished their first piece. It was surprisingly delicious. It wasn't too hard to make but it looks like it takes a lot of work 🙂 Thank you for this recipe I will definitely be using it again.
What a great idea, Chevas! I'm happy to hear that you enjoyed the cake. It is definitely a Russian favorite:).
Oh my goodness Olga! SO beautiful! Just glorious, really. I cannot wait to make this next Christmas. Since the cake doesn't rise much, I'm going to try converting it with gluten free flour for my family with allergies. Thank you for your wonderful blog!
Can i use 8oz cool whip instead 1 cup heavy cream??
If that's what you prefer, sure:).
I don't use Cool Whip, but if that's what you happen to have, it can certainly be used.
olga, спекла медовик по твоему рецепту! получилось замечательно, необыкноенно нежный торт! мои гости были в восторге! спасибо!
That's great, Julie! I'm thrilled to hear that.
The cake I am referring to has eggs, sugar, honey and flour (no butter). It is made on a double boiler. It is not a thick dough, so you either press it on foil or spread with knife. It is very porous and chewey. You peel the foil when it is baked. The frosting is dolche de leche and butter (but frankly I like the version with sour cream and whipped cream better). You put walnuts between the layers and on the top. Does this ring a bell? I imagine all former Soviet bloc was making this.
Another favorite from that era was bird's milk (ptich'e moloko) - not the one with souffle, but the layered cake with ganache on top.
No, I don't know this cake, HB. Sorry.
I know this is from so many years ago, but I do know this cake and make it often and my friends all call it “The Cake”! If you still want the recipe, I am happy to share.
Olga, I did try this recipe on Friday and cut it yesterday. Wow! it worked perfectly. I used dolce de leche and equal parts of whipping cream and sour cream. (It took me 8 recipes to find the right one, but it was worth it). Thank you so much!
Olga, I was wondering if you had the recipe of'mujskoi ideal'.
I'm so happy to hear that, HB. Thanks for taking the time to write and tell me.
Can you describe the cake to me? Sometimes there are different cake names.
Hi Olga,
I should say I admire your talent. You are clearly very artistic. I like the care that you use in your creations. I have a couple of questions regarding the honey cake. I used to make it long time ago. There were diferent variations on it. I remember making man's ideal, which was a no-fat batter cooked on a double boiler.
Now I am trying to make it and every time I fail. I should say that I am not a novice when it comes to baking. What I do not like in the recipes I use is that they do not seem to be porous, and, most importantly they do not turn brown even though I use honey and cook them. What I remember about these honey cakes is that they were soft and chewey. Not the ones that I bake now.
Any advice?
Best,
Hasmik
PS I am going to try your recipe this Friday, but if you have any tips, I would really appreciate.
Hi Hasmik,
Did you already try this recipe? I'm not exactly sure what you were having trouble with. If you follow the recipe, it should turn out. I try to be very detailed in the instructions.
The cake turned out so delicious!
P.S. I really like your foil trick! 😉
Thanks, blueberry:). I like any tricks that make life a little simpler.
Olga, I am planning in making this cake:-) my question is, can I substitute the heavy cream for whipping heavy cream? What's the difference? Thanks!
Hi Irina!
Heavy cream and heavy whipping cream are basically the same thing. Yes, they will both work. However, heavy cream has a slightly higher fat content, so it will keep it's shape better and longer. Heavy whipping cream will whip up too, but it will deflate faster. For this recipe, both will work just as well. If you're whipping up cream for desserts where the whipped cream is on it's own, it's best to use heavy cream.