
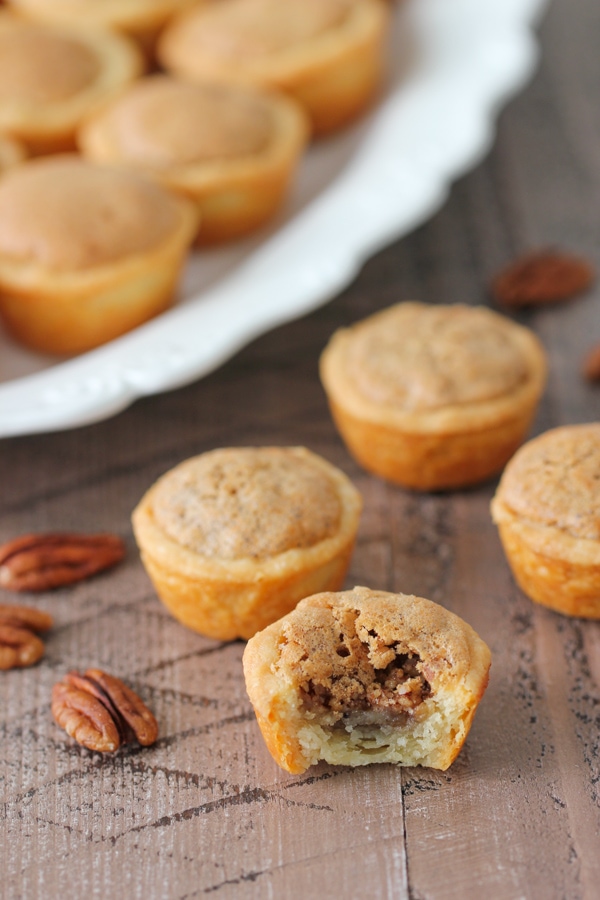
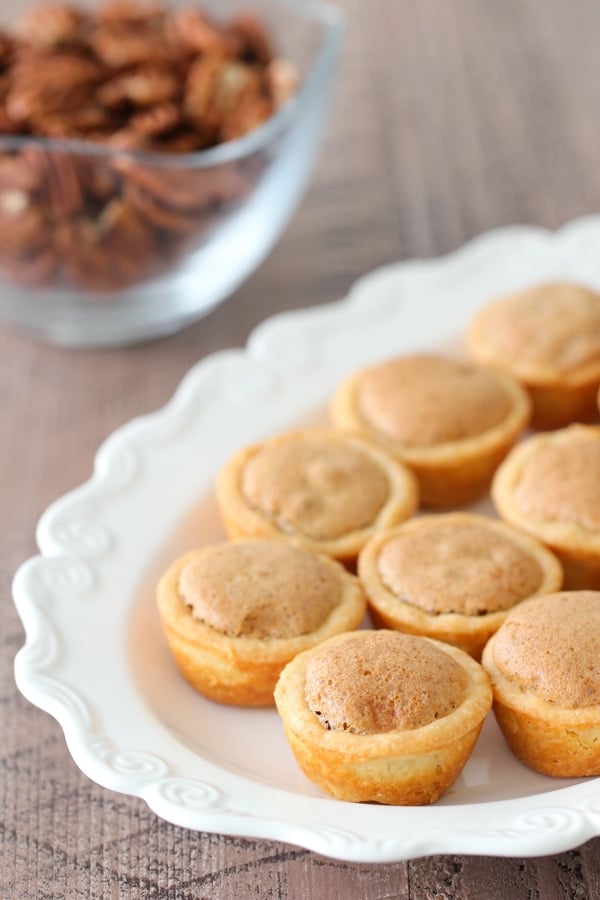
Pecan Tassies are cute and delicious pecan pies - but better! The buttery and flaky dough for these individual little pastries is filled with crunchy pecans and a gooey brown sugar filling.
Every year for Christmas, we have a family tradition of baking all kinds of baked goodies. We spend days with flour, sugar and eggs, forming cookies and pastries that will fill pretty plates.
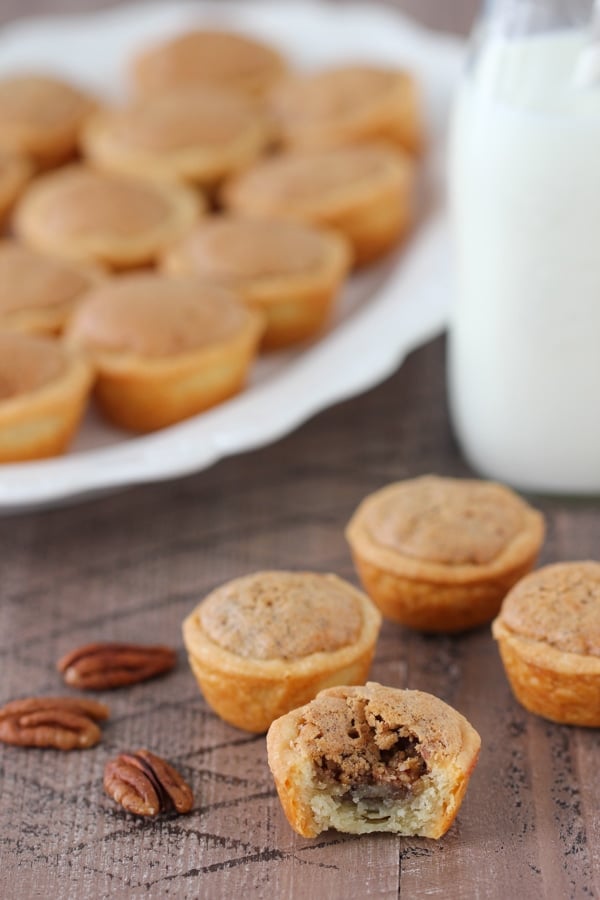
Pecan tassies have always been at the top of the list. The mini pies are so cute and taste amazing. I really like the combination of the tender crust with the gooey, nutty and somewhat crunchy filling.
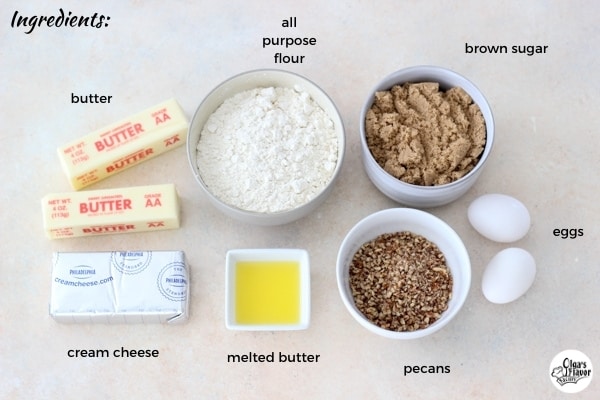
Ingredients for Pecan Tassies:
Dough:
- butter, softened - it's important for the butter and cream cheese to be softened to room temperature so that they are able to be mixed evenly
- cream cheese
- all purpose flour
Filling:
- eggs
- melted butter
- brown sugar
- pecans - you can also use just about any other type of nuts for this recipe
Video of How To Make Pecan Tassies
Preparing the Cookie Dough and the Filling:
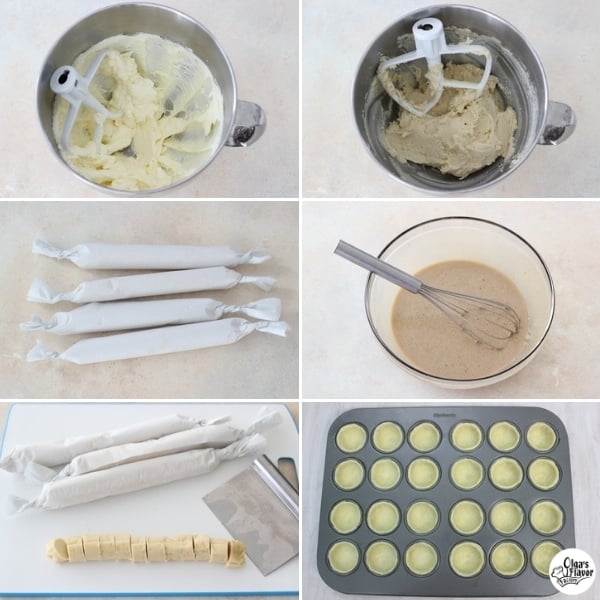
- In a stand mixer with a paddle attachment or using a hand mixer, combine the butter and cream cheese until smooth. Add the flour just until combined.
- Divide the dough into 4 equal parts, press into log shapes and wrap each into aluminum foil or parchment paper.
- Refrigerate for at least 1 hour. I highly recommend making the dough in advance. You can keep it refrigerated up to 3-5 days in advance or frozen for up to 3 months.
- Mix the eggs, melted butter and brown sugar until smooth and most of the brown sugar is dissolved. (You can use a whisk to mix it all together or mix it up in a standing mixer, hand mixer or in a standing mixer.) I have found that when you mix the filling with a mixer, it's easy to incorporate too much air into in and sometimes the tops of the Pecan Tassies will become too crackly and and won't look as pretty after baking. That is not always the case, but keep it in mind.
- When the dough has chilled and is firm, cut each cylinder into 12 equal portions, 48 total.
- Press the dough into the cavity of the cupcake/muffin cavities of a mini muffin pan (greased).
Assembling and Baking the Pecan Tassies
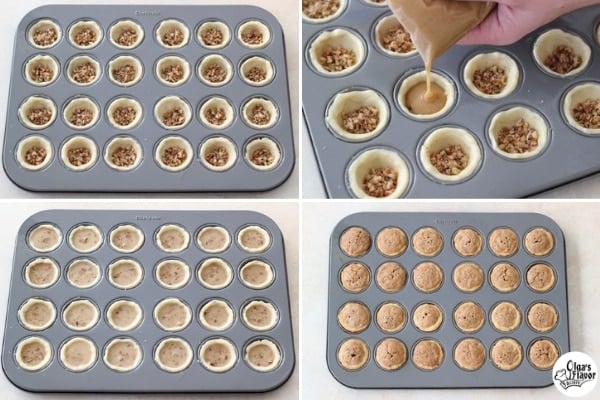
- Add about ½ teaspoon of chopped pecans into the the bottom of each of muffin cup.
- Pour the filling into a large ziptop bag, snip off a small corner and pour the filling over the nuts. Fill each of the muffin cups almost full, but be careful not to overfill them.
- Bake the Pecan Tassies in a preheated oven (350 degrees Fahrenheit) for 25-28 minutes.
Tips For the Best Pecan Tassies
- For the dough, make sure to bring the butter and cream cheese to room temperature so that they mix evenly. If they are too cold, you'll have white flecks of cream cheese and butter in the dough and they won't be mixed in well. For this dough, it is best to have a very smooth dough.
- Make the dough in advance. This is so convenient and makes the process of making these cookies so much more doable, breaking up the process. The dough is so easy to make and have in your freezer, ready to go for months in advance.
- For the filling, whisk the ingredients together for a minute or so and set it aside for about 5 minutes, then whisk for another 30 seconds and repeat this process a few times. You can easily do this while you are shaping the dough in the muffin pan. The sugar will dissolve more naturally as they stand at room temperature and will melt better as they bake.
- If your brown sugar is not the best quality or isn't very fresh, you can see that easily because it will be hard to dissolve when you're mixing the filling. Unfortunately, that will often mean that the filling will crystallize after you bake the pecans. Sometimes it helps to put the mixed filling over a hot water bath and whisk for a few minutes. The warmth will help to dissolve the sugar better. This doesn't always work, but in some cases, it does.
- You can mix the nuts with the filling and spoon it all out together to fill the pecan tassies.
- You can also portion out the nuts separately, filling the bottom of the dough and then pour in the filling. A ziptop bag works great for this.
- Don't overfill the dough with filling. If the filling oozes out, it may drip down the sides of the pecan tassies and the the cookies will stick to the muffin pans and make it hard to remove the cookies out of the muffin pans.
- Brush the cupcake/muffin pans with oil and use a paper towel to rub it around. You don't want to have too much oil, because the dough will slide around in there when you're shaping the dough and will be harder to manage. It is important to grease the pan, because the cookies will be hard to remove if you don't.
- Remove the Pecan Tassies out of the muffin pans when they are still warm. They should pop right out. If they are sticking to the pan, use a thin butter knife to gently pry them out from the side.
Storing and Freezing Pecan Tassies
Store baked Pecan Tassies at room temperature for at least a week, covered.
Pecan Tassies also freeze really well. You can prepare the dough in advance and freeze it for up to 3 months and also freeze the baked cookies for up to 3 months. Make sure to wrap both the dough and/or the baked Pecan Tassies in multiple layers (parchment paper, aluminum foil, freezer bags, etc) or in an airtight container to prevent freezer burn and to keep them as fresh as possible.
Pecan Tassies

Pecan Tassies are cute and delicious pecan pies - but better! The buttery and flaky dough for these individual little pastries is filled with crunchy pecans and a gooey brown sugar filling.
- Prep Time: 1 hour
- Cook Time: 25 mins
- Total Time: 1 hour 25 mins
- Yield: 48 tassies 1x
- Category: Sweets
Ingredients
Dough:
- 2 sticks butter, softened to room temperature (1 cup or 16 Tablespoons total)
- 6 oz cream cheese, room temperature
- 2 cups all purpose flour
Filling:
- 2 eggs
- 2 Tablespoons butter, melted
- 1 ½ cups brown sugar
- ¾ cup pecans, finely chopped
Instructions
- Preheat the oven to 350 degrees. Grease 2 mini muffin baking pans with oil.
- In a standing mixer with a paddle attachment, mix the butter and cream cheese together until combined.
- Add the flour and mix to combine.
- Divide the dough into 4 equal parts, press into log shapes and wrap each into aluminum foil or parchment paper. Refrigerate for at least 1 hour. I like to make this dough ahead of time. You can even freeze it.
For the filling:
- Mix the eggs, melted butter and brown sugar until evenly combined and most of the sugar is dissolved. Set aside.
- When the dough is chilled and firm, divide each cylinder into 12 equal portions. You should have 48 total.
- Press each portion into the cavity of mini muffin tins.
- Place about ½ a teaspoon of chopped pecans into each.
- Pour the filling into a ziptop bag. Cut a tiny opening in one of the corners. Fill each muffin cup about ¾ full. (You can also use a teaspoon.)
- Bake in the preheated oven for 25-28 minutes.

This recipe was originally published on December 11, 2012. I have added a video to make it even more easy to follow the recipe and clarified the instructions, although the recipe is still the same.
These were so delicious! They reminded me of little miniature pecan pies and are a nice little treat to have around the festive holidays. Yum! Thank you so much for the recipe!
Yay! I'm thrilled to hear that you like them. These are my husband's favorite cookies.
My hubby couldn't get enough of them, either! Thanks again!
Hello Olga, I had made these for a really big party and everybody loved them!! They were a light desert and were very scrumptious. Thanks for the recipe! (:
That's awesome, Emily! I'm so glad you liked them. Thanks for taking the time to let me know. I love hearing feedback from other people who try my recipes. I haven't made these in a while, and now you've got me craving them. Maybe I'll make some this weekend.
Hahah yes, they are VERY tasty!! Please keep posting more recipes!! Every recipe that i have made from this website were a HUGE success! 🙂
Thank you, Emily. I will do my best.
Hi Olga, I was wondering if I can use walnuts instead of pecans?
Yes, you can use walnuts instead of pecans, Jules.
Hi Olga, I made these but they were still a bit gooey inside even though the dough was fully cooked. It was still delicious and everyone loved it but I was just curious if it was supposed to be like that.
hi Olga,
what if i dont have mini muffin pan, can I use a cupcake pan?
I wouldn't recommend it, Oksana, but you can give it a try.
Olga, these little treats are so delicious. Made them twice already. Thanks for the recipe!
How long can the dough stay in a freezer you think?
I've personally kept my batter in the freezer for about a month, but I know it will keep perfectly even longer. Just make sure to seal it really well, otherwise it will taste just like the contents of your freezer:).
I made these delicious mini pies today:) I'm afraid the wont last till Christmas! Thanks Olga!
How should I store them if I make them a day ahead?
I usually store them in a sealed container at room temperature.
Olga,
These are so delious and easy to make. Thank you!
yummy,,I will do it ,just a question can I substitute brown sugar for regular,,,??thank you.
Hi Natalia,
In this recipe, you can't substitute white sugar for brown sugar.
They look so good. Do you think i can substitute cream cheese for mascarpone cheese? thanks in advance:)
Hi Lily, I have seen recipes that use mascarpone cheese for the crust, but I've never made it myself, so I can't say for sure.
Mmm these are amazing!! Can't wait to go back home and eat these amazing goodies that mom will definitely make 🙂 thank you Olga for posting this recipe!
Me too, Milana! Can't wait to sit around talking and munching on cookies. OR catching people sneaking into the cupboards in the mornings:).
Really great idea. I will try it out during the holidays. Thanks
I love love love little treats! Will be making these for my husbands coworkers in the near future! Thanks!