
Learn How to Make Homemade Sauerkraut that's perfectly crunchy and briny. This recipe has been passed down through generations. With just a few simple ingredients, it's a delicious way to enjoy fermented foods.

Making homemade sauerkraut is more than just a cooking tradition—it’s a time-honored ritual that’s been passed down through families for generations. For those of us with Slavic roots, it’s a rite of passage. With all the buzz around fermented foods these days, homemade sauerkraut is making a major comeback.
The beauty of sauerkraut is in its simplicity—cabbage, salt, and time are all you need to create a perfectly briny batch. This easy-to-follow recipe walks you through each step, from choosing the type of cabbage, to packing it into jars for fermentation. Whether you’re new to fermentation or a seasoned pro, you’ll love how easy it is to make sauerkraut at home.
Whether you’re using it as a topping, adding it to Russian beet salad, Vinegret, or just enjoying it straight from the jar, this homemade sauerkraut will elevate any dish.
*Although this post is NOT sponsored and I am not affiliated with any of the brands that I will be mentioning, some of the links may be affiliate links.
Jump to:
Why You'll Love This Recipe
Easy to Make: With just a few ingredients and a few simple steps, you’ll have everything you need to make a delicious batch of sauerkraut at home.
Crunchy and Fresh: Unlike store-bought versions, homemade sauerkraut stays wonderfully crisp and crunchy, adding the perfect texture to any meal. No soggy sauerkraut here!
Long-Lasting: Once fermented, your sauerkraut will keep for months in the fridge, so you can enjoy the results of your hard work for a long time. It’s perfect for meal prep or keeping on hand for many other recipes. My favorite - Shchi (Russian Cabbage Soup) or the faster version, Shchi in the Instant Pot.
Versatile: Sauerkraut isn’t just for sandwiches! It’s great on salads, as a side dish, or paired with meats, stews, and more. Its tangy flavor adds a unique depth to any dish.
Naturally Fermented: There’s something truly satisfying about creating food through fermentation. With just cabbage, salt, and a little patience, you can make a batch of sauerkraut that’s both fresh and full of flavor—no additives, preservatives, or mystery ingredients.
Ingredients
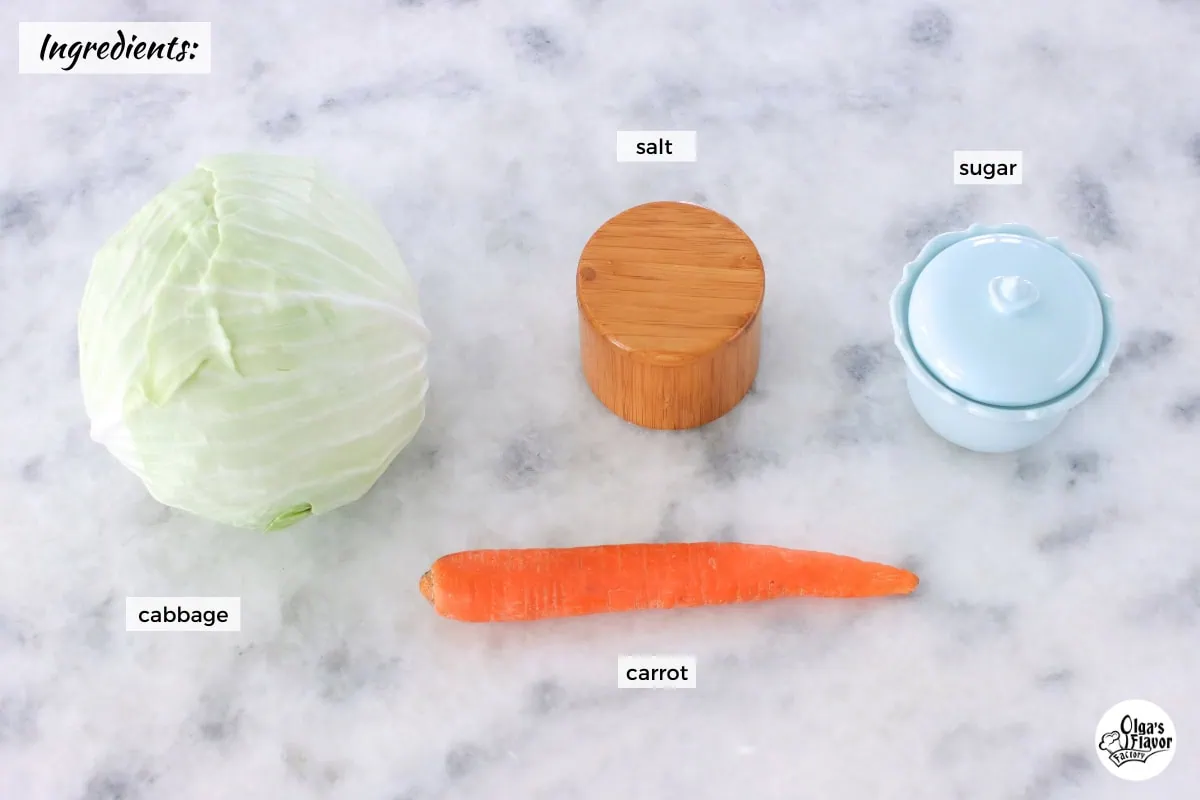
- Cabbage - Green cabbage has a mild flavor and a great texture that’s perfect for making crunchy, briny sauerkraut. While purple cabbage can be used for a vibrant color, green is the traditional choice and my personal favorite for that classic sauerkraut flavor.
- Carrot - Carrots are optional but add a lovely touch of natural sweetness and color to the sauerkraut.
- Salt - Salt is key! It draws out moisture from the cabbage, creating the brine that’s essential for fermentation. It also helps preserve the sauerkraut. Be sure to use non-iodized salt like sea salt or kosher salt, as iodine can interfere with the fermentation process.
- Sugar (Optional) - A small amount of sugar can help kick start fermentation by feeding the beneficial bacteria. Don’t worry, it won’t make your sauerkraut sweet—just a tiny bit will help create the right environment for the fermentation to happen smoothly, especially if you’re new to fermenting.
The complete list of ingredients and their exact measurements can be found in the recipe card below.
What is the Best Cabbage to Use For Sauerkraut?
When it comes to making sauerkraut, the best cabbage to use is one that’s lighter in color, almost white. This type of cabbage, typically harvested in the fall, has more moisture and releases a lot of juice—something that's essential for a good brine.
Young, bright green cabbage, usually available in the spring, tends to be firmer and doesn’t release as much juice. While it’s perfectly fine to use, the older, lighter cabbage (often sold in autumn) provides more liquid, which is crucial for creating the brine that ferments the cabbage.
For the best results, you want your shredded cabbage to be fully submerged in the salty brine, which helps it ferment properly and gives you that tangy, crunchy texture we all love in sauerkraut.
How To Make Homemade Sauerkraut

- Shred the Cabbage: Start by shredding your cabbage. You can use a sharp knife, or if you’re looking to save time, a mandolin slicer works wonders. But be careful! A mandolin is super sharp, so make sure to use the safety guard and watch your fingers.

- Combine the Cabbage, Carrots, Salt, and Sugar: In a large bowl, combine the shredded cabbage, carrots, salt, and sugar. For a large cabbage head, I typically use 1 full tablespoon of salt, and for a smaller cabbage head, I use a little less than a tablespoon. The salt is crucial for drawing out moisture from the cabbage, so don’t skip it! If you’re new to fermenting, just know that the saltiness will dilute as the cabbage ferments, so it’s okay to make it a little saltier than you think it should be.
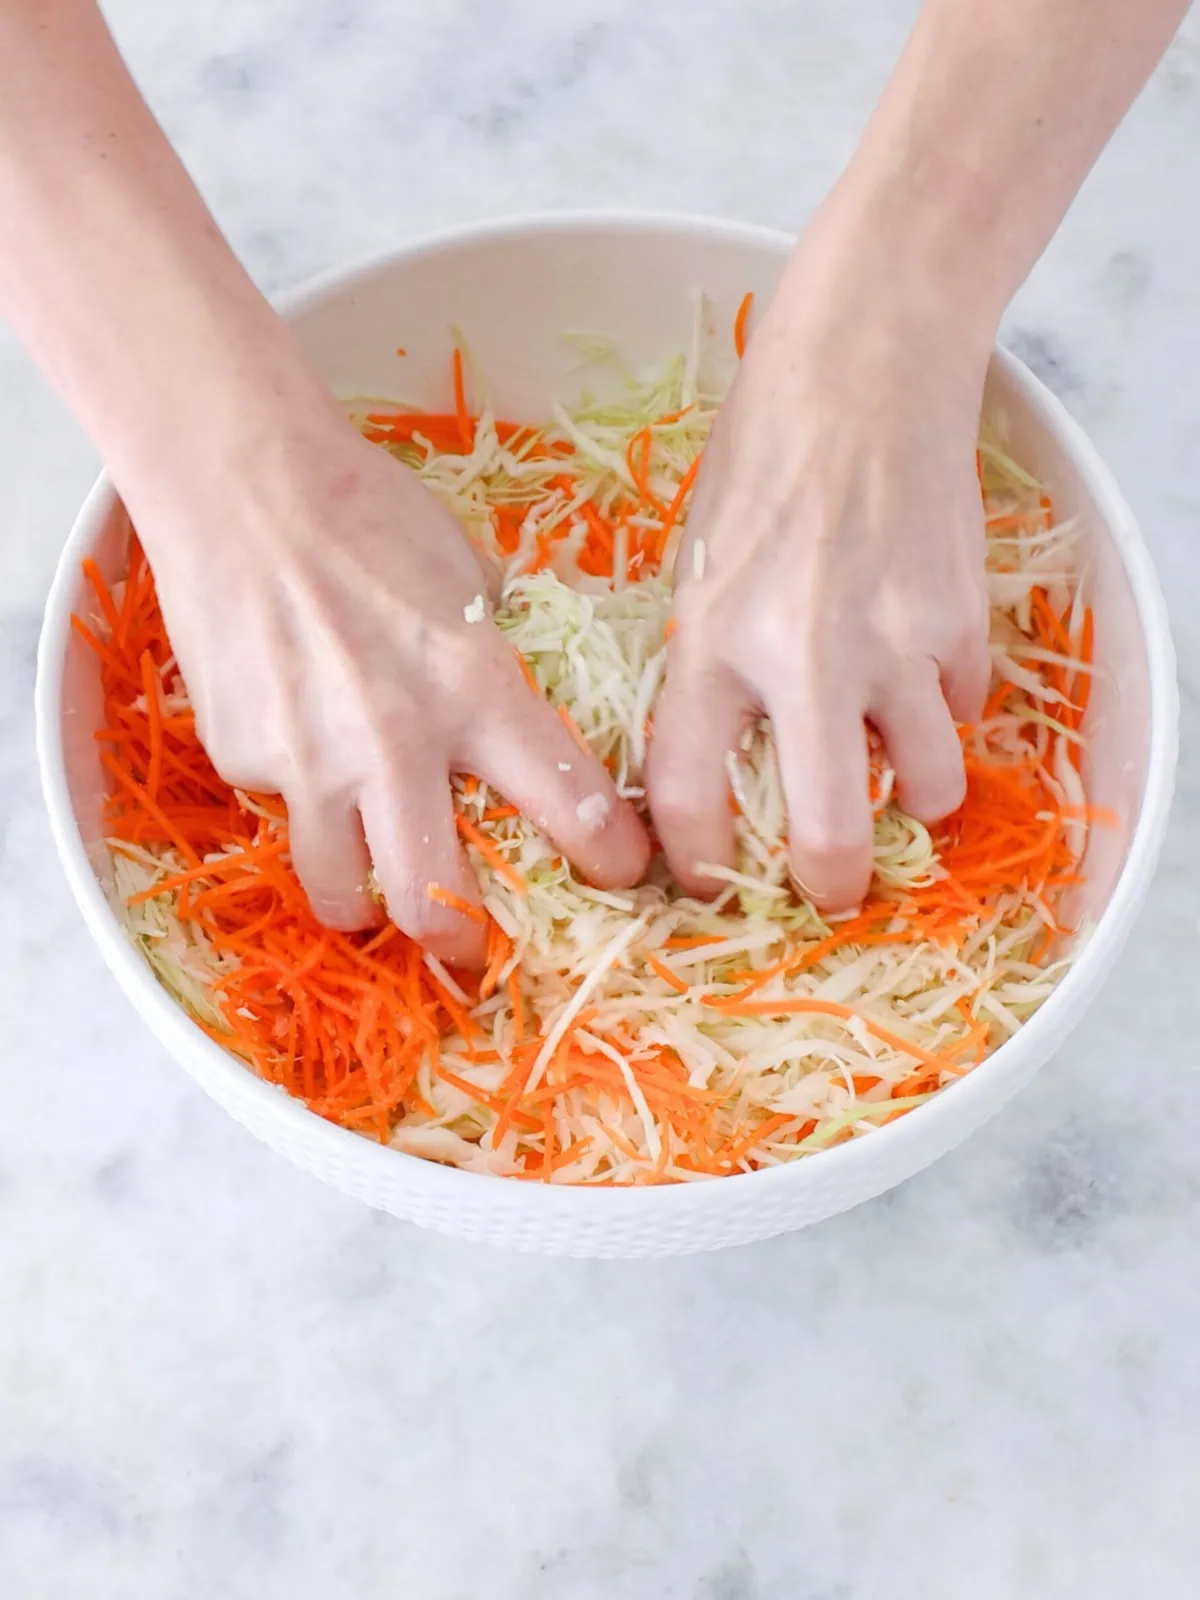
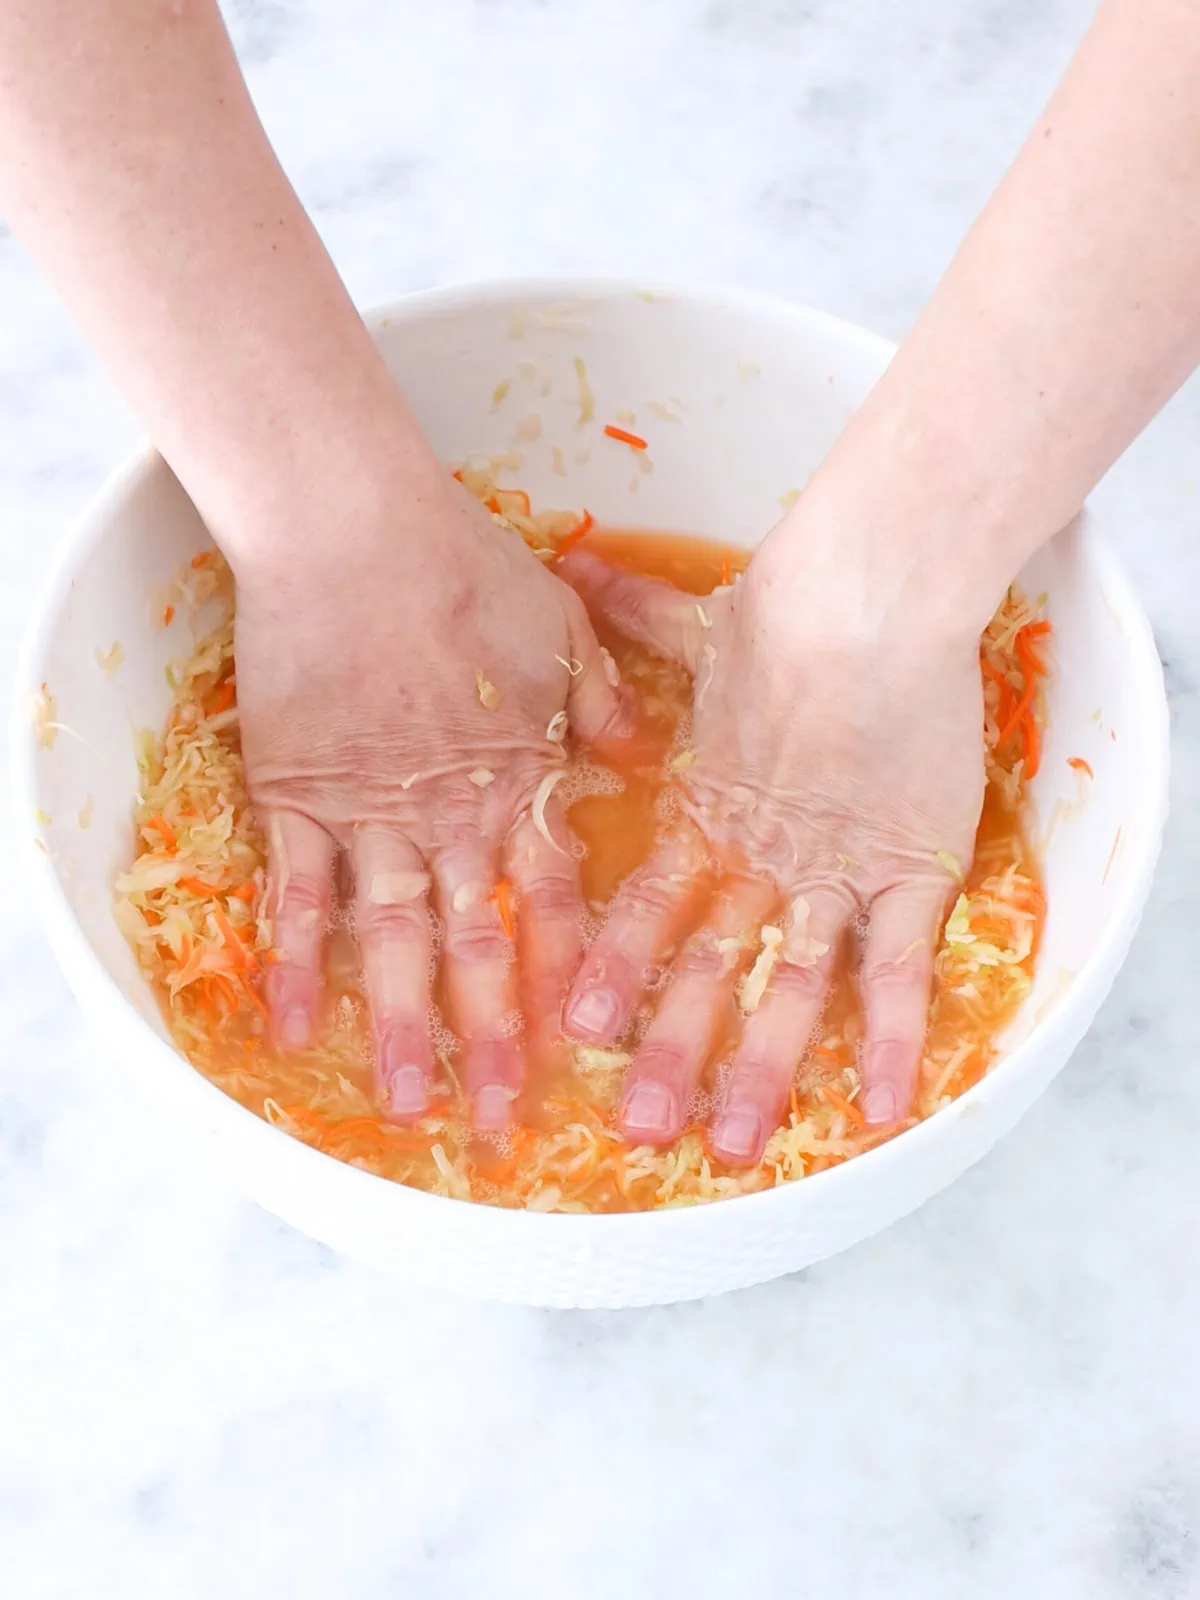
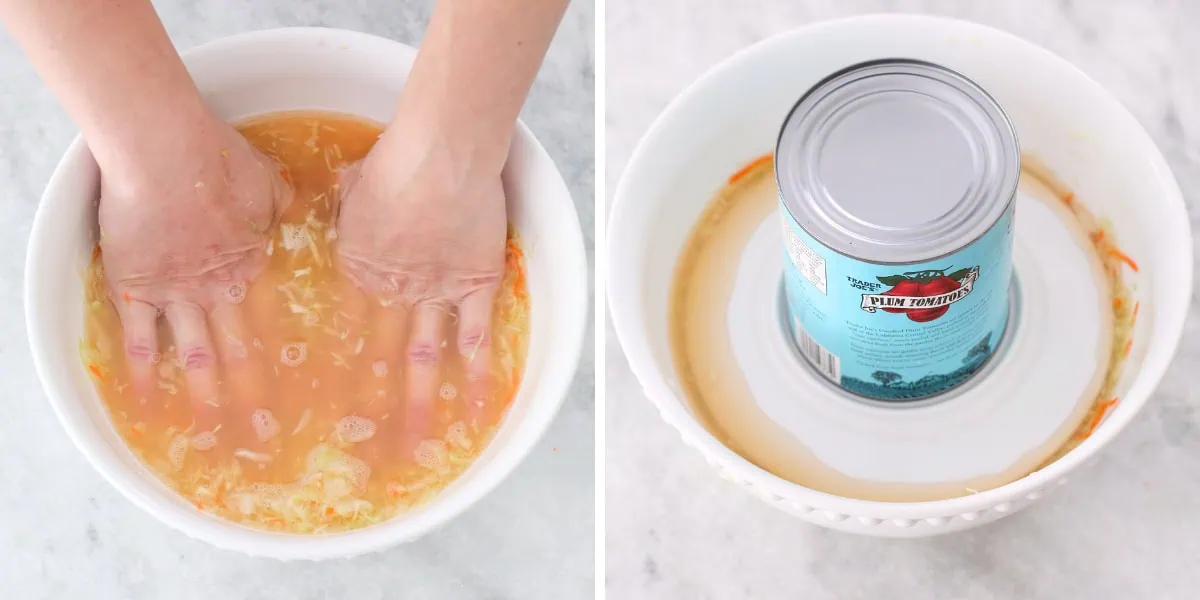
- Massage the Cabbage: Now, here’s where the magic happens—use both hands to aggressively scrunch up the cabbage mixture for about 5 minutes. You’ll need to really work it! This helps release the natural liquid from the cabbage and creates the brine needed for fermentation. If you don’t feel like you’re getting enough liquid, ask a family member to help out.
- Test and Adjust the Saltiness: This is a great time to taste a bit of the cabbage. It should have a noticeable salt flavor since it will mellow out as it ferments. If it’s not salty enough, don’t hesitate to add a little more salt and mix it in. This ensures the perfect balance for fermentation.
- Ferment the Sauerkraut: Leave the sauerkraut at room temperature for about 3 days to ferment. Each day, gently use the end of a wooden spoon to make several deep holes through the mixture—this helps release any built-up gas. (Be sure the cabbage stays fully submerged throughout the entire fermentation process.)

- Store the Sauerkraut: Transfer the sauerkraut to a glass jar(s) and store in the refrigerator for months. When naturally fermented, sauerkraut can stay fresh and flavorful in the fridge for 4 to 6 months after opening.
Helpful Tips
- Slicing the cabbage - You can use either a knife or a mandolin to shred the cabbage. While a mandolin is much quicker, it’s extremely sharp, so please be careful! You've been warned—take your time and slice with caution!
- Grating the carrot - For the carrots, I like using a fine julienne slicer to grate them. It gives the carrots a nice, delicate texture that blends perfectly with the cabbage.
- Submerging the Cabbage - Make sure there’s enough liquid to fully submerge the cabbage during fermentation. Keeping the cabbage submerged is key to preventing spoilage and to make sure the cabbage ferments properly. If it doesn’t stay fully under the brine, you can gently press it down or add extra weight to help it stay in place. Using a fermentation weight really helps with that too.
Fermenting the Sauerkraut
Once you've massaged the cabbage enough, it's time to start the fermentation process!
You have a few options here, depending on what works best for you:
You can keep the cabbage in a large bowl, or transfer it to a glass jar. Personally, I prefer using a bowl because it makes it easier to place a weight on top, ensuring the cabbage stays submerged during fermentation.
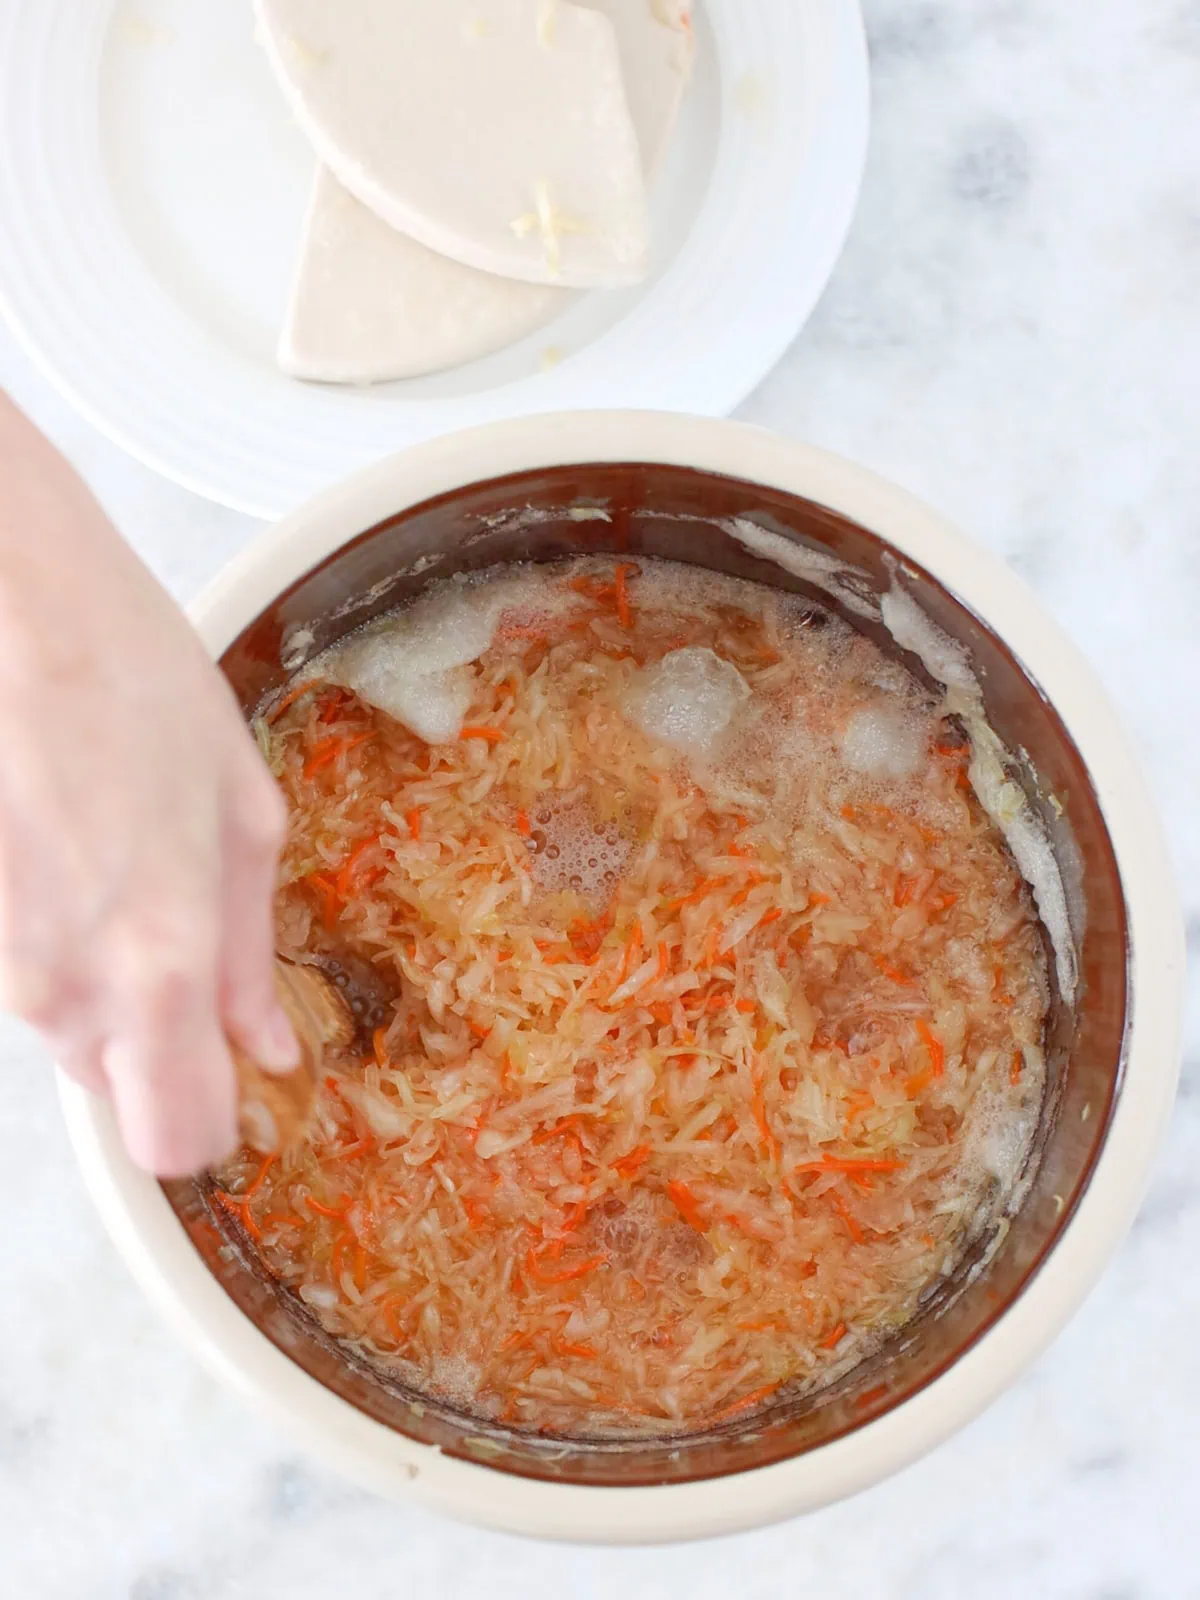
- To keep the cabbage submerged, I typically place a plate (or even an extra cabbage leaf) on top and then add something heavy, like a large can of tomatoes or a jar filled with water. As the sauerkraut ferments, it will expand, so be sure to use a bowl with plenty of extra room at the top. I then cover the bowl with several layers of plastic wrap, making sure it seals around the bowl and the weight. (Just a heads up: during fermentation, you’ll notice a strong "cabbagy" odor—totally normal! That's why I cover it with plastic wrap really well.)
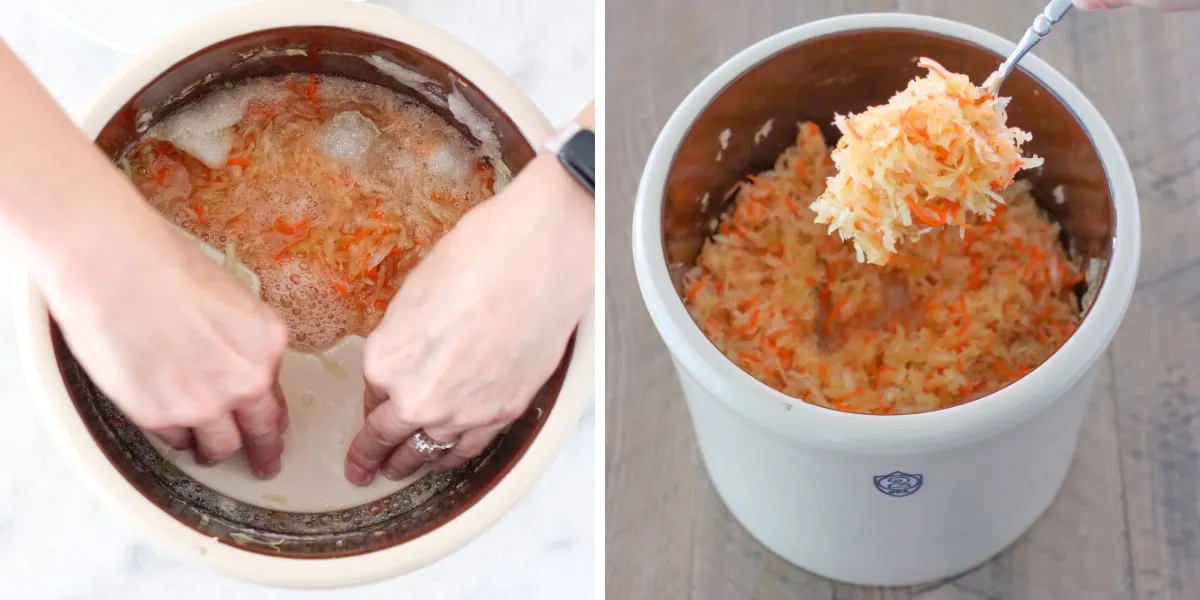
Another option is fermenting in a crock. A few years ago, I bought a large crock specifically for making sauerkraut, and it’s been great! It holds a lot of cabbage, and I also bought weights to keep the cabbage submerged while it ferments. I typically make a triple recipe at once, and it all fits perfectly in the crock.
The crock I have is a 2 gallon stoneware crock by the Ohio Storeware brand. I also bought a set of clay weights to go along with the crock. Here's a link to all my favorite sauerkraut making supplies on my Amazon page.
Now, let the sauerkraut ferment at room temperature for about 3 days. After 3 days, taste the sauerkraut—it should already have that familiar tangy flavor. If it still doesn’t taste briny enough, let it ferment for another day or two and check again.
Storing Sauerkraut
Transfer the sauerkraut to a glass jar and store in the refrigerator.
I usually use a 64 oz jar, and it is about ¾ full with sauerkraut from one large cabbage head.
Serving the Sauerkraut
Sauerkraut is wonderful to use in many recipes. One of my favorite soups is Shchi With Dry Mushrooms. It's also great with roasted chicken and potatoes, or sausage. (Who would like a recipe for those?) I also add it to salads, such as Beet Vinegret Salad.

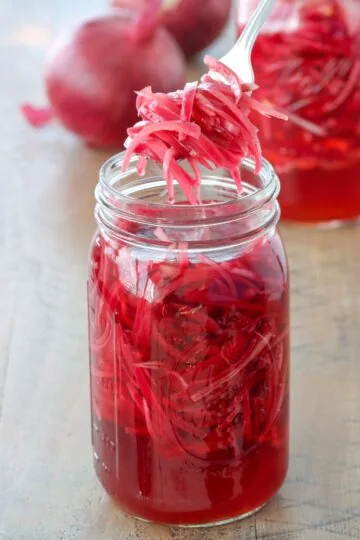
To make a simple sauerkraut salad, I simply season it with salt (if needed) and freshly ground black pepper, a drizzle of olive oil, thinly sliced or finely minced red onion, dill seeds, and fresh herbs, like green onion and dill. Some easy pickled red onions are fantastic in the sauerkraut salad if you have some on hand too. Sometimes, I also add a thinly sliced apple to it for a bit of sweetness.
Frequently Asked Questions
It usually takes about 3 days to ferment the sauerkraut at room temperature. However, you may need to ferment it for an extra day or two if it's not ready, if you like it tangier or your house is too cold.
Not at all! You can make sauerkraut with just a large bowl and a weight (like a can of tomatoes or a jar of water) to keep the cabbage submerged. That's what I did for many years. If you want to take it to the next level, you can use a fermentation crock, which is great for larger batches and if you make sauerkraut regularly.
The strong “cabbagy” smell is completely normal and part of the fermentation process. As the cabbage ferments, it produces lactic acid, which creates that distinctive odor. Don’t worry, the smell will fade, and the sauerkraut will taste amazing! In the meanwhile, cover it up really well while it's on the counter.
After about 3 days of fermentation, taste your sauerkraut. It should have a tangy, briny flavor. If it still tastes a bit bland, let it ferment for another day or two and taste again.
While it's okay to ferment the sauerkraut at room temperature, once it's done, store it in the fridge to keep it fresh and tasty. It’ll stay good for about 4 to 6 months once opened.
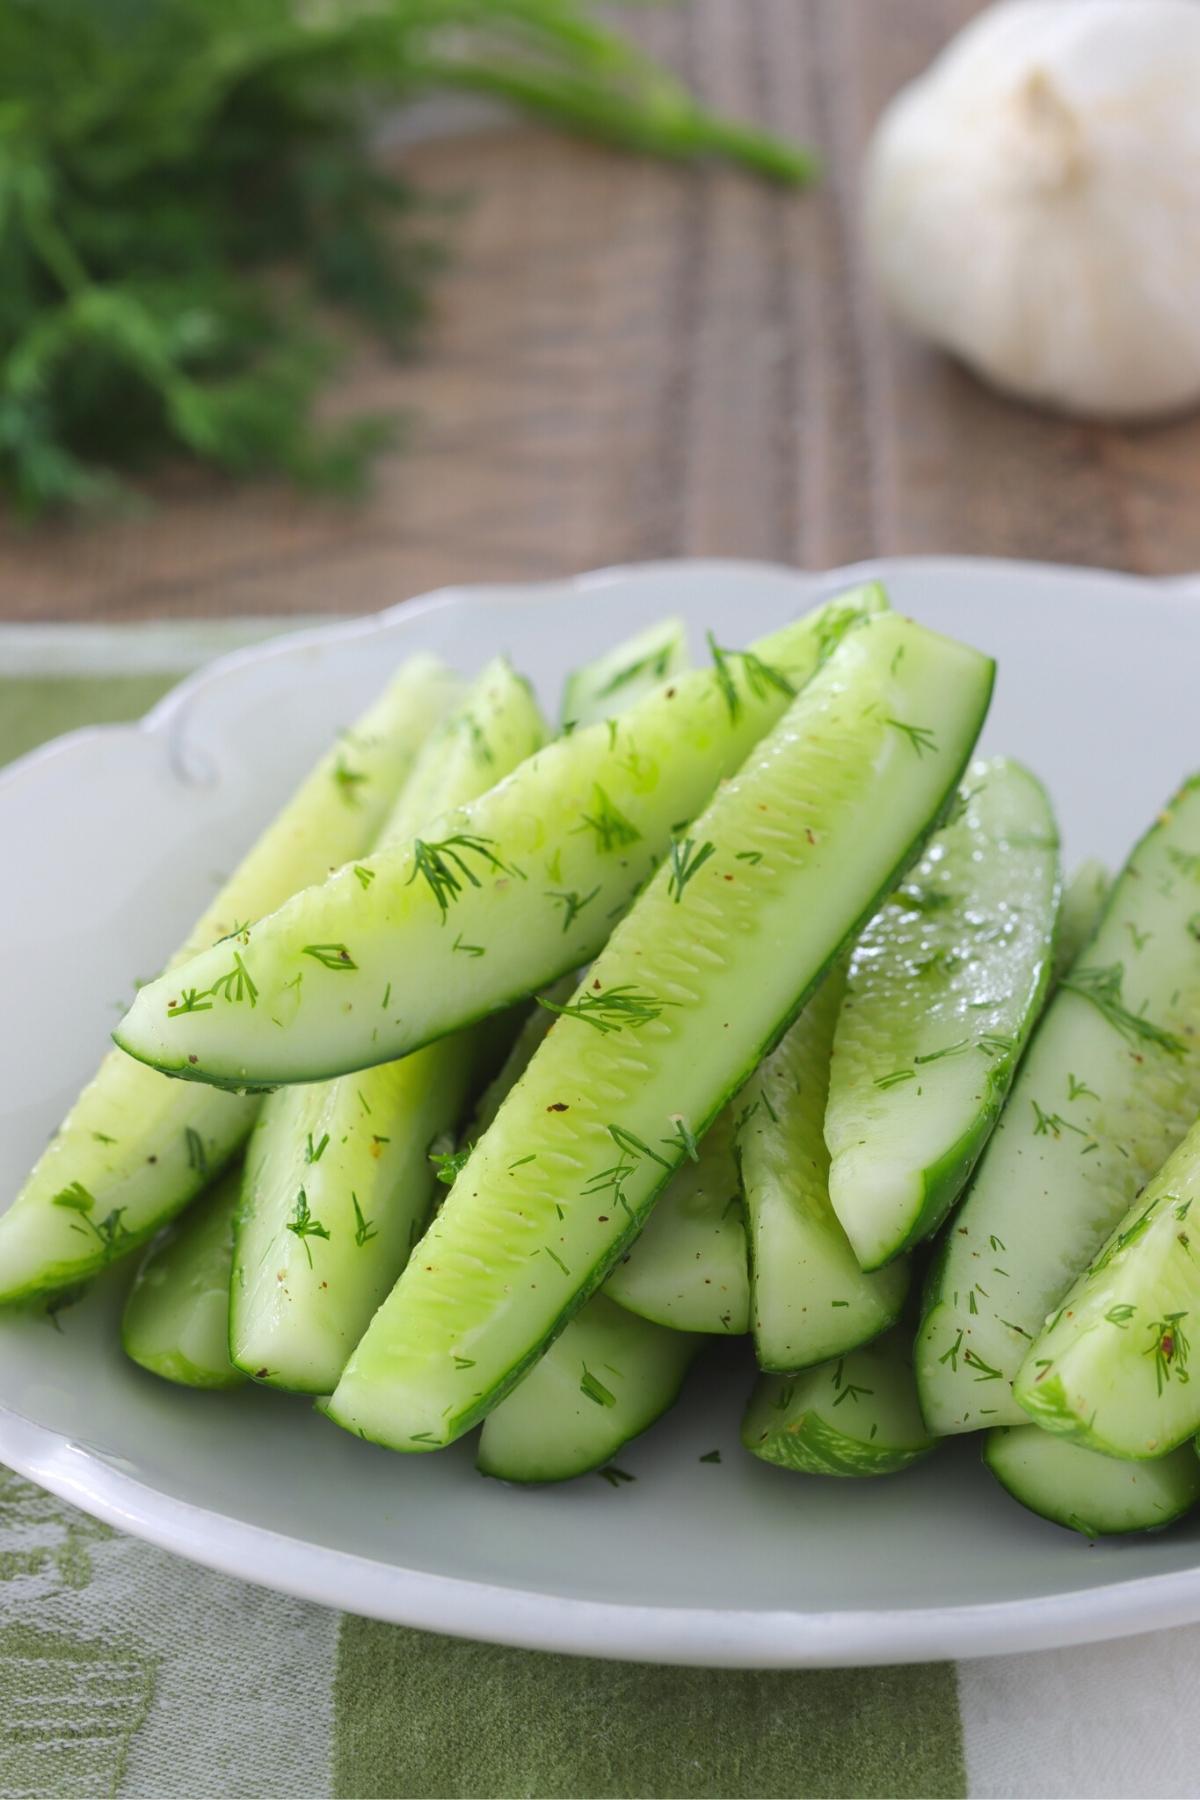
Other Veggies Recipes You'll Love


How To Make Homemade Sauerkraut
Ingredients
- 1 large cabbage head
- 1 large carrot shredded
- ¾ - 1 Tablespoon salt
- ½ Tablespoon sugar (optional)
Instructions
- Using a sharp knife or mandolin, finely shred the cabbage.
- Grate the carrots using a fine julienne slicer or box grater.
- In a large bowl, combine the shredded cabbage, grated carrots, salt, and sugar. If using a large cabbage head, use 1 tablespoon of salt; for a small cabbage head, use just under 1 tablespoon.
- Using both hands, aggressively scrunch the cabbage and carrots for at least 5 minutes, until the mixture releases a generous amount of liquid. The liquid should cover the cabbage completely. The cabbage mixture should feel and look wet. When you press down on it, all of the liquid should cover the cabbage liberally.
- After scrunching, taste the cabbage. You should be able to taste the salt, but keep in mind that the brine will dilute slightly as it ferments. If it feels a bit saltier than you'd expect, that's perfect! The flavor will balance out as it turns into sauerkraut.
- Now, it's time to ferment the cabbage. Keep it in a large bowl or transfer to a large jar. You can also use a fermenting crock. As the sauerkraut ferments, it will increase in size, so make sure to use something with plenty of extra room at the top.
- Put a weight on top of the cabbage - a plate on top of the cabbage, or an extra cabbage leaf and then something heavy on top of it, like a large can of tomatoes, a jar filled with water or clay weights.
- Keep the sauerkraut at room temperature for about 3 days. Each day, use the end of a wooden spoon to poke several holes all the way through the sauerkraut, to release some of the built up "gas". Make sure the cabbage is submerged for the entire 3 days.
- At this point, when you taste the cabbage, it should taste like sauerkraut. If it still doesn't taste briny, let it stand for another day or two.
- Transfer the sauerkraut to a glass jar and store in the refrigerator for 4-6 months.
Notes
*affiliate links - This is NOT a sponsored post. Some of the links may be affiliate links.


I will be canning my sauerkraut.
When it is done do I just put it in the jars and seal it or do I need to heat it to get to seal?
Ok, I gotta say this is one of my new favorite recipes (first one was and still is the white bread 😊)
I always wanted to try and make my own sauerkraut but felt intimidated by the process until I saw you recipe and it seemed so easy! I can not thank you enough Olga 🙏🏻 It comes out perfect every time. Our family loves it, especially my husband, he loves taking it to work (he doesn’t like to eat anything heavy at work). And I’ve been adding it to my meals, even breakfast, as a side to my eggs and avocado. It’s delicious 😋 Thank you so much ❤️
When you serve this di you eat it cold or do you heat it up? And if you heat it how?
Usually we eat it cold, not warm. If you want to heat it up, you can saute it in the skillet until it is warmed through.
Do you use table salt or Kosher salt?
I use sea salt, Christine.
Hey Olga! I’m always such a fan of your recipes. First time making kraut. I think I followed your instructions exactly. I’m day 2 into the fermentation process, and it’s slimy. Is this normal? Will the sliminess go away? Thank you!
Hi Brittney! How awesome that you're trying something new:).
Do you have enough brine to completely submerge all the cabbage? That is the most important part to make sure the cabbage ferments properly.It's shouldn't be "slimy", but the consistency of the brine will not be as clear as it was the first day. Push down on the cabbage and place some sort of weight on top of it.
Day 2 is still early in the process, so it may still be fine. After it ferments for a few more days, it shouldn't be slimy. The cabbage will soften a bit but still have a bit of a crunch, it shouldn't be mushy. I hope that helps.
Totally fan girling over here! Thank you for taking the time to respond. I definitely need to add a little brine to it. I do think that the sliminess is starting to self-correct. Working up the nerve to give it a taste tomorrow maybe!
Thank you for this recipe, Olga! I grew up on my Russian grandmother's sauerkraut, and I've never been able to find its equal. Yours looks exactly like hers! One question: if you make a big batch and store it for a while, is there any way to keep it from getting soggy over time? One of the reasons I loved Grandma's kraut so much is that it was so crisp - every other sauerkraut I've ever tasted (probably German?) is too mushy and limp!
I hope you enjoy this recipe, Aud:).
I usually don't have a problem with the sauerkraut getting soggy over time. Even months after making it, it is still just as crisp as when I first made it.
I’ve made this recipe several times and worked every time. Love it. Three days was perfect.
Now, I did research and everywhere it says you should ferment first about 3-4 weeks to get best results. What do you know about this? I’m so confused now.
I share recipes the way I make them, Anna. I never ferment for 3-4 weeks, but you can do that if you like. Of course, the fermented sauerkraut will keep fermenting and will stay fresh for weeks and even months, so there's no harm in doing so.
Hi Olga! Thanks for the recipe. Very excited to try this. How long should I keep the weight (can of tomatoes, jar of water, etc.) on top of the plate to keep the cabbage submerged before I can remove it to cover the bowl with plastic wrap (to trap the cabbage odor)?
I keep the weight on top of the sauerkraut the entire time it is fermenting, to make sure the cabbage is covered in the brine the entire time. I take off the weight only when I transfer the ready sauerkraut to the refrigerator. I cover it with plastic wrap on the sides, around the weight, to keep the odors from wafting through my house:).
Thank you!
I am so happy to have stumbled across your site while looking for a recipe for sauerkraut. There are so many amazing recipes here! I tried this one and for the first time I was able to make sauerkraut successfully at home and I am thrilled to be able to use it now that it is done. The flavor just gets better and better! Thank you so much! One thing, I wasn't able to mash it up as the instructions said but used a little cabbage juice I had on hand leftover from making "blender coleslaw" the same week to top off the kraut in a jar and it seemed to work fine. It is heavenly Kraut!!!
Welcome, Maddy! So glad you stopped by. That's so great that you were able to make sauerkraut and enjoyed the results. Homemade sauerkraut is so wonderful!
Perfect to put on top of hot dogs on a hot summer day.
Great idea:).
My kraut didn't expand as far as I can tell, however it tastes briny and seems to be ready. How important is the expanding part of the process?
Thank you for sharing the tips 😊
As long as it doesn't smell weird (cabbagy, yes), but not spoiled, it's fine. The expansion really depends on the type of cabbage you use.
Thank you Olga for the recipe. I made my sauerkraut. It tastes delicious.
I'm so glad you were happy with the Sauerkraut, Alina! Thank you for taking the time to write.
What kind of smell is 'normal" during fermenting? Mine smells pretty bad , and I am wondering if I did something wrong. My cabbage was not very light in color, it was kinda green. And I am not sure if it released enough of brine juice .
That's a hard question to answer, Lana. It shouldn't smell "spoiled" but just have a strong cabbage smell.
If your cabbage was really green and you didn't get a lot of brine juice, that would definitely be an issue. I hope it still works out for you.
Well it actually turned out pretty good ! Thanks for the recipe !
I'm so glad it worked out, Lana:).
In the steps you say add salt and pepper. No mention of adding the sugar and pepper isn’t listed in ingredients. Just clarifying, thanks!
I apologize, Brooke. The "pepper" is a typo - it needs to say sugar. I fixed it in the recipe.
Thanks! I will definitely make it! 🙂 how long you can keep it in the fridge?
I hope you enjoy it, Emma. For months! People used to make sauerkraut to last for the entire winter and spring:).