
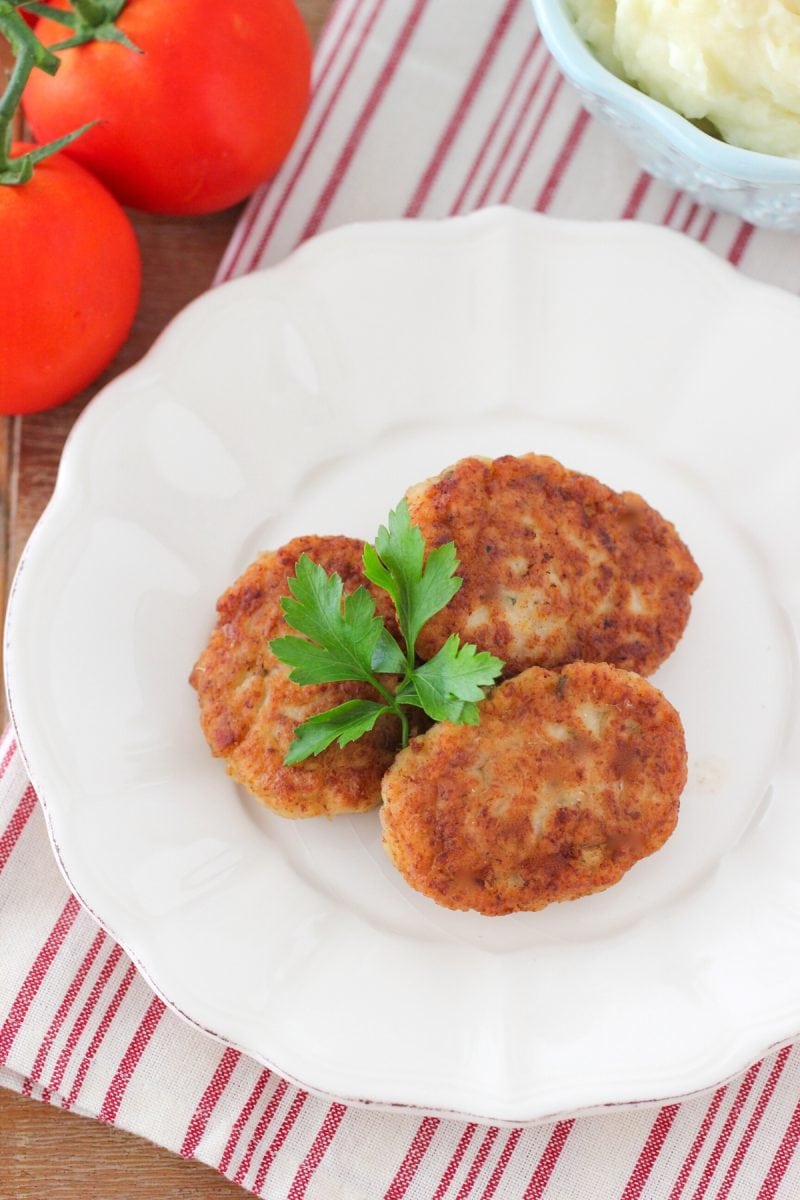
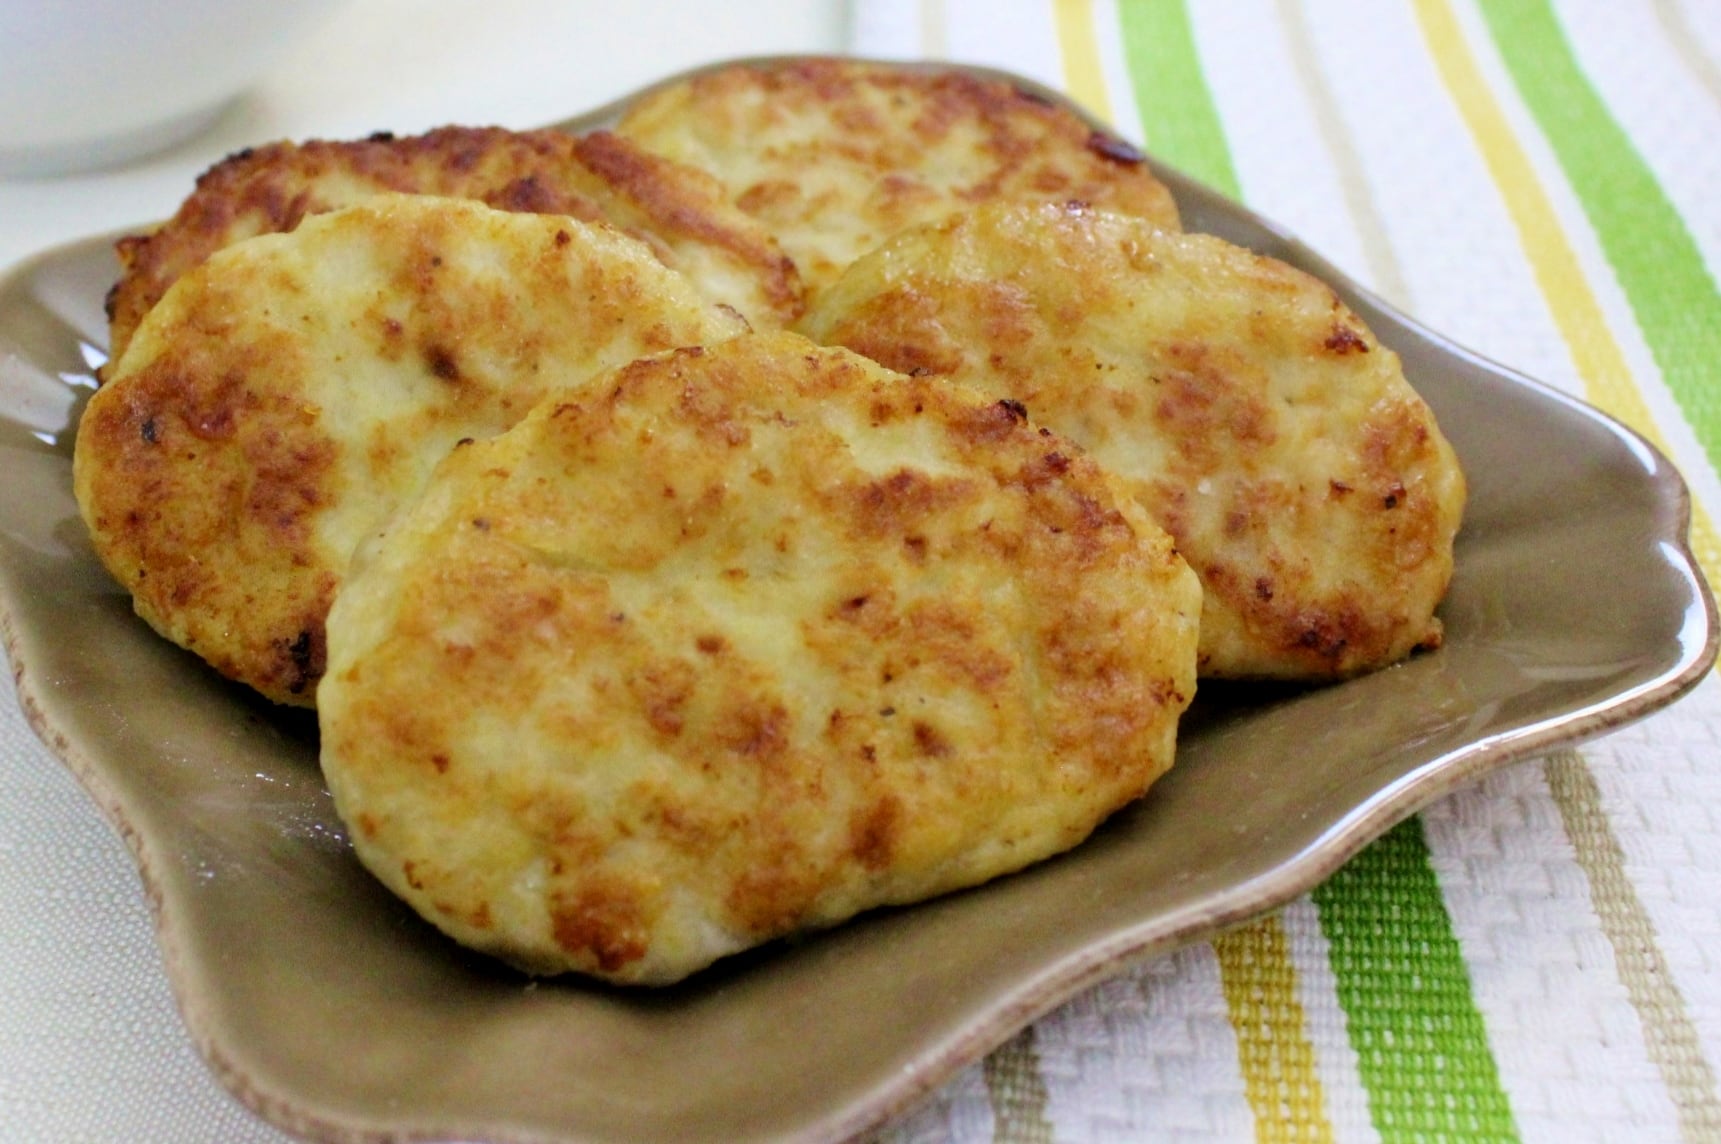
These Chicken Kotleti are the ultimate Eastern European comfort food—light, juicy, and full of flavor. They are a hit with both kids and adults.
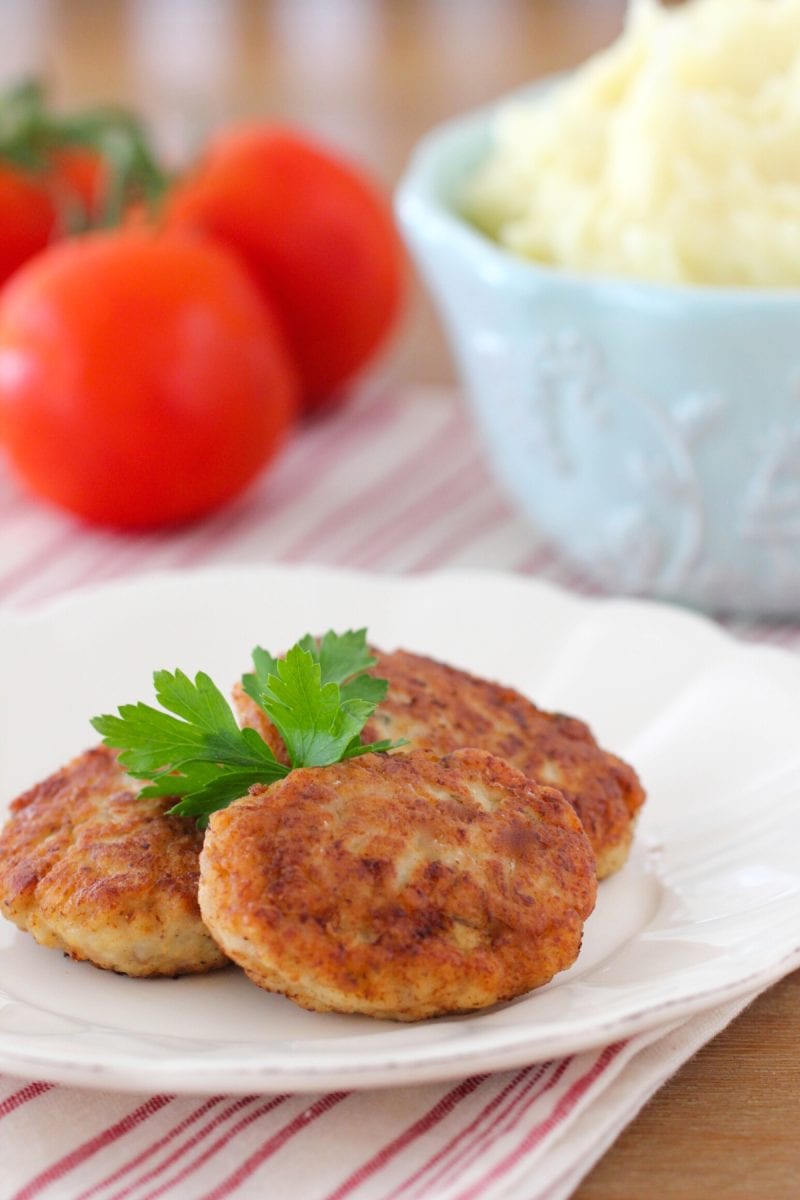
Chicken Kotleti aren’t just a favorite—they’re a foundational dish in many Eastern European homes, especially across the Soviet countries like Belarus, Ukraine, and Russia. I would go out on a limb to say that all Slavic children grew up eating kotleti, just like Italians grow up with meatballs.
I absolutely love this simple, classic recipe—it’s perfect for busy family weeknight dinners, but it also works wonderfully when serving guests. The flavor is always a hit, and they’re so easy to make that I can prepare them any time, whether for a casual meal or something a little more special.
Jump to:
What are Kotleti?
Kotleti, which translates to "cutlets" in Russian, are small, individual meatball-type patties that popular in Slavic cuisines. Instead of round in shape, like most other meatballs, kotleti have a long oval shape.
Traditionally made with beef or pork, this version uses ground chicken for a lighter, more tender texture. I personally think chicken kotleti are so much more delicious, and definitely more tender and juicy. The patties are typically pan-fried until golden and crispy on the outside while remaining juicy and soft inside, making them the perfect balance of flavor and texture.
Why You'll Love This Recipe
Juicy & Flavorful: Ground chicken makes these Kotleti extra tender and juicy, bursting with flavor in every bite. You've got to try Chicken and Mushroom Patties, chicken kotleti bursting with a delicious mushroom filling.
A Hit with Kids & Adults: These patties are loved by the whole family, making them perfect for everyone from picky eaters to adults.
Make Ahead & Freezable: Perfect for meal prep! You can prepare them in advance and then reheat or even freeze them.
Ingredients
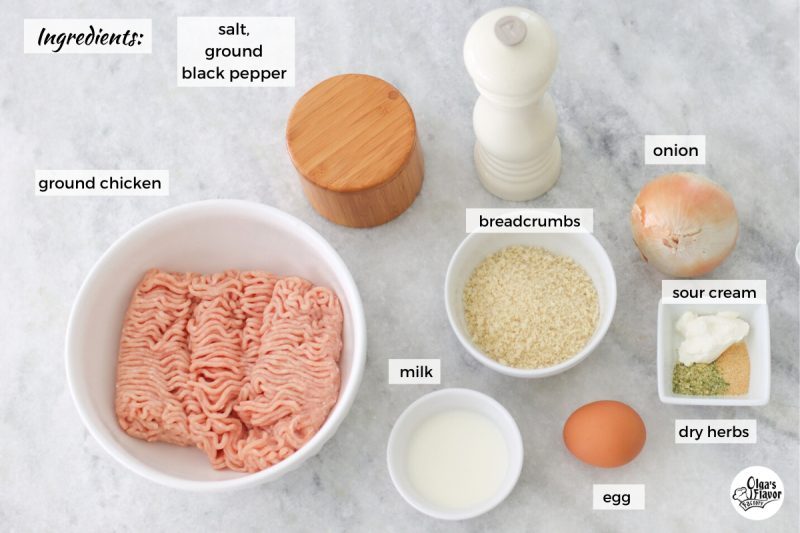
- Ground Chicken: The star of this dish! Ground chicken gives the kotleti their light, tender texture, making them extra juicy and flavorful compared to traditional beef or pork cutlets.
- Panko Breadcrumbs: While I used to toast sliced bread, soak it in milk, and pulse it in the food processor (really delicious!), panko breadcrumbs make the process so much easier. They create a porous texture that helps keep the kotleti juicy and tender.ground chicken.
- Sour Cream: In addition to the milk, sour cream adds a richness and creaminess that takes the kotleti to the next level. It brings a subtle tang that complements the meat perfectly.
- Onion: Onions do more than just flavor these kotleti—they add an extra level of juiciness. Grated finely, they blend into the meat mixture, infusing every bite with savory goodness without being overpowering.
- The complete list of ingredients and their exact measurements can be found in the recipe card below.
How to Make Chicken Kotleti

- First, make the ground chicken mixture: Soak the bread or breadcrumbs in milk, and while that’s soaking, grate the onion. Place the ground chicken in a large bowl, then add the soaked breadcrumbs, sour cream, egg, grated onion, salt, pepper, and your dry herbs and spices. Mix everything together until well combined.
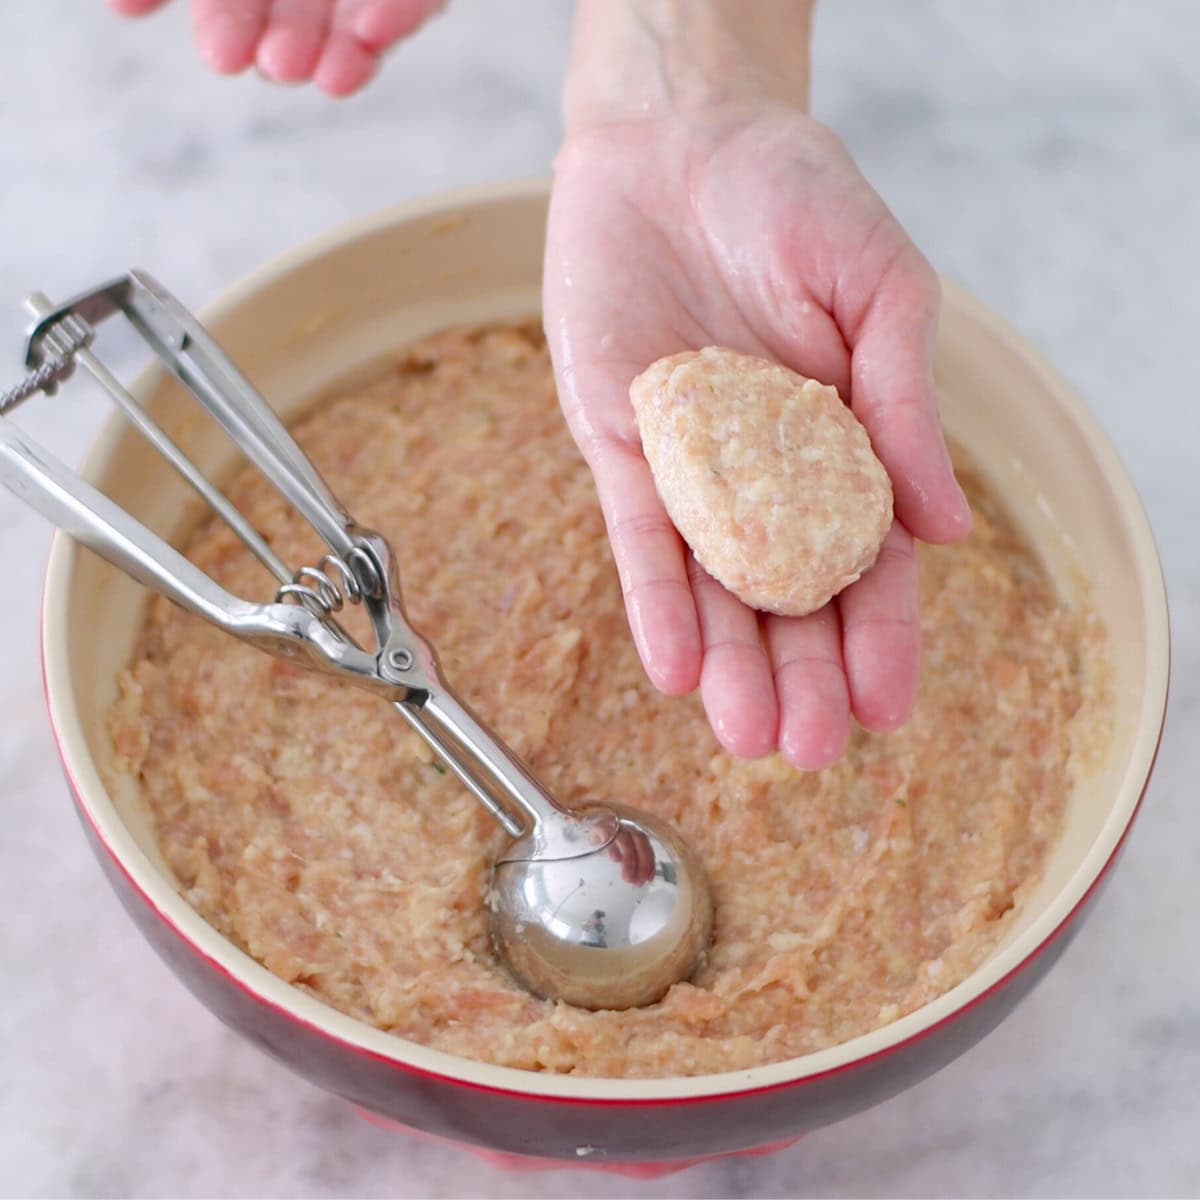
- Shape the patties: Using dampened hands, shape the chicken mixture into oval patties. This helps prevent the mixture from sticking to your hands. Aim for about 2.5 inches in length for each patty—small enough to cook through easily

- Work in Small Batches for Best Results: Shape only a few kotleti at a time—don’t try to prep all of them at once. This mixture is super soft and harder to work with, so it’s best to work with one pan full at a time, then assemble more as needed.

- Pan-fry the kotleti: Heat some oil in a skillet over medium heat. Once the oil is hot, carefully place the patties in the skillet. Cover the pan to help steam the kotleti and keep them juicy. Cook the first side for about 5 minutes, or until golden brown, then flip and cook the second side for another 3 minutes.
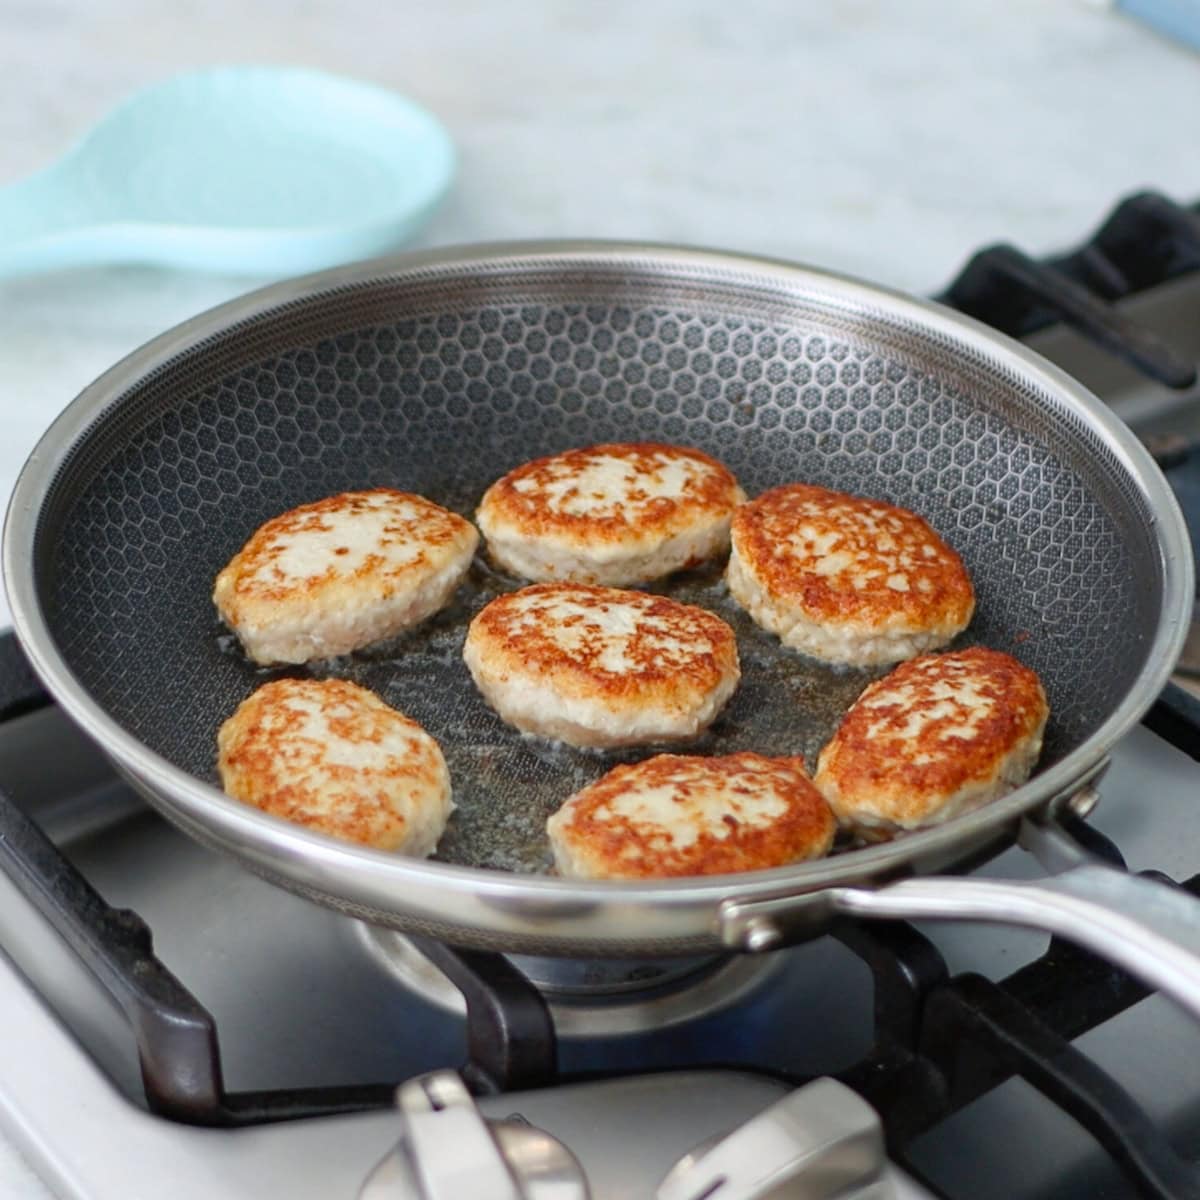
- Repeat the process: Once the first batch is done, wipe out the skillet with a paper towel and add a little more oil before cooking the next batch of kotleti.

- Serve and enjoy: Serve the chicken kotleti hot, straight from the skillet or store leftovers in the refrigerator for 3-5 days.
Helpful Tips
The Ground Meat Mixture Should Be Tender: The chicken mixture will be very tender, much softer than a typical meatball mixture, so don’t worry if it feels looser than usual. This is exactly how it should be for the juiciest, most tender kotleti. If it's unworkable, add more breadcrumbs. These Cheesy Chicken Meatballs are also so juicy and have a similar method.
Use a Portion Scoop for Consistency: Using a portion scoop is a great way to keep kotleti the same size. This helps them cook through at the same time, making for a more uniform result.
Cook in Batches or Multiple Pans: It’s best to cook the kotleti in batches, or you can even use multiple pans if you’re making a large batch. This way, each patty gets enough space to cook properly.
And don’t forget—clean the skillet after each batch! Wipe out any brown bits left behind, and add a little more oil. Those leftover bits can burn and discolor the next batch, preventing your kotleti from getting that beautiful, even golden-brown color.
Make Ahead
Chicken Kotleti are perfect for making ahead, and I always make extra batches when I’m putting in the effort to cook them. That way, we can enjoy them more than once! Plus, they freeze beautifully, so I often stock my freezer with them for freezer meal prep.
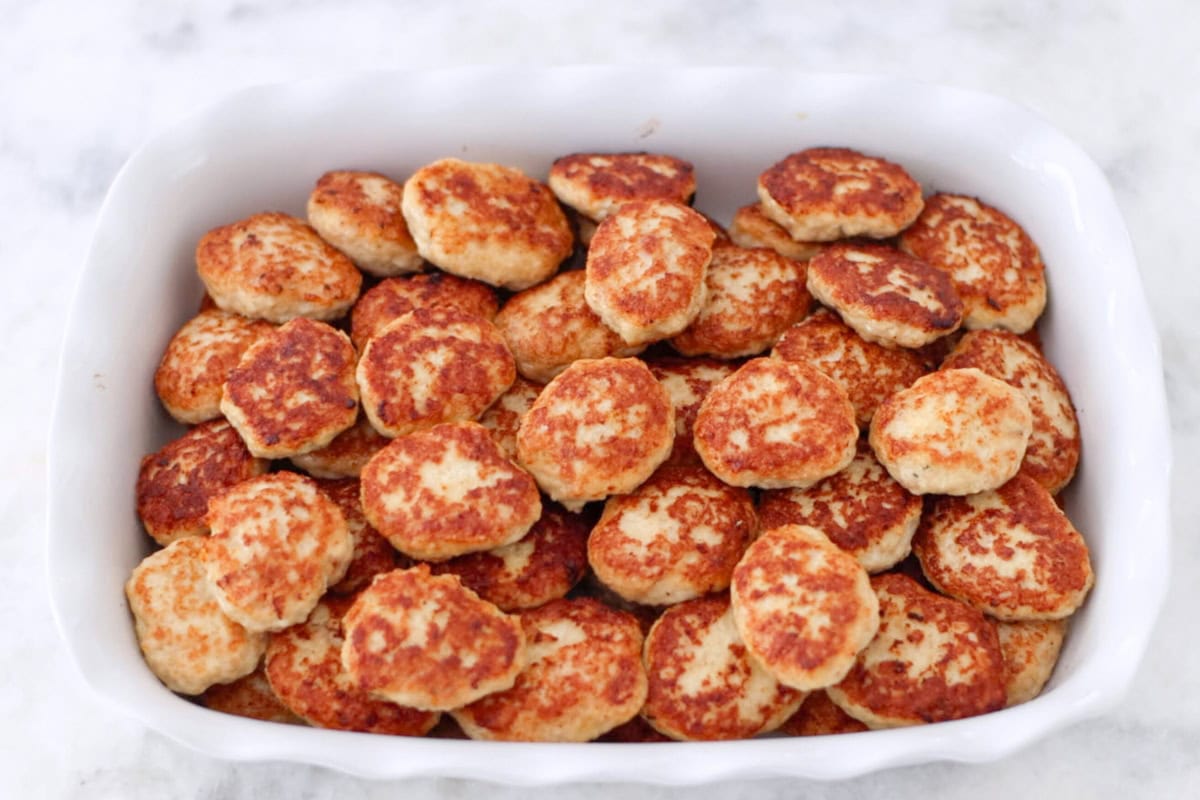
You have several options for meal prep:
- You can prepare the raw chicken mixture ahead of time and store it in the refrigerator for 1-2 days. When you're ready, just shape and cook the kotleti. If you want to prepare them even further in advance, the raw mixture can also be frozen for up to 3 months. Simply thaw it when you're ready to cook, then shape the kotleti and proceed with the recipe.
- Another option is to cook the kotleti ahead of time and store them in the refrigerator for up to 5 days. They reheat perfectly, so you’ll have a delicious meal ready to go.
- Finally, cooked Chicken Kotleti freeze wonderfully! Freeze them for up to 3 months. It's one of my favorite shortcut meals to have in my freezer.
How to Reheat:
If you have leftovers (lucky you!), the best way to reheat kotleti is in a pan. Add a small amount of water to the pan to create steam, cover, and heat on low heat until they're warmed through. They’ll stay juicy and delicious! You can also reheat them in the oven at 350°F. Just add a bit of water to the baking pan, cover, and heat until they’re warmed all the way through.
How to Freeze Chicken Kotleti
To freeze your Chicken Kotleti, store them in a freezer storage container or an airtight container. For added convenience, I like to freeze them individually first. Arrange the kotleti in a single layer on a baking sheet, cutting board, or large plate, and place them in the freezer just long enough for each one to freeze solid.
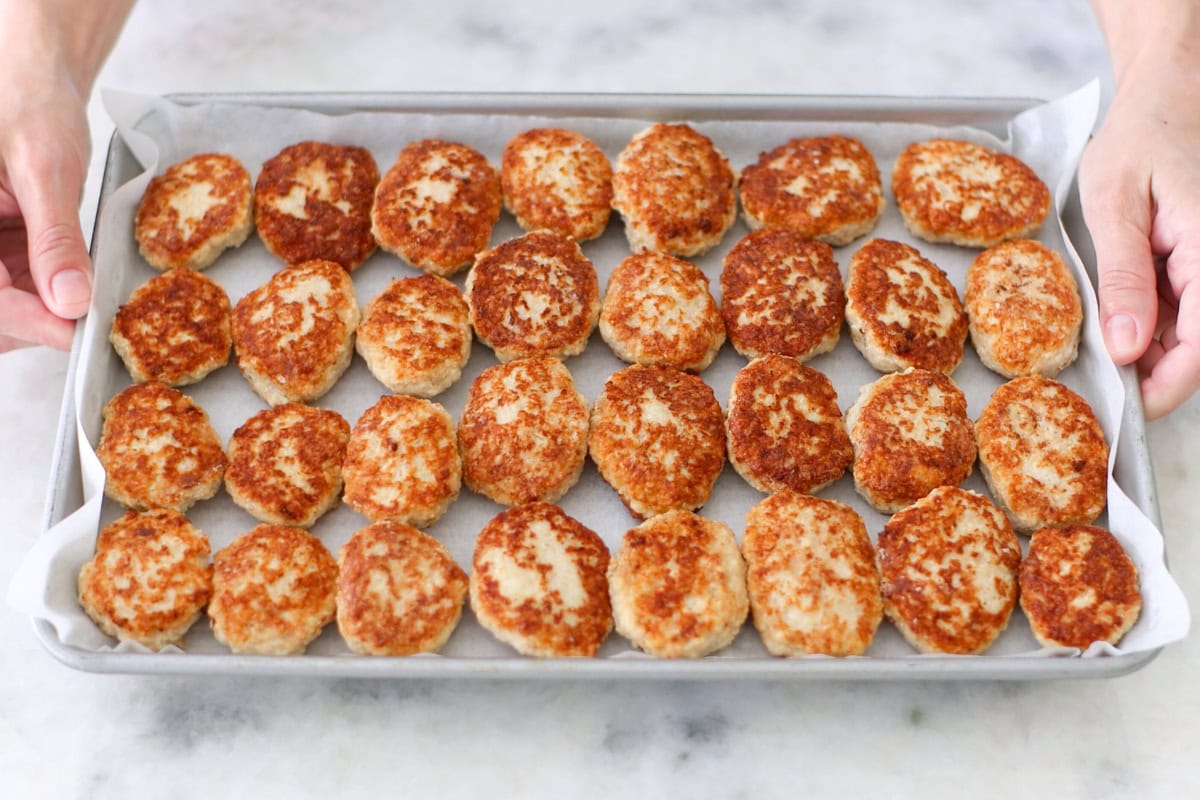
Once frozen, transfer them to a freezer ziplock bag. This method allows you to pull out just the number of kotleti you need, without thawing the entire batch, and they won’t freeze together.
This is a trick I use all the time when freezing Pelmeni, Blueberry Vareniki, and all sorts of meatballs, like these Honey Garlic Glazed meatballs.
Serving
Just like any meatball recipe, kotleti are one of the most versatile entrees and pair beautifully with just about anything. One of the most traditional sides to serve with kotleti are fluffy mashed potatoes, so check out how to make homemade mashed potatoes, Buckwheat Kasha with Mushrooms and pasta or rice. For salads, they are so good with Sour Cream Garden Salad, Garlic Dill Cucumbers or Cauliflower Tomato Salad.
Frequently Asked Questions
Absolutely! If you prefer turkey or beef or have it on hand, these other options are great substitute for chicken. The flavor and texture will be different, but they will also be super delicious. Feel free to experiment!
Yes, chicken kotleti freeze very well! Cook the chicken kotleti, then freeze in an airtight container or a freezer ziplock bag for up to 3 months.
While frying gives chicken kotleti that perfect golden crunch, baking them is a great option if you want a lighter, healthier version. Simply place the patties on a baking sheet, brush or spray with a little oil, and bake at 425°F for about 20-25 minutes, flipping halfway through. They will be pale in color and not crispy though.
If you tried this Cabbage Kotleti recipe or any other recipe on my blog, please leave a 🌟 star rating or a comment below. I love hearing from you!

Chicken Kotleti
Ingredients
- 1 ½ lbs ground chicken
- ¾ cup panko bread crumbs or 2 slices of bread
- ⅓ cup milk
- 1 small onion or ½ of a large onion, grated
- 2 tablespoons sour cream
- 1 teaspoon salt
- ½ teaspoon pepper
- 1 egg
- 1 teaspoon dry herbs and spices such as garlic powder, dry parsley, chives, thyme, etc.
- oil for pan frying the kotleti (avocado oil, light olive oil, vegetable oil, etc.)
Instructions
- In a medium bowl, soak the panko breadcrumbs (or bread slices) in the milk and set aside for a few minutes. If using sliced bread, after soaking, puree the bread in a food processor or blender before adding it to the meat. Grate the onion using the small or medium holes of a box grater.
- Add the soaked breadcrumbs (or pureed bread), sour cream, egg, grated onion, salt, pepper, and dry herbs and spices to the ground chicken. Mix gently until well combined. The mixture will be very tender and softer than a typical meatball mixture.
- Dampen your hands with a little water and shape the mixture into oval patties, about 2 ½ inches in length. Work in small batches for easier handling.
- Heat oil in a skillet over medium heat. Add the patties to the skillet, making sure not to overcrowd the pan. Cook for about 5 minutes on the first side, until golden brown, then flip and cook for another 3 minutes on the second side. Cover the skillet to steam the kotleti and ensure they cook through.
- Wipe the skillet clean with a paper towel, add more oil, and repeat the cooking process for the remaining patties.
- Serve the kotleti hot or store leftovers in the refrigerator for up to 5 days or freeze up to 3 months.
Notes
- Clean the Pan After Each Batch: After each batch, wipe the skillet with a paper towel to remove any brown bits. If it gets really dirty, you may even want to wash it out. This ensures a clean surface for the next batch, preventing any leftover bits from burning or discoloring the kotleti and keeping them evenly golden brown.
- Freezing Tip: To freeze the kotleti, arrange them in a single layer on a baking sheet and freeze until solid. Then, transfer to a freezer ziplock bag. This way, you can remove just as many as you need without thawing the whole batch. They won’t freeze together!
- Reheating: Reheat kotleti in a pan by adding a little water to create steam, covering the pan, and heating on low. You can also reheat in the oven at 350°F—add a little water to the baking pan, cover, and heat until warmed through.
- Make Ahead: You can prepare the raw chicken mixture up to 1-2 days in advance and store it in the refrigerator, or freeze it for up to 3 months. If cooking ahead, store the cooked kotleti in the refrigerator for 5-7 days.
Olga, please help! I really really want to make kotlety for my kids, but
I don't have store bought ground chicken, can I make my own?
What parts of chicken are better for this purpose?
Thank you
Absolutely, Uliana. I actually use ground chicken that I grind myself most of the time. The texture is much better and of course, you know exactly what kind of meat is going in.
I like to use both dark meat (thighs are the easiest) and some breast meat too. You can use only dark meat and that would be just fine, but if you use only white meat (breast) the meat may be too dry.
Olga,
I hope you and family staing warm. Thank you for advise.
We live in Florida, so we can't complain about the cold:).
You're welcome. I am happy to answer any questions.
I'm so glad I found your website, these were soooo good!!
Welcome, Natalie! I'm so glad you stopped by. I hope you find many other recipes to enjoy. These chicken kotleti are a personal favorites of my husband and I make them all the time. It's so awesome to hear that others are enjoying them too. Thanks for taking the time to write.
Another Olga hit in my household! I have to say the meat mixture was a bit hard to handle, since it was so wet, but they were so delicious! And moist! Will definitely make them regularly!
Thanks!
Susanna
You're right, the ground meat mixture IS tricky to work with, but I love how tender and moist the kotleti turn out to be:). Glad you enjoyed them, Susanna.
Hi Olga, I noticed that the recipe has a yield amount, but how many people would 16 large Kotleti serve?
The recipe looks great though, and I am looking forward to trying it!
That depends on how much people eat:). Some people may eat 2 kotleti, others will eat 4, and some might eat 6.
Some people eat more than others, so whenever I can, I like to add how much a recipe yields, not how many people it serves, since a serving size is different with everyone.
Hi Olga,
Do you drain the juice from the onions after grating them? The meat just seems too wet to handle, I can't even make an oval shape, it just falls apart. I don't know what i did wrong. I made sure I didn't have too much milk with the crumbs as well, just enough to get them all soggy 🙁
Hi Elena,
No I don't drain the onions. The meat mixture should be VERY soft. The trick is to use damp hands when shaping them. This is the secret to really moist and juicy kotleti. Add more breadcrumbs if you still can't work with it.
Thank you for the fast reply. I'll try to add a bit more breadcrumbs.
Hi Olga,
I'm Olga too 🙂 I just got done making these kotleti and they turned out sooo good!!! Thank you for this awesome recipe and I love you site!
May God Bless You!!!
your* not you lol
Glad to "meet you", Olga! I'm so happy to hear that you liked the kotleti:).
Hi Olga,
I made these and my husband said these were the most amazing ever! And he said to try making these patties for hamburgers instead of beef... I think we are hooked! :)) thanks for the recipe! I sure do love your site and visit it at least 3 times a week!
Yay! So happy to hear that you enjoyed this recipe. I like using chicken for hamburgers once in a while too.
Thanks for visiting my site and for taking the time to let me know.
Even my picky kids love these kotletki. Thanks this is really helpful for my kid's menu... God bless you, Olga.
How cool is that? I've noticed that most people really like these kotleti. Probably because chicken is a well liked protein.Thanks for letting me know, Helen.
Olga, I just made these wonderful kotletki and everyone loved them. I will definatly do them again, but I will triple the recipe because they are too good and my brothers just swollow them too fast. They turned out so soft with a really pretty korochka. Thank you very much for sharing these amazing recipes with.
Merry Christmas to you and your family 🙂
These are favorites for my husband and myself. We never get tired of eating the chicken kotleti. I'm so glad to hear that your family enjoyed them too:).
Hello Olga! Thank you so much for the recipe! It was seriously the best chicken kotleti I have ever made! 🙂
I made kotleti last night and they tasted so awesome !! Thank you for this great recipe !!
Yay! I'm so happy to hear that:). It's very rewarding when I hear of other people enjoying our family favorites.
I always use pork for my kotleti but after trying these I dont think I will go back.. Husband absolutely loved them.. Thanks for the recipe
Natasha, I used to use pork all the time before too. After trying kotleti with chicken once, my husband and I were won over and I only make it this way now. I'm so glad you liked it too.
These look so yummy! I am planning on whipping up a batch tomorrow. Quick question: what kind of bread do you typically use to make your breadcrumbs? Thanks!
I use hearty country bread or homemade sandwich bread. I always have some bread in the freezer and just take out a slice or two whenever I need it.
Olga, my hubby (Vadim) actually made these today and I'm eating one as I write. Soo wonderful! Thank you so much. It's just perfect!
Yay, Vadim!
I'm so glad you liked them, Natasha.
Hi, this is Natasha's husband. I love the pictures and probably will force Natasha to make some, unless I get to make them first. Great posts.
Thanks, Vadim.
Your wife is quite an amazing cook herself:)