
 My family is very close and we love sharing everything with each other. It's not unusual to discover my phone with 27 group text messages coming in. We like to send pictures, news, funny anecdotes, etc. and share it with everybody via text messages. It's awesome to live in the age of technology. I can watch my nieces growing even though they live so far away; I can see what new nail polishes my sisters are wearing and get excited that the cherry tree in my parents backyard actually grew cherries this year.
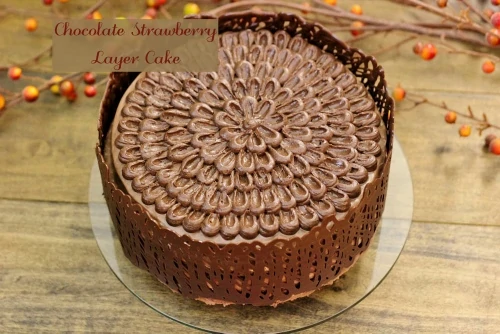
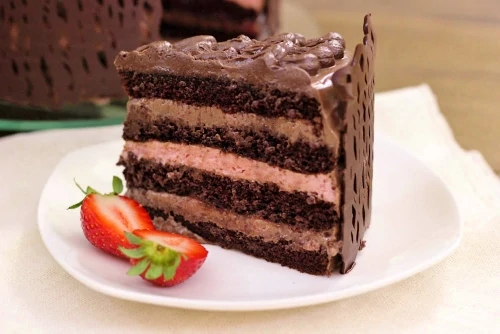
My sisters (and sister in laws) are all great cooks and bakers, so we often share new recipes that we've tried. Recently, on my Dad's birthday, my sister, Karina, made him a birthday cake that the family devoured with gusto, and of course, Mom had to send me a picture. I heard rave reviews from all who ate it. When Karina came down for a visit, making this cake for the blog was on my to-do list for sure. It was surprisingly simple to prepare and took me four times as much time to edit the recipe and pictures as it did to actually bake and decorate. The verdict - it's amazing! The cake is moist and tender, the strawberry souffle goes perfectly with the chocolate and the cream cheese chocolate frosting is so creamy and chocolaty but not too sweet at all. Karina is so creative! This was her idea from start to finish.
The chocolate cake layers are from My Baking Addiction.
Ingredients:
Chocolate Cake:
1 ½ cups sugar
1 ¾ cups flour
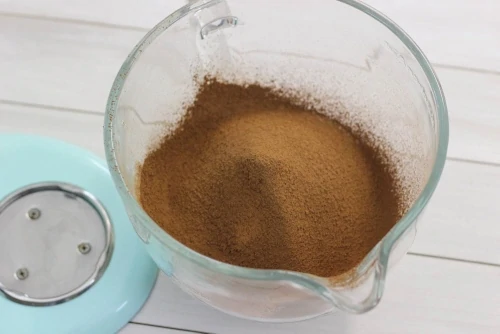
¾ cups unsweetened regular cocoa powder
2 teaspoons baking soda
1 teaspoon baking powder
1 teaspoon salt
2 eggs
1 cup buttermilk
1 cup strong coffee, cooled
½ cup oil
2 teaspoons vanilla
Strawberry Mousse:
2 teaspoons gelatin
3-4 Tablespoons water
¾ cup strawberry puree, cooled (½ lb strawberries, ⅛-1/4 cup sugar cooked until soft and then pureed)
½ cup heavy cream, chilled
Frosting:
1 stick of butter (8 Tablespoons), softened
2 (8 oz each) packages cream cheese, softened
1 ¼ cup powdered sugar
4 teaspoons vanilla
½ cup unsweetened regular cocoa powder
1 cup sour cream
⅓ (14 oz) can condensed milk, or to taste
Garnishing/Decorating:
½ pint strawberries, chopped, to add in between the cake layers
6-8 oz chocolate, for decorating
Preheat the oven to 350 degrees Fahrenheit.
Grease 2 (9 inch) round baking sheets with oil. Line the bottom of the pans with parchment paper.
Start by brewing a nice, strong cup of coffee and set it aside to cool.
 Combine all the dry ingredients (sugar, flour, cocoa, baking powder, baking soda, salt) in a large bowl and mix to combine. I like to sift in the cocoa powder, since it tends to be very lumpy. Mix them all together.
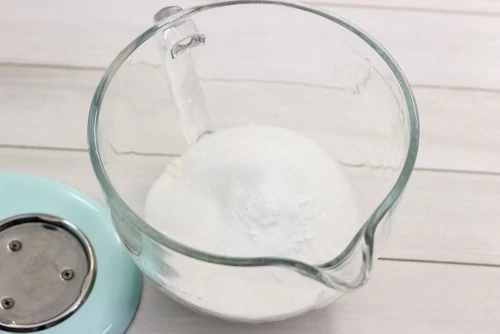

 Mix all the liquid ingredients (eggs, buttermilk, coffee, oil and vanilla) in a large measuring cup.
 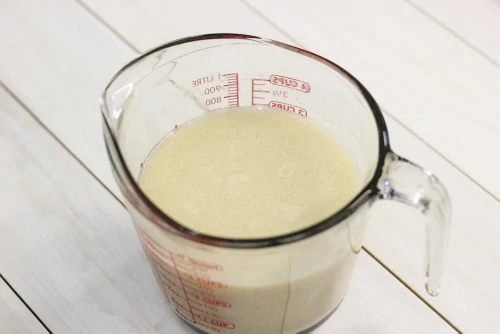 Pour in the liquid ingredients into the dry ingredients and mix to combine.
 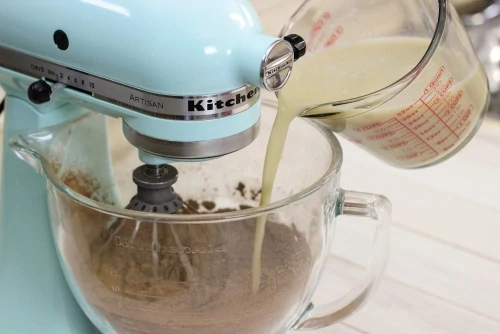 Divide the cake batter evenly between the two cake pans.
 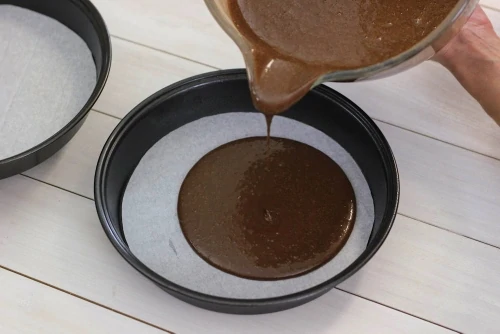 Bake for 30-35 minutes. Cool the cake layers. When they are cool enough to handle, slice each cake layer in half horizontally.
Meanwhile, make the Strawberry Mousse.
Combine the strawberries and sugar in a small saucepan. 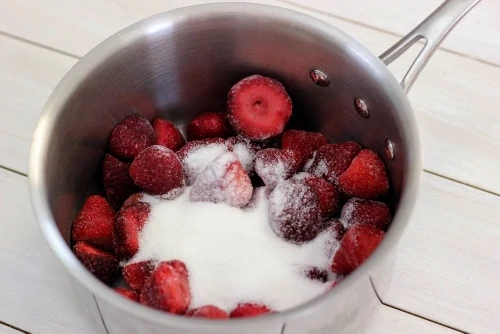 Bring to a boil, reduce to a simmer and cook just long enough for the berries to become soft, about 10-15 minutes.
 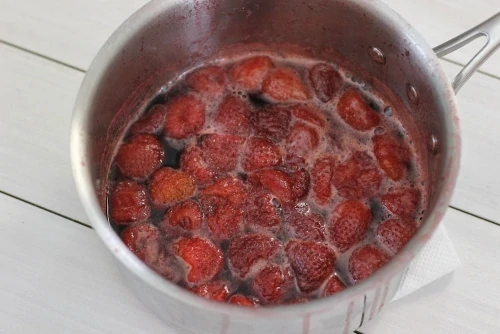 Cool slightly and puree in a food processor.
 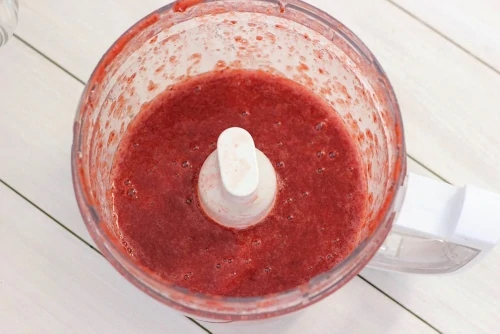 You can also use other berries for this souffle. Raspberries and chocolate are a divine combination, and you can use frozen berries, which means you can make it all year round.
You will most likely have strawberry puree left over. You only need ¾ cup of strawberry puree. I used the remaining strawberry puree as a syrup for pancakes, crepes, waffles, etc. Set aside to cool completely.
Sprinkle the gelatin over the water and set aside to bloom, for about 5 minutes. 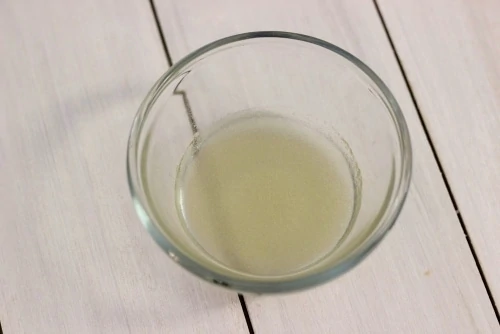 Heat the gelatin in a microwave for just 20-30 seconds, until the gelatin dissolves, but be careful not to boil it.
In a chilled bowl and whisk attachment, whip up the chilled heavy cream. 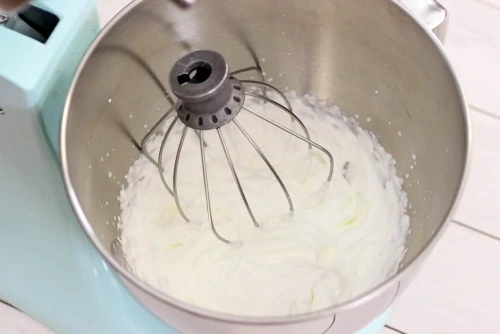 Add the strawberry puree and mix to combine.
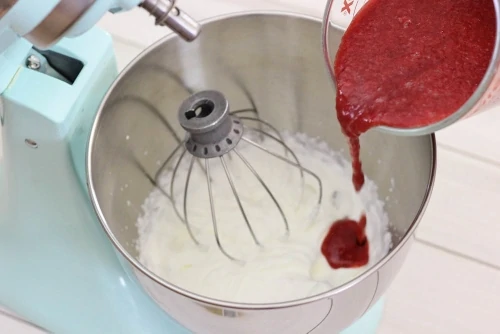
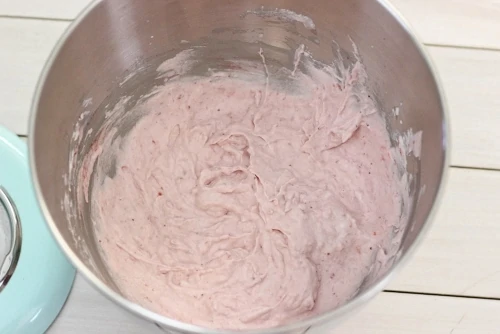 Pour in the gelatin, mix to combine.
 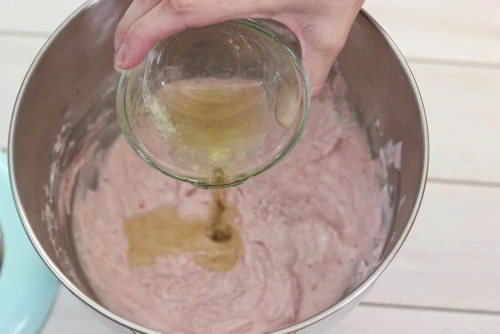 Place the strawberry mousse in the refrigerator for about 10 minutes, just until starts to set.
Meanwhile start making the Frosting.
Cream the softened butter and cream cheese in the large bowl of a standing mixer, using a paddle attachment, or a hand mixer, until creamy and fluffy. 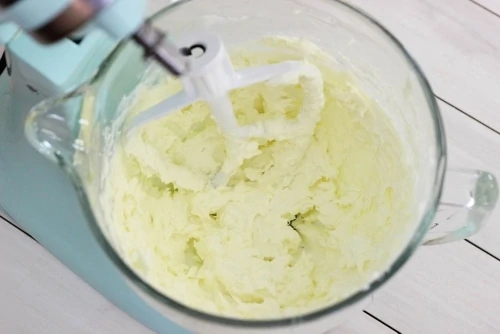 Add the powdered sugar, mix to combine.
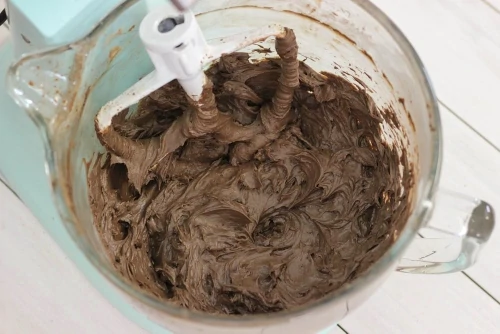
 Sift in the cocoa powder and mix to combine.
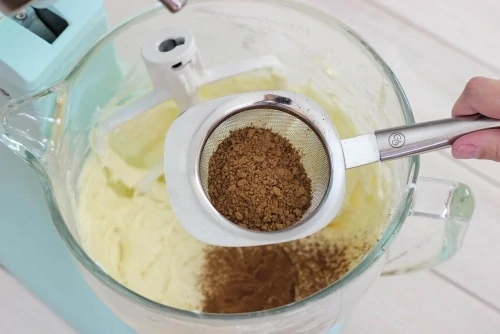
 Divide the frosting in half. Set aside one half to be used to make the chocolate petal design on top of the cake later. Add the sour cream, condensed milk and vanilla to the other half of the frosting and mix to combine.
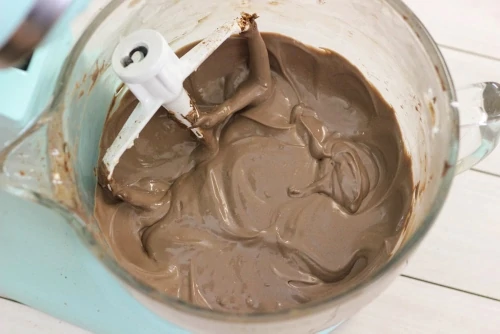 Add as much condensed milk as you like, depending on how sweet you want the frosting to be.
Place some aluminum foil all around your cake platter.
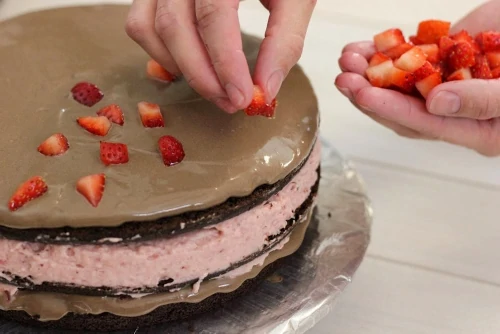
Place a dollop of frosting on the bottom of the plate and place the first cake layer on top of it. Spread some of the frosting on top of the first cake layer. Sprinkle in some of the chopped strawberries on top of the frosting. 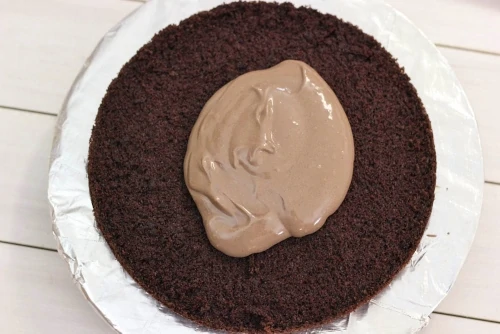
 Spread out the Strawberry Mousse on top of the second cake layer, followed by more of the chocolate frosting and strawberries on top of the third cake layer.
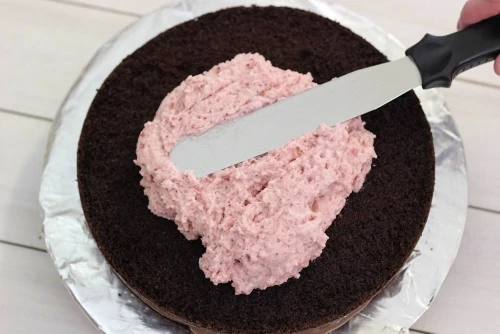
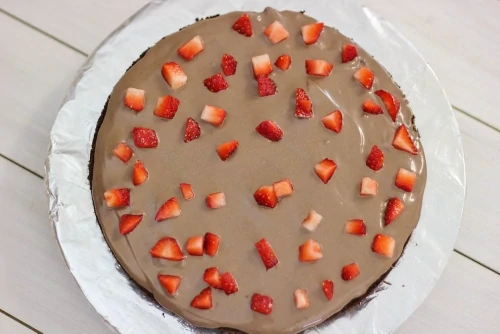
 Frost the top and sides of the cake with more chocolate frosting.
 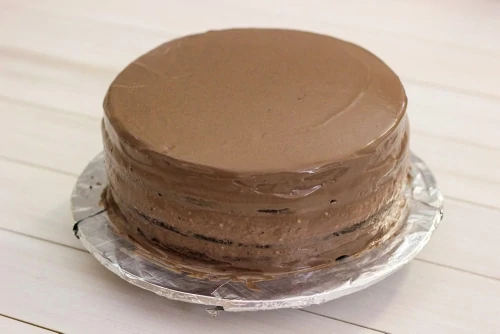 Decorate the cake with a chocolate petals design on top and a chocolate cage around the sides. Remove the aluminum foil from the cake platter and it is magically clean. Yay! I will have additional posts describing in details how to do both.
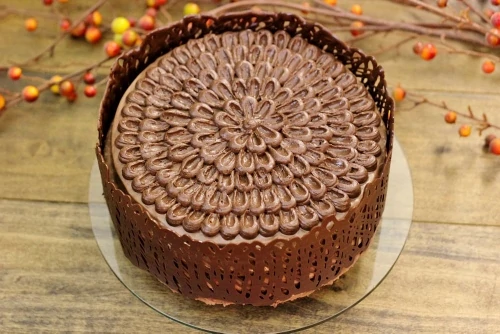

Chocolate Strawberry Layer Cake
Ingredients
Chocolate Cake:
- 1 ½ cups sugar
- 1 ¾ cups flour
- ¾ cups unsweetened regular cocoa powder
- 2 teaspoons baking soda
- 1 teaspoon baking powder
- 1 teaspoon salt
- 2 eggs
- 1 cup buttermilk
- 1 cup strong coffee cooled
- ½ cup oil
- 2 teaspoons vanilla
Strawberry Mousse:
- 2 teaspoons gelatin
- 3-4 Tablespoons water
- ¾ cup strawberry puree cooled (½ lb frozen strawberries, ⅛-1/4 cup sugar cooked until soft and then pureed)
- ½ cup heavy cream chilled
Frosting:
- 1 stick of butter 8 Tablespoons, softened
- 2 8 oz each packages cream cheese, softened
- 1 ¼ cup powdered sugar
- 4 teaspoons vanilla
- ½ cup unsweetened regular cocoa powder
- 1 cup sour cream
- ⅓ 14 oz can condensed milk, or to taste
For garnishing:
- ½ pint strawberries chopped, to add in between the cake layers
- 6-8 oz chocolate for decorating
Instructions
Chocolate Cake
- Preheat the oven to 350 degrees Fahrenheit.
- Grease 2 (9 inch) round baking sheets with oil. Line the bottom of the pans with parchment paper.
- Start by brewing a nice, strong cup of coffee and set it aside to cool.
- Combine all the dry ingredients (sugar, flour, cocoa, baking powder, baking soda, salt) in a large bowl and mix to combine. I like to sift in the cocoa powder, since it tends to be very lumpy. Mix them all together.
- Mix all the liquid ingredients (eggs, buttermilk, coffee, oil and vanilla) in a large measuring cup.
- Pour in the liquid ingredients into the dry ingredients and mix to combine.
- Divide the cake batter evenly between the two cake pans.
- Bake for 30-35 minutes.
- Cool the cake layers. When they are cool enough to handle, slice each cake layer in half horizontally.
Strawberry Mousse:
- Meanwhile, make the Strawberry Mousse. Combine the strawberries and sugar in a small saucepan. Bring to a boil, reduce to a simmer and cook just long enough for the berries to become soft, about 10-15 minutes. Cool slightly and puree in the food processor. You will most likely have strawberry puree left over. You only need ¾ cup of strawberry puree. I used the remaining strawberry puree as a syrup for pancakes, crepes, waffles, etc. Set aside to cool.
- Sprinkle the gelatin over the water and set aside to bloom, for about 5 minutes. Heat the gelatin in a microwave for just 20-30 seconds, until the gelatin dissolves, but be careful not to boil it.
- In a chilled bowl and whisk attachment, whip up the chilled heavy cream until soft peaks form.
- Add the strawberry puree and mix to combine.
- Pour in the gelatin, mix to combine. Place the strawberry mousse in the refrigerator
Chocolate Frosting:
- Meanwhile start making the Frosting. Cream the softened butter and cream cheese in the large bowl of a standing mixer, using a paddle attachment, or a hand mixer, until creamy and fluffy.
- Add the powdered sugar, mix to combine. Sift in the cocoa powder and mix to combine.
- Divide the frosting in half. Set aside one half to be used to make the chocolate petal design on top of the cake later.
- Add the sour cream, condensed milk and vanilla to the other half of the frosting and mix to combine. Add as much condensed milk as you like, depending on how sweet you want the frosting to be.
Assembling the cake:
- Place some aluminum foil all around your cake platter. Place a dollop of frosting on the bottom of the plate and place the first cake layer on top of it.
- Spread some of the frosting on top of the first cake layer. Sprinkle in some of the chopped strawberries on top of the frosting.
- Spread out the Strawberry Mousse on top of the second cake layer, followed by more of the chocolate frosting and strawberries on top of the third cake layer.
- Frost the top and sides of the cake with more chocolate frosting.
- Decorate the cake with a chocolate petals design on top and a chocolate cage around the sides. Remove the aluminum foil. I will have additional posts describing in details how to do both.
Hi Olga, thanks for the receipe, we love it. I baked it 3 times now, the first time following step by step the receipe it turned out just ok.... the 2 and 3 time was very good. I had to made some adjustments, 1 package of cream cheese is more than enough, thats what i used last 2 times cause first time i had a lot of it leftover. Then i added more strawberry and i found it to be more tastiert. Also i found it confusing when i bake it first because it is not mentioned that you need 2 cake pans, so i had to wait for a batch to bake and then the second, maybe its a good idea to let the readers know at the beginning. Also maybe to underline or let the readers know how important it is for the strawberry juice to COOL off completely before adding to the cream. I did not pay much attention and it was a bit of disaster ...also actually the 3rd time when i bake it, it made me aware of the cake divided in 4 and not 3 layers...., in the end all worth it, very yummy cake! Thanks for sharing, and just letting you know about my experiene! 😉
Hi Denise,
Thank you so much for sharing your feedback. I will make sure to take note of all your suggestions.
Hi Olga, do you think it would affect the flavor much of I only used one package of cream cheese instead of two? I only have one at home right now.....
The flavor would probably be ok, but you might not have enough frosting, Vita.
Any hints on "growing" the cake? I'm trying to do the math here, and I think if I use costco's 9x11 pans instead of the 9" round, I would need 1.5x the batter? Does that seem right? Also, do you think the (straw)berry mousse would be good as topping to your chocolate ricotta cheesecake? Decisions, decisions...
thanks!
SvetKa
I'm not sure, Svetka. I've never done this cake any other way.
The strawberry mousse firms up and will have a thick consistency. If I would pair it with the cheesecake, it would be more like another layer, not a topping.
To anyone else needing a bigger cake: I used this website for conversion (http://www.joyofbaking.com/PanSizes.html) and ended up baking 2 batches, each in a 9x11 pan. Used all the frosting as frosting, which was enough, and the mousse came through (but 1.5x would have been better). Instead of the cage and the petals, I used crumbs from leveling to dust the sides, and to outline a border as you did in the chocolate truffle cake. Made a 5-petal flower out of cut strawberries. 4 family members asked me where I bought the cake 🙂
Thank you, Olga, for another absolute winner.
Thanks for sharing, Svetka.
Thank you for the amazing recipe. I have a few quick question for you. I know some people make cakes in advance and freeze them. would this be an option for this cake?
Also, how many days in advance can you make this cake and prior to cutting into it with out freezing? (keeping it only in fridge?) Thank you so much for all of your wonderful recipes!! <3
I know people do freeze cake layers, and I'm pretty sure that this cake would work for that. I personally don't like doing that myself. You can certainly make the cake layers a few days in advance, just store them tightly covered, so that they don't dry out and don't absorb the smells of the room.
thank you for your reply =) In fact I did bake them one after another, but the funny thing is that the first one was flat and the second one was so perfect! (no idea how that could possible work out) also we only have a small piece of the cake left (protagyem ydovolstvie) and after 5 days it tastes even better than it did before(which is amazing, it feels like on bolche propitaniy and the strawberries did not suffer at all). Glad i made a try out, will know do's and don't for the real deal =)
Hmmm... That is a mystery:).
I'm so glad you're still enjoying the cake days later. That's great!
Olga, this is one of the best chocolate cakes! My hubby loved it. I did it this week as a try out cause making another one for next weeks V-day party. The only concern I had was one of the layers didn't raise as much as the other one. So I ended up cutting the bigger one into 3 layers, and smaller one into two, so it would look kinda even. Any suggestions how to make it better? Also Im thinking to add more berries (is that a good idea, or it will be soggy)? Thank you so much.
That's wonderful, Lidiya! I'm so happy to hear that you enjoyed the cake.
One layer didn't rise as much most likely because it deflated. Did you bake both layers at the same time or did you bake one layer after the first one was done? Sometimes, as the batter stands, it will deflate, which is why it's best to bake it immediately.
Also, it's important to make sure that you mix the batter evenly, because sometimes all the volume is at the top, which will rise beautifully, and the batter that sink to the bottom and is the second cake layer turns out flatter. I hope that helps.
You can add more berries, but I would recommend eating the cake soon after. The longer it stands the soggier it will get. It'll be great if you eat it soon after assembling it though.
Sad to say this was not a fan cake at my sons birthday I had very high hopes for it,
I would say the frosting is amazing but the rest of the cake it was not good,
Hopefully the next cake will have better fans over a cake,
I love your cooking thanks for sharing,
I'm sorry to hear that, Marina.
Question: i know it says to use a 9in pan, I only have a 10inch would that still work or should i go out and buy myself a 9inch thanks
Olga, oh my goodness, I called you "Natasha." So sorry! Just got off the phone with a friend and I guess her name is stuck in my head! Feeling embarrassed...
It's alright, it happens. No big deal:).
Hi Natasha... I very rarely comment, and when I do, it's usually to ask a question. Before I asked another one (!), I just wanted to say that our family loves your recipes. I love that I can finally cook the Russian recipes that I should have learned while still living at home (but never did), and the non-Russian recipes are equally fantastic. So thank you!
I am just wondering if this cake refrigerates well. I'd like to make it the evening before we have some guests over for dinner. So a full day before it's served... Thanks in advance!
Hi Ann!
Thanks for stopping by and for trying out my recipes:).
You can definitely make the cake ahead of time and keep it in the refrigerator. I make most of my cakes the day before I plan to serve them. I think they taste better after the frosting has a chance to seep into the cake layers and all the flavors meld together. Enjoy:).
Olga I'm about to try your chocolate cake, I don't use vegetable oil(as stated in the original recipe) so I don't have any at home, what oil did you use for this cake?
Any kind of mild tasting oil, Irina.