
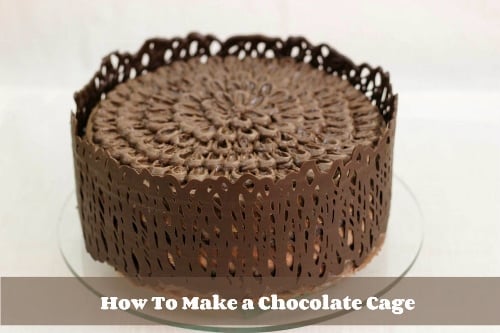
 Dress up a cake with a gorgeous chocolate border all around it, also known as a Chocolate Cage. I personally think it looks like a fancy fence.
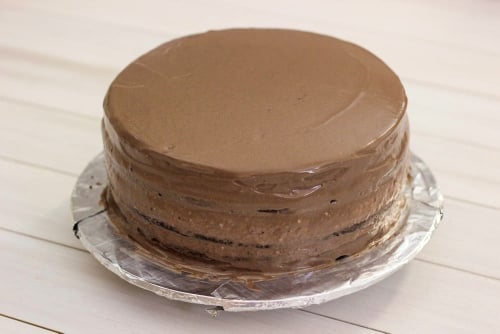
Frost the cake with a thin layer of icing or frosting, so that you have an even and smooth surface. (For the recipe of this cake, click HERE.)
 Start with measuring as much parchment paper as you'll need to go all around the cake. You may need to tape two pieces of parchment paper together, or use half at a time. Make it as tall as you want it to be around the cake.
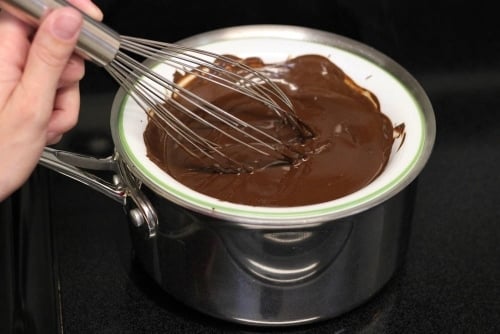
 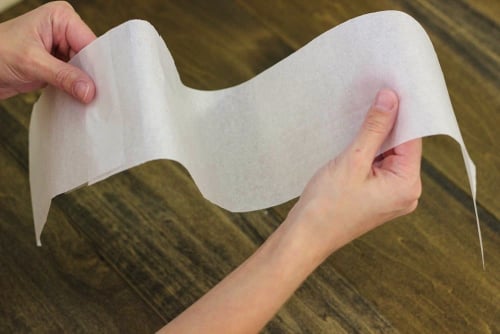 Melt chocolate over a double boiler or in the microwave and put it in a piping bag. Here's a helpful post about how to make a Homemade Double Boiler.
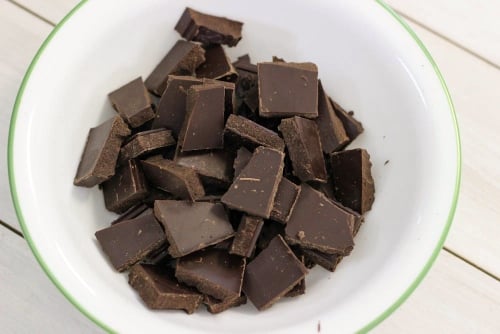
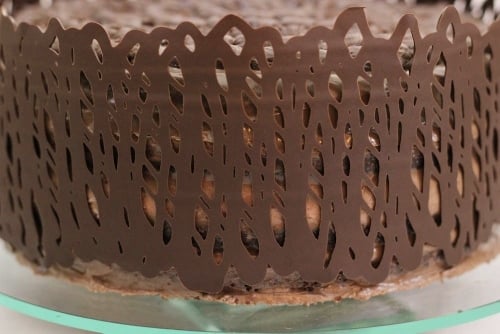
 Place the chocolate in a piping bag. Cut off the corner of the piping bag and pipe out whichever design you like.
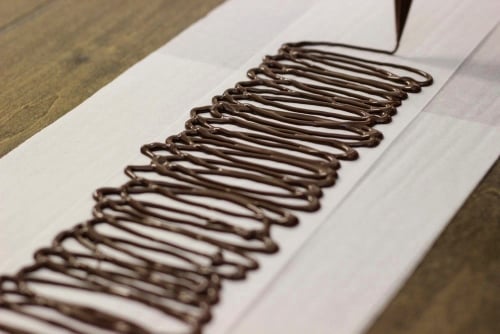
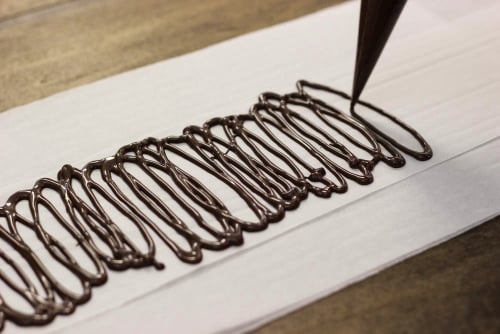
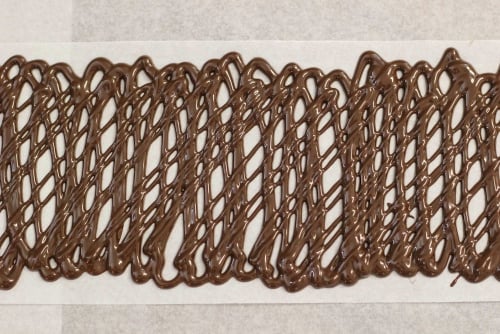 Make sure the chocolate lines aren't too thin, which will make it fragile and you will have the possibility of it breaking.
You can leave the chocolate to set at room temperature, but depending on the type of chocolate you use, it may take a long time. Here's a trick that I like to use.
Before I start melting and piping out the chocolate, I place two large metal baking sheets in the freezer. When I've piped out the chocolate, I take our the chilled baking sheets, invert them upside down, top with parchment paper, and place the strip of swirled chocolate on top of the cold baking sheets. 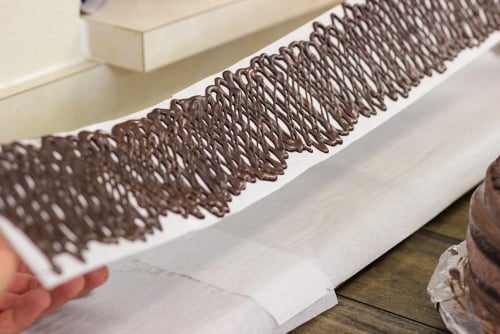 In just a minute or so, the chocolate will firm up just enough for you to wrap it around the sides of the cake. The chocolate should still be bendable.
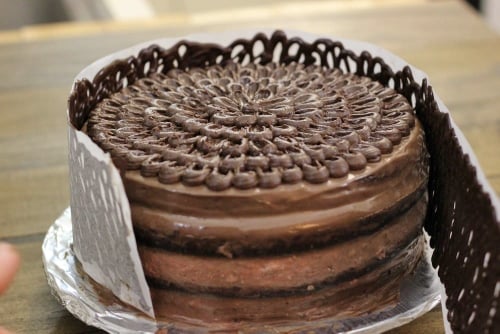
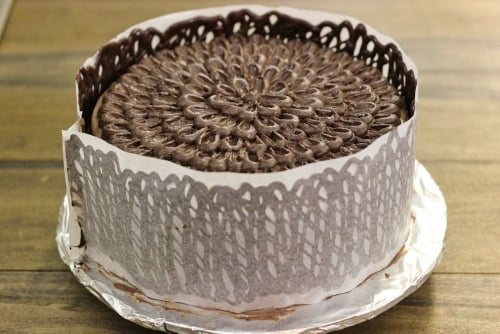 Place the cake in the refrigerator until the chocolate is completely firm. Peel off the parchment paper off carefully.
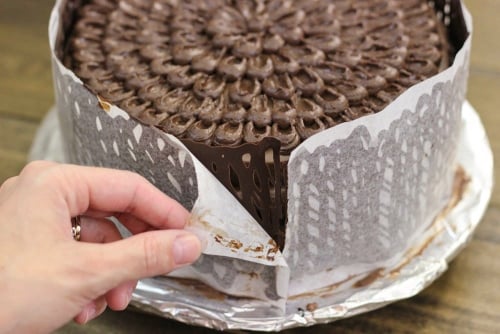
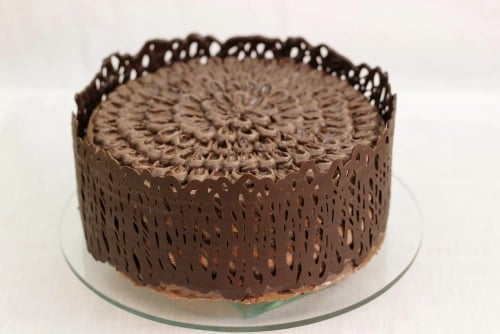
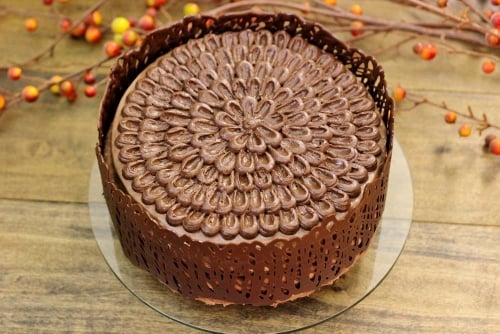
I also have a detailed tutorial on how to decorate the top of your cake with this lovely chocolate petal design, which you can check out HERE.


do you have to put a little oil on the paper?
No, April. No oil is necessary.
I would love to know what brand of chocolate you use?
Hi Olga! I followed your instructions and made this cake for father's day, and it turned out beautifully! I put a picture and linked to your tutorial on my blog. Thank you so much - my dad loved it! 🙂
Thank you for sharing my blog, E! I'm so glad you enjoyed the cake and especially since your Dad enjoyed it too.
Olga, will the chocolate break when trying to cut the already made cake>?
It is easy to cut through, but it shouldn't break. It depends on the type of chocolate that you use. The one I used stayed in one piece.
What brand chocolate do you use?
Wow this looks amazing! I definately want to try. Wanted to ask after you melt the chocolate you instantly put in piping bag or you let it cool abit? Thanks and keep up the good work!
It's not very hot, so you should be able to handle it pretty much right away. If not, just wait for it to cool off a bit, but it should still be runny.
God bless you for sharing so many loved recipes and awesome tips with us. i am planning on making this cake for Thanksgiving. i know it will taste as amazing as it looks. i have used many of your recipes and love every one. you a blessing!
Thanks, Tanya655. You're so sweet to say so. I'm so glad that the recipes and tips are helpful to you.
Olya,
You are so incredible and talented!!! You're cake looks amazing and stunningly beautiful! Like something you'll buy in the store in Russia where decorations are done by the Professionals. I can't wait to try this design on the next chocolate cake I am planning to make. I've come to a conclusion, cakes have to do with the decorating and then flavor. I've previously made a cake that was so delicious, but it was plain and people said yes, it ok. But when you serve a cake that is not as tasty, but beautifully decorated, the people just keep talking about what kind of amazing cake you've served. Thank you so much for sharing such an easy method to dress up and make my cakes look beautiful and delicious.
You're welcome, Tanya.
Glad I could be of help to you.
Thanks for the tutorial! So cool! Can't wait to try it.
Hey Olga, thanks for the awesome post. I've made so many of your recipes and they turned out fabulous..,Except...this one. Lol. I attempted the cage today and it turned out, well not as good looking as yours. Haha. I used chocolate chips. It was too thick of a chocolate. Something about me and chocolate chips just doesn't click. Next time I will use candy coating. It works better with me. Lol.
I'm sorry to hear that, Olsya. I've noticed that chocolate chips are thicker when you melt them than if you a chocolate bar; a chocolate bar should work with no problems.
Looks fantastic!!! Could you tell me the number of the dot tip you used? I love all your recipes and have made several with many compliments. Thanks for your posts, I read them daily. God bless you.
Great texture! Looks phenomenal! Fantastic post Olga:)))
Thanks, valentin!
Beautiful. It looks so much harder to do than it really is. 🙂
It's really simple to make and adds such an elegant touch to any cake.
Thanks Olya! I saw one similar idea but didn't have any clue how to make it. It is definately so easy 😉 What kind of chocolate is better to use?
Svetlana,
I use a regular chocolate bar. It's best not to use chocolate chips. You can use semi sweet, milk chocolate or dark chocolate, whichever you prefer.
Can you frost the cake before putting the chocolate cage around it?
Yes, you should definitely frost the cake before you put on the chocolate cage. If you read the instructions carefully, you'll see that's it's the first step that I wrote about.
Love this!!!!